
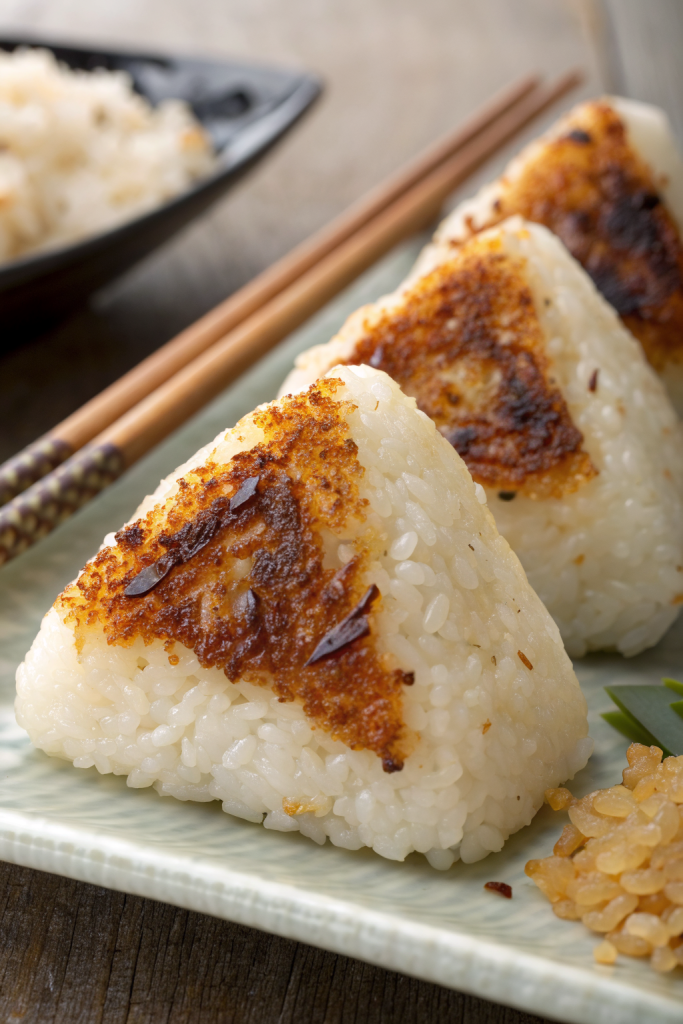
Yaki Onigiri Japanese Grilled Rice Balls Recipe tastes smoky, salty-sweet, crispy on the outside, and soft and chewy inside. It works perfectly for busy weeknights, kids’ lunchboxes, or late-night snacks and usually takes about 35 minutes from start to finish. I first learned this in a tiny Tokyo izakaya, and I still chase that same toasty aroma in my own kitchen.
Why Make This Yaki Onigiri Japanese Grilled Rice Balls Recipe at Home
You control the texture, seasoning, and fillings at home, which turns a simple rice ball into your dream snack. Restaurant versions often sit around, but you can grill yours fresh and eat them while the shoyu glaze still sizzles.
You also save money and use leftover rice in a way that feels special instead of sad. Kids love to help shape the onigiri, and adults love how easy they pack into lunch boxes or picnic containers.
“This Yaki Onigiri Japanese Grilled Rice Balls Recipe hits that perfect combo of crispy, smoky, and comforting, and I could eat a whole batch by myself. ★★★★★”
Ingredients You Need
Rice
- 3 cups cooked Japanese short-grain rice (about 1.5 cups uncooked)
- Use sushi rice or labeled “short-grain Japanese rice.”
- Avoid long-grain or jasmine rice, which stays too loose and dry.
- Slightly warm rice shapes better than cold rice from the fridge.
Seasoning & Glaze
- 2 tablespoons soy sauce
- Use regular Japanese soy sauce like Kikkoman or Yamasa.
- Use low-sodium if you prefer a lighter salt level.
- 1 tablespoon mirin
- Adds mild sweetness and gloss.
- If you do not have mirin, mix 1 tablespoon water with 1 teaspoon sugar as a quick swap.
- 1 teaspoon sugar (optional, adjust to taste)
- 1 teaspoon toasted sesame oil
- 1 teaspoon neutral oil (canola, vegetable, or grapeseed) for brushing the pan or grill
- Pinch of salt for seasoning the rice while shaping
Optional Fillings
You can keep yaki onigiri plain or tuck a little surprise in the center.
- Cooked salmon flakes (shiozake or any cooked salmon, lightly salted)
- Tuna mixed with a little mayo and soy sauce
- Umeboshi (pickled plum), pitted and chopped
- Seasoned kombu or other Japanese pickles, finely chopped
- Furikake rice seasoning for mixing into the rice
Use only about 1 to 2 teaspoons filling per rice ball so it holds together.
Optional Toppings & Garnishes
- Nori strips or small sheets (to wrap or serve on the side)
- Toasted sesame seeds
- Shichimi togarashi (Japanese seven spice)
- Finely sliced green onion
- A small dab of miso on top before grilling for a deeper savory flavor
Equipment
- Rice cooker or pot for cooking rice
- Medium bowl for mixing glaze
- Small bowl of water and a pinch of salt for shaping
- Nonstick skillet, cast iron pan, or grill pan
- You can also use an outdoor grill or a toaster oven with a tray.
- Brush or spoon for glaze
- Spatula or tongs for flipping
Tips & Mistakes
- Shape with slightly warm rice so the grains stick together and hold their form.
- Wet your hands and add a pinch of salt before shaping to prevent sticking and to season the surface.
- Pack the rice firmly but gently; squeeze enough so it holds, but do not crush the grains into a dense brick.
- Keep the size moderate, about the size of your palm, so the center heats through before the outside over-browns.
- Use short-grain Japanese rice only; other types fall apart or dry out on the grill.
- Preheat the pan or grill so the surface of the rice balls sears and forms a crust instead of sticking.
- Brush only a thin layer of glaze at a time; heavy glaze burns quickly and turns bitter.
- Flip gently with a spatula or tongs; rough handling breaks the rice balls.
- Keep the heat at medium to medium-low once you start glazing so the sugar caramelizes slowly.
- Avoid overfilling; too much filling splits the rice and leaks onto the pan.
- Do not rush the browning; slow toasting gives that deep nutty flavor and crisp shell.
- If one side starts to scorch, lower the heat and move the rice balls to a cooler spot in the pan or grill.
How to Make Yaki Onigiri Japanese Grilled Rice Balls Recipe
Step 1: Cook and Prep the Rice
Rinse the uncooked rice in cold water until the water runs mostly clear. Cook the rice in a rice cooker or pot with the usual water ratio for Japanese rice. Once cooked, fluff it gently with a rice paddle and let it cool until warm but not hot.
Step 2: Mix the Glaze
In a small bowl, stir together soy sauce, mirin, sugar, and toasted sesame oil until the sugar dissolves. Taste and adjust sweetness or saltiness as you like. Set the glaze near the stove with a brush or spoon ready.
Step 3: Shape the Rice Balls
Prepare a small bowl of water with a pinch of salt. Wet your hands, then scoop about 1/3 to 1/2 cup of warm rice into your palm. If you use filling, press a small dent in the center, add 1 to 2 teaspoons filling, then cover with a little more rice.
Shape the rice into a triangle or round puck by pressing gently between your palms. Rotate as you press so the shape stays even and compact. Line the finished rice balls on a plate or tray.
Step 4: Preheat the Pan or Grill
Heat a nonstick skillet, cast iron pan, or grill pan over medium heat. Add a small amount of neutral oil and spread it into a thin layer. Wait until the pan feels hot when you hover your hand a few inches above it.
Step 5: Toast the Rice Balls Plain First
Place the rice balls in the pan, leaving a little space between each one. Cook 3 to 4 minutes per side until the surface turns lightly golden and feels a bit firm. Rotate to toast all sides, including the edges, so the crust forms evenly.
Step 6: Brush with Glaze and Grill to Crispy
Lower the heat to medium-low. Brush a thin layer of glaze on the top of each rice ball, then flip after about 1 to 2 minutes. Brush the other side, then keep flipping every 1 to 2 minutes, brushing lightly, until the surface turns deep golden brown and smells toasty and savory.
If any spots darken too fast, move that rice ball to a cooler part of the pan. Aim for a crisp shell with a soft, steamy center. This stage usually takes another 5 to 8 minutes.
Step 7: Finish and Garnish
Transfer the yaki onigiri to a plate. Sprinkle with sesame seeds, green onion, or shichimi togarashi if you like. Add nori strips on the side or wrap a small strip around each rice ball right before serving.
Variations I've Tried
I mix a little miso into the glaze for a deeper, slightly smoky flavor and extra umami. A miso butter version tastes amazing: soften a tablespoon of butter, mix it with miso and a bit of soy sauce, then brush it on while grilling. I also enjoy a simple shio version with only salted rice and no glaze, which tastes very clean and highlights the rice itself.
Sometimes I mix furikake directly into the rice before shaping for extra flavor in every bite. A spicy version with a sprinkle of shichimi togarashi in the glaze adds a gentle kick without overpowering the rice. For kids, I keep them plain or stuff them with a tiny bit of tuna mayo, which always disappears first.
How to Serve Yaki Onigiri Japanese Grilled Rice Balls Recipe
Serve yaki onigiri hot, right off the pan, while the outside still tastes crisp and the center stays soft and steamy. Pair them with miso soup, a simple cucumber salad, or sliced fruit for a light meal. They also work well as a side with teriyaki chicken, grilled fish, or sautéed vegetables. Pack cooled yaki onigiri in lunch boxes with some pickles and edamame for a filling, handheld meal.
How to store
- Cool the yaki onigiri completely before storing so condensation does not make them soggy.
- Store in the fridge in an airtight container for up to 2 days, with parchment between layers to prevent sticking.
- Freeze individually wrapped rice balls (plastic wrap, then a freezer bag) for up to 1 month.
- Reheat from the fridge in a covered skillet over low heat with a tiny splash of water, or in a toaster oven until hot and crisp again.
- Reheat from frozen by microwaving until warm, then finish in a skillet or toaster oven to bring back the crispy exterior.
Yaki Onigiri Japanese Grilled Rice Balls Recipe
Ingredients
Instructions
- Cook Japanese short-grain rice using your usual method, then fluff and let it cool until warm but not hot.
- In a small bowl, mix together the soy sauce, mirin, sugar, and toasted sesame oil until the sugar dissolves. Set the glaze aside near the stove.
- Prepare a small bowl of water with a pinch of salt. Wet your hands to prevent sticking.
- Scoop about 1/3 to 1/2 cup of warm rice into your palm. If using filling, press a small dent in the center, add 1 to 2 teaspoons of filling, then cover with a little more rice.
- Shape the rice into a triangle or round puck, pressing firmly but gently between your palms and rotating so the shape is even and compact. Repeat to form all the rice balls and place them on a plate or tray.
- Heat a nonstick or cast iron skillet or grill pan over medium heat. Add the neutral oil and spread it into a thin layer.
- Place the rice balls in the pan, leaving space between them. Cook for 3 to 4 minutes per side, turning to toast all sides, until lightly golden and a thin crust forms.
- Reduce the heat to medium-low. Brush a thin layer of glaze on the tops of the rice balls and cook for 1 to 2 minutes, then flip and brush the other side.
- Continue flipping every 1 to 2 minutes, brushing lightly with glaze, until the surfaces are deep golden brown, crisp, and fragrant, 5 to 8 minutes more. Move any pieces that are browning too quickly to a cooler spot in the pan.
- Transfer the yaki onigiri to a serving plate. Sprinkle with toasted sesame seeds, green onion, or shichimi togarashi if desired, and add nori strips for wrapping.
- Serve hot while the exterior is still crisp and the centers are soft and steamy.
Notes
Approximate per serving (1 rice ball, 1/6 of recipe, without optional fillings or toppings): 155 calories; fat 2.5 g; saturated fat 0.4 g; carbohydrates 30 g; fiber 0.5 g; sugars 2 g; protein 3 g; sodium 330 mg. Values will vary based on brands, add-ins, fillings, and portion size.