
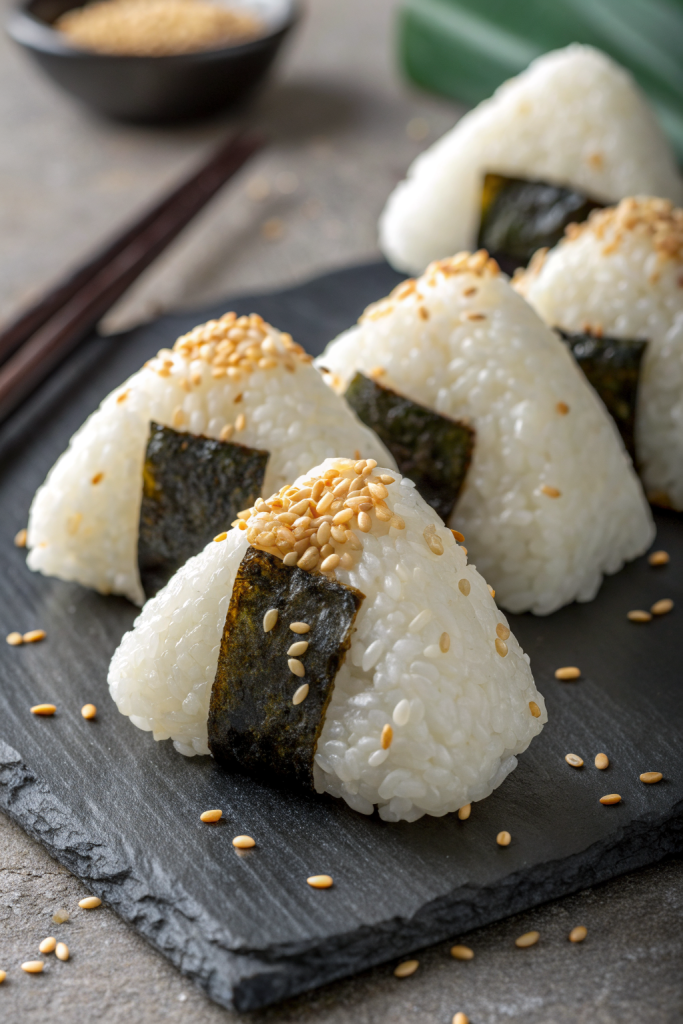
How to Make Tuna Mayo Onigiri Recipe tastes like the best parts of a tuna salad sandwich wrapped in warm, salty rice with a cozy hug of nori. It works perfectly for busy folks who want a quick lunch, snack, or meal prep option in under 40 minutes. I ate an embarrassing number of these during college, and I still pack them when I “forget” to meal prep like a responsible adult.
Why How to Make Tuna Mayo Onigiri Recipe Is Worth It
This tuna mayo onigiri recipe hits that perfect combo of creamy, salty, and slightly tangy, all wrapped in soft rice with a crisp nori edge. It feels like comfort food, but you can still eat it with one hand while scrolling on your phone with the other.
You can meal prep a batch, stash them in the fridge, and have grab-and-go snacks or lunches that taste way better than sad desk salads. Kids usually love them, adults inhale them, and they travel well in lunchboxes or on road trips.
“These tuna mayo onigiri taste like a sushi shop snack but come together in my tiny kitchen in under an hour. ★★★★★”
Ingredients You Need
For the rice
- 2 cups uncooked Japanese short-grain rice
- Use sushi rice or “Calrose” style rice. Brands like Nishiki or Kokuho Rose work great.
- 2 1/4 cups water (for cooking the rice)
- 2–3 tablespoons rice vinegar
- 1 teaspoon sugar
- 1 teaspoon fine sea salt
For the tuna mayo filling
- 2 cans tuna (5 oz each), drained
- Use tuna in water for a lighter taste or tuna in oil for richer flavor.
- 3–4 tablespoons Japanese mayonnaise (Kewpie gives the most authentic taste)
- Regular mayo works if you do not have Kewpie; add a tiny pinch of sugar and extra splash of vinegar.
- 1–2 teaspoons soy sauce
- Use low-sodium soy sauce if you watch salt.
- 1–2 teaspoons rice vinegar or lemon juice
- 1 teaspoon sugar (optional, to balance saltiness)
- 1–2 teaspoons sesame oil (toasted)
- 1 tablespoon finely chopped green onion (optional)
- 1 tablespoon finely chopped cucumber or celery (optional crunch)
- Freshly ground black pepper, to taste
For assembly
- 4–6 sheets nori (seaweed), cut into strips or rectangles
- Use roasted nori for sushi; avoid flavored snack nori if you want a classic taste.
- Extra salt for seasoning your hands and the rice
- Small bowl of water for dipping your hands while shaping
Helpful equipment
- Rice cooker or heavy pot with lid
- Fine mesh strainer (to rinse rice)
- Mixing bowls
- Rice paddle or silicone spatula
- Plastic wrap (helps with shaping and less mess)
- Kitchen scissors (to cut nori)
Quick Tips & substitutions
- Rinse the rice 3–4 times until the water runs mostly clear so the grains cook fluffy, not gummy.
- Let the rice cool until just warm before shaping; hot rice burns, cold rice crumbles.
- Wet and lightly salt your hands before shaping so the rice does not stick and the onigiri taste seasoned.
- Use canned salmon or canned chicken instead of tuna if that fits your pantry.
- Swap Japanese mayo with regular mayo plus a small pinch of sugar and extra rice vinegar.
- Use tamari or coconut aminos instead of soy sauce if you avoid gluten or soy.
- Wrap the onigiri in nori right before eating if you want crisp seaweed.
- Use plastic wrap to shape if rice sticks too much or you feel nervous about hand-shaping.
How to Make How to Make Tuna Mayo Onigiri Recipe
Step 1: Rinse and cook the rice
Measure the rice into a bowl and cover it with cold water. Swirl with your hand, drain the cloudy water, and repeat 3–4 times until the water looks mostly clear. Drain the rice in a fine mesh strainer for a few minutes.
Add the rinsed rice and measured water to a rice cooker or pot. Cook the rice according to your rice cooker instructions, or bring it to a boil on the stove, then cover and simmer on low for about 15 minutes. Turn off the heat and let the rice sit, covered, for another 10 minutes so the steam finishes the cooking.
Step 2: Season the rice
In a small bowl, mix rice vinegar, sugar, and salt until they dissolve. Fluff the hot rice in a wide bowl or baking dish with a rice paddle. Drizzle the vinegar mixture over the rice and gently fold it in with slicing and lifting motions so you do not mash the grains.
Taste and adjust with a pinch more salt or vinegar if you want a brighter flavor. Spread the rice out slightly in the bowl so it cools faster. Let it sit until warm but not hot, about 10–15 minutes.
Step 3: Mix the tuna mayo filling
Add drained tuna to a mixing bowl and break it up with a fork. Stir in Japanese mayo, soy sauce, rice vinegar or lemon juice, sugar if using, and sesame oil. Mix until the tuna looks creamy and evenly coated.
Add green onion and chopped cucumber or celery if you want extra crunch and freshness. Taste and adjust with more soy sauce, mayo, or vinegar until it hits your favorite balance of salty, tangy, and creamy. Chill the filling in the fridge while the rice cools if you want a firmer texture.
Step 4: Prep your station
Set up a small bowl of water and a small dish of salt near your rice. Cut nori sheets into strips or rectangles that can wrap around the bottom or sides of each onigiri. Keep the tuna filling, rice, and nori within easy reach.
You can line your counter with parchment or use a tray to hold finished onigiri. If you want less mess, tear off small squares of plastic wrap to help shape each rice ball. Keep a clean towel nearby because rice loves to stick to everything.
Step 5: Shape the rice and add filling
Scoop about 1/3 to 1/2 cup of warm rice into your hand or onto a piece of plastic wrap. Wet your hands lightly, then rub a pinch of salt between your palms. Flatten the rice into a thick disc, about the size of your palm.
Add 1–2 tablespoons of tuna mayo filling to the center of the rice. Fold the rice around the filling, pinching the edges together so the tuna sits fully enclosed. Add a little extra rice on top if the filling peeks out.
Step 6: Form the triangle (or your favorite shape)
Cup your hands around the rice ball and gently press to form a triangle: press the top to shape a point, then press the sides to define the corners. Rotate as you shape so the triangle looks even and the filling stays centered. Use gentle but firm pressure so the rice sticks together without turning into a dense brick.
If you use plastic wrap, gather it around the rice and shape the triangle through the wrap. Open the wrap once the shape feels firm and smooth. Repeat with the remaining rice and filling.
Step 7: Add the nori
Wrap a strip or rectangle of nori around the bottom or back of each onigiri. Press the nori lightly so it sticks to the warm rice. If you plan to eat later, keep the nori separate and wrap it right before serving to keep it crisp.
You can fully wrap the onigiri in nori if you want a stronger seaweed flavor. You can also sprinkle furikake or toasted sesame seeds on the outside of the rice for extra flavor and crunch. Line the finished onigiri on a tray or plate.
Step 8: Taste and adjust the batch
Try one onigiri while the rice still feels warm. Adjust the next ones with a bit more salt on your hands, more filling, or slightly smaller or larger size based on your first taste. You can tweak the tuna mixture with extra soy sauce or mayo if it tastes too mild.
Once you dial in your favorite ratio, shape the rest of the batch the same way. Pack them in containers for lunches or serve them right away. Enjoy that “I made my own convenience store snack” satisfaction.
Recipe Variations
- Gluten-free: Use gluten-free tamari instead of soy sauce and check that your rice vinegar and mayo label lists gluten-free.
- Dairy-free: This recipe already avoids dairy; just confirm your mayo does not include any dairy-based ingredients.
- Vegan: Use mashed chickpeas or mashed tofu with vegan mayo, soy sauce or tamari, and sesame oil instead of tuna.
- Low carb: Use cauliflower rice cooked until tender and cooled, then mix with a bit of mayo to help it stick, though the texture will feel softer.
- Spicy tuna: Add sriracha, chili crisp, or gochujang to the tuna mayo mixture.
- Extra crunchy: Stir in diced cucumber, celery, or pickles for more texture.
- Furikake twist: Mix furikake into the rice before shaping or sprinkle on top of each onigiri.
Ways to Serve How to Make Tuna Mayo Onigiri Recipe
- Pack in a bento box with sliced cucumbers, cherry tomatoes, and orange wedges.
- Serve as a quick lunch with miso soup and a simple salad.
- Offer as an after-school snack with cut fruit and edamame.
- Bring on road trips or picnics in a small cooler with ice packs.
- Set out on a snack board with other onigiri flavors, cut veggies, and dips like soy sauce and chili oil.
Storage Success
Store tuna mayo onigiri in an airtight container in the fridge for up to 2 days for the best taste and texture. Wrap each one tightly in plastic wrap, then place them in a container so they do not dry out. Keep the nori separate and wrap it right before eating so it stays crisp.
Eat them cold or let them sit at room temperature for 20–30 minutes so the rice softens again. If you want to warm them slightly, use a very short microwave burst with the plastic wrap on, then cool for a minute before adding nori.
How to Make Tuna Mayo Onigiri Recipe
Ingredients
Instructions
- Rinse the rice in cold water, swishing with your hand and draining, 3–4 times until the water runs mostly clear. Drain in a fine mesh strainer for a few minutes.
- Add the rinsed rice and 2 1/4 cups water to a rice cooker or a heavy pot with a lid. Cook according to the rice cooker instructions, or bring to a boil on the stove, then cover, reduce heat to low, and simmer for about 15 minutes. Turn off the heat and let the rice sit, covered, for another 10 minutes.
- In a small bowl, stir together the rice vinegar, sugar, and fine sea salt until dissolved. Transfer the hot rice to a wide bowl and gently fluff with a rice paddle.
- Drizzle the vinegar mixture evenly over the rice and gently fold it in with slicing and lifting motions so the grains do not mash. Taste and adjust the seasoning with a pinch more salt or vinegar if desired. Spread the rice out slightly and let cool until just warm, about 10–15 minutes.
- For the filling, place the drained tuna in a mixing bowl and break it up with a fork. Add Japanese mayonnaise, soy sauce, rice vinegar or lemon juice, sugar if using, and toasted sesame oil. Stir until the tuna is creamy and evenly coated.
- Add the chopped green onion and cucumber or celery if using, along with freshly ground black pepper to taste. Adjust with more soy sauce, mayo, or vinegar to reach your preferred salty, tangy, and creamy balance. Chill the filling if you prefer it firmer.
- Prepare a small bowl of water and a small dish of salt near your rice. Cut the nori sheets into strips or rectangles. Set out the rice, tuna filling, and nori within easy reach.
- To shape each onigiri, scoop about 1/3 to 1/2 cup of warm rice into your damp hand or onto a piece of plastic wrap. Lightly wet your hands, then rub a pinch of salt between your palms. Flatten the rice into a thick disc roughly the size of your palm.
- Place 1–2 tablespoons of tuna mayo filling in the center of the rice. Fold the rice around the filling, pinching the edges together so the tuna is fully enclosed. Add a little extra rice on top if needed to cover the filling.
- Gently form the filled rice into a triangle by cupping your hands around it: press the top to shape a point and press the sides to define the corners, rotating as you go so the filling stays centered. Apply gentle but firm pressure so the rice holds together without becoming dense. If using plastic wrap, gather it around the rice and shape through the wrap, then remove it.
- Wrap a strip or rectangle of nori around the bottom or one side of each onigiri, pressing lightly so it sticks to the warm rice. For the crispest texture, add the nori just before serving.
- Taste one onigiri and adjust the remaining batch as needed with more salt on your hands, more filling, or slightly different sizes. Serve warm or at room temperature, or wrap and refrigerate for later.
Notes
Approximate per onigiri (assuming 8 onigiri per batch): 230–260 calories; fat 9–11 g; saturated fat 1.5–2 g; carbohydrates 27–30 g; fiber 1 g; sugars 2–3 g; protein 10–12 g; sodium 480–650 mg. Values will vary based on brands, exact mayo amount, optional add-ins, and portion size.