
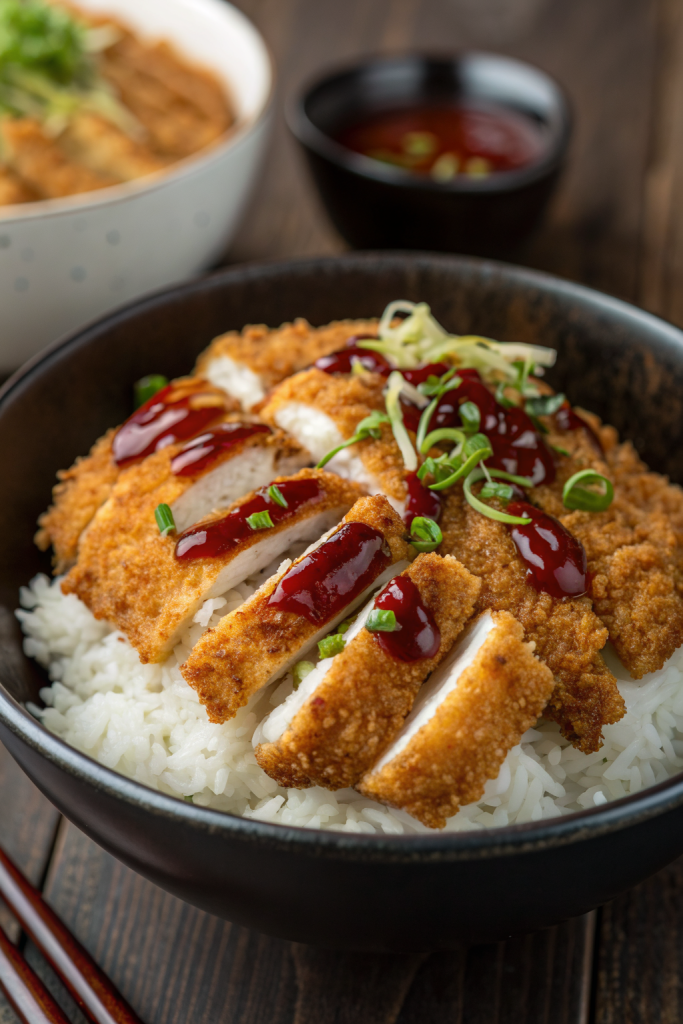
Crispy Japanese Katsu Bowls Recipe hits that perfect combo of crunchy, saucy, and cozy, with juicy cutlets over fluffy rice and a tangy-sweet katsu sauce that tastes like comfort in a bowl. It works for busy weeknights or casual weekend dinners, and you can get it on the table in about 40–45 minutes if you move with purpose. I first made a version of this in my tiny college apartment, and my roommates still text me photos when they cook it.
Why Crispy Japanese Katsu Bowls Recipe Is Worth It
You get shatteringly crisp cutlets, sticky rice, and a punchy sauce in one bowl, so it feels like takeout without the delivery fee. The panko crust stays crunchy under the sauce, and the contrast with the soft rice and fresh toppings makes each bite seriously satisfying.
You also build a super flexible base recipe. You can swap proteins, change the grain, or load it with veggies, and the Crispy Japanese Katsu Bowls Recipe still tastes restaurant-level with basic grocery store ingredients.
“This Crispy Japanese Katsu Bowls Recipe tastes like my favorite Japanese spot moved into my kitchen and started doing the dishes too. ★★★★★”
Ingredients You Need
Protein & Marinade
- 1 to 1 ½ pounds boneless, skinless chicken thighs
- Use thighs for juicier katsu and more forgiveness if you overcook slightly.
- 1 teaspoon kosher salt
- ½ teaspoon black pepper
- 1 tablespoon soy sauce (low-sodium works great)
- 1 tablespoon mirin (or 1 tablespoon rice vinegar + ½ teaspoon sugar as a shortcut)
You can swap in chicken breast cutlets, pork loin cutlets, or extra-firm tofu slabs. Pound thicker cuts to about ½ inch so they cook evenly and stay tender.
Breading Station
- ½ cup all-purpose flour
- 2 large eggs
- 1 tablespoon milk or water (loosens the egg for easier coating)
- 1 ½ to 2 cups panko breadcrumbs
- Use Japanese-style panko if possible; it fries lighter and crispier than standard breadcrumbs.
- ½ teaspoon garlic powder (optional, for extra flavor in the crust)
- Neutral oil for shallow frying (canola, vegetable, or peanut oil)
Panko from brands like Kikkoman or store-brand “Japanese-style panko” both work well. Avoid Italian-seasoned breadcrumbs because they change the flavor profile.
Katsu Sauce
- ¼ cup ketchup
- 2 tablespoons Worcestershire sauce
- 1 tablespoon soy sauce
- 1 tablespoon oyster sauce or tonkatsu sauce (if you have it)
- 1 to 2 teaspoons sugar or honey (adjust to taste)
- ½ teaspoon Dijon or Japanese mustard (optional, for a little bite)
Whisk everything in a small bowl until smooth. Bottled tonkatsu sauce works as a shortcut; just thin it with a splash of water if it tastes too thick or strong.
Rice & Veggie Base
- 2 cups uncooked short-grain Japanese rice (or sushi rice)
- 2 ¼ cups water (adjust per package directions)
- 1 teaspoon neutral oil or a small knob of butter (optional, for extra shine)
- 2 cups finely shredded green cabbage
- 1 medium carrot, julienned or shredded
- 2 green onions, thinly sliced
Use leftover rice if you have it and reheat with a splash of water in the microwave. A bagged coleslaw mix works as a quick cabbage shortcut.
Garnishes (Optional but Highly Recommended)
- Toasted sesame seeds
- Japanese mayo (Kewpie)
- Sliced cucumbers or quick pickles
- Nori strips or furikake seasoning
- Lime or lemon wedges
Equipment List
- Cutting board and sharp chef’s knife
- Meat mallet or rolling pin (to pound cutlets)
- 3 shallow bowls or pie plates (for flour, egg, and panko)
- Large skillet or frying pan (heavy-bottomed works best)
- Tongs or chopsticks (for turning cutlets)
- Wire rack set over a sheet pan or a plate lined with paper towels
- Rice cooker or medium saucepan with lid
- Small bowl and whisk for the sauce
Quick Tips & substitutions
- Pat the chicken dry before seasoning so the crust sticks better.
- Pound the meat to even thickness so it cooks quickly and stays juicy.
- Chill breaded cutlets in the fridge for 10–15 minutes to help the panko adhere.
- Use one hand for wet ingredients and the other for dry to avoid “breaded fingers.”
- Swap chicken with thin pork chops, tofu, or shrimp for different katsu bowls.
- Use gluten-free panko and tamari instead of soy sauce for a gluten-free version.
- Bake at 425°F (220°C) on a wire rack with oil spray if you want a lighter version instead of pan-frying.
- Use leftover rice or microwave rice packets when you feel short on time.
- Thin the katsu sauce with a splash of water if it tastes too strong or salty.
- Slice the cutlets after they rest so the juices stay inside and the crust stays crisp.
How to Make Crispy Japanese Katsu Bowls Recipe
Step 1: Cook the Rice
Rinse the rice under cold water until the water runs mostly clear. This step removes excess starch and helps the grains cook fluffy instead of gummy. Add the rice and measured water to a rice cooker or saucepan, then cook according to your cooker or package directions.
If you use a saucepan, bring it to a gentle boil, then cover and lower the heat to low. Simmer for about 15 minutes, then turn off the heat and let it steam, covered, for another 10 minutes. Fluff with a rice paddle or fork and keep it covered until you build the bowls.
Step 2: Prep and Season the Protein
Trim any excess fat from the chicken thighs and open them up so they lie flat. If they look thick in spots, cover them with plastic wrap and pound gently with a meat mallet or rolling pin until about ½ inch thick. Season both sides with salt, pepper, soy sauce, and mirin, then set aside while you prep the breading station.
You do not need a long marinade here; the seasoning soaks in while you set up the flour, egg, and panko. If you want more flavor, you can let the chicken sit in the fridge for 30 minutes.
Step 3: Set Up the Breading Station
Place the flour in one shallow bowl. Crack the eggs into a second bowl, add the milk or water, and whisk until smooth. Add the panko and garlic powder to a third bowl and toss to combine.
Keep the bowls in a line: flour, egg, panko. This setup keeps the process clean and quick. Place a wire rack or plate nearby so you can rest the breaded cutlets before frying.
Step 4: Bread the Cutlets
Dredge one piece of chicken in the flour and shake off the excess. Dip it into the egg mixture and coat it completely, then lift and let the extra drip off. Press it firmly into the panko on both sides, really packing the crumbs onto the surface.
Set the breaded cutlet on the wire rack or plate and repeat with the remaining pieces. If you have time, slide the tray into the fridge for 10–15 minutes. This chill time helps the coating cling better and fry crisp.
Step 5: Mix the Katsu Sauce
While the breaded cutlets rest, whisk the ketchup, Worcestershire, soy sauce, oyster or tonkatsu sauce, sugar or honey, and mustard in a small bowl. Taste and adjust the sweetness or saltiness to your liking. If the sauce tastes too thick, add a teaspoon or two of water.
You want a pourable, glossy sauce that coats the back of a spoon. Set it aside so the flavors meld while you fry the cutlets.
Step 6: Prep the Veggie Toppings
Shred the cabbage as thin as you can so it tastes light and crunchy. Julienne or shred the carrot and slice the green onions. If you use cucumbers or pickles, slice those now as well.
Keep the veggies in separate small bowls so everyone can customize their Crispy Japanese Katsu Bowls Recipe. This setup also turns dinner into a fun build-your-own situation, which kids usually love.
Step 7: Fry the Katsu
Pour about ¼ inch of neutral oil into a large skillet and heat it over medium to medium-high heat. Drop a few panko crumbs into the oil; if they sizzle and turn golden in about 10 seconds, the oil sits at a good temperature. Gently lay the breaded cutlets in the pan without crowding.
Fry each side for about 3–4 minutes, until the crust turns deep golden and the chicken cooks through. Use tongs or chopsticks to flip them carefully so the coating stays intact. Transfer the cooked cutlets to a wire rack or paper towel–lined plate so excess oil drips off and the crust stays crisp.
Step 8: Slice the Katsu
Let the cutlets rest for 3–5 minutes. This short rest keeps the juices inside and prevents soggy crust. Use a sharp knife to slice each cutlet into strips about ¾ inch wide.
Slice across the grain for the most tender bite. Keep the strips in their original cutlet shape so they look neat when you fan them over the rice.
Step 9: Build the Bowls
Scoop a generous portion of hot rice into each bowl. Add a handful of shredded cabbage and carrots on one side. Fan the sliced katsu over the rice, slightly overlapping the pieces.
Drizzle katsu sauce over the cutlets and a little over the rice if you like extra flavor. Add green onions, sesame seeds, a zigzag of Kewpie mayo, and any other toppings you enjoy. Serve the Crispy Japanese Katsu Bowls Recipe with lemon or lime wedges so everyone can squeeze a little brightness over the top.
Recipe Variations
- Gluten-free: Use gluten-free panko, tamari instead of soy sauce, and a gluten-free Worcestershire sauce.
- Vegan: Use extra-firm tofu, pressed and sliced, then bread it with plant-based milk and fry in oil; swap oyster sauce with extra soy sauce and a touch of sugar.
- Low carb: Serve the katsu over shredded cabbage or cauliflower rice instead of regular rice, and go lighter on the sauce.
- Baked version: Bake breaded cutlets on a wire rack at 425°F (220°C) for 15–20 minutes, flipping halfway, and spray lightly with oil.
- Spicy version: Add chili flakes or sriracha to the katsu sauce and sprinkle shichimi togarashi over the finished bowls.
- Extra veggie version: Add steamed broccoli, edamame, or sautéed mushrooms to bulk up the bowl without more meat.
Ways to Serve Crispy Japanese Katsu Bowls Recipe
- Serve with miso soup and a simple cucumber salad on the side.
- Pack leftovers in a bento-style lunch box with rice, sliced katsu, and sauce in a small container.
- Turn it into a katsu sandwich by tucking sliced cutlets, cabbage, and sauce into soft sandwich bread.
- Serve mini bowls with less rice and more shredded cabbage as a lighter lunch.
- Offer a toppings bar with sesame seeds, nori strips, pickles, and extra sauce so everyone customizes their own bowl.
Storage Success
Cool leftover katsu and rice to room temperature, then store them separately in airtight containers. Keep the sauce in a small jar and the shredded veggies in another container so they stay crisp. The chicken keeps well in the fridge for up to 3 days, and the rice tastes best within 2 days.
Reheat the katsu in a toaster oven or air fryer so the crust turns crisp again, and warm the rice in the microwave with a splash of water. Assemble fresh bowls with reheated components and fresh toppings, and the Crispy Japanese Katsu Bowls Recipe still tastes like a solid weeknight win.