
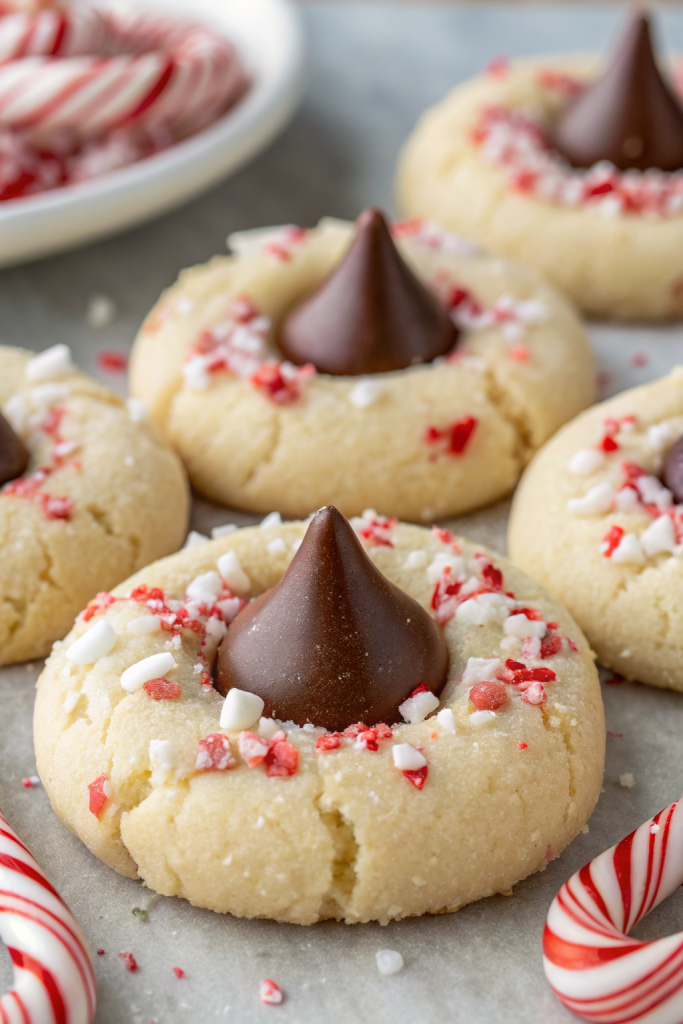
Chocolate Blossom Cookies Recipe tastes like a soft brownie and a classic sugar cookie had a chocolatey, crinkly-topped baby with a kiss of melty chocolate in the center. This small-batch style cookie recipe works perfectly for busy families, bake sales, or weeknight cravings and takes about 30 minutes from start to finish. I baked a version of these in my tiny first apartment oven, and they still turned out so good my roommate hid the leftovers in her closet.
Why Chocolate Blossom Cookies Recipe Is Worth It
Chocolate blossom cookies give you chewy edges, fudgy centers, and that iconic chocolate kiss on top in every bite. The dough mixes easily in one bowl, so you skip a sink full of dishes and still get bakery-level cookies.
You can customize the base with different cocoa powders, flavored chocolate kisses, or even sprinkles without changing the method. Kids love helping press the chocolate into the warm cookies, and adults mysteriously “help” with quality control.
Soft, rich, and perfectly chocolatey, this Chocolate Blossom Cookies Recipe disappears from the cookie plate faster than any other ★★★★★
Ingredients You Need
Dry ingredients
- 1 1/4 cups (160 g) all-purpose flour
- 1/3 cup (30 g) unsweetened cocoa powder
- Use natural cocoa for classic flavor or Dutch-process for deeper color and richer taste.
- 1 teaspoon baking soda
- 1/4 teaspoon fine sea salt
Wet ingredients
- 1/2 cup (1 stick / 113 g) unsalted butter, softened to room temperature
- Use salted butter and reduce added salt to a pinch if that’s what you keep on hand.
- 1/2 cup (100 g) granulated sugar
- 1/2 cup (100 g) packed light brown sugar
- 1 large egg, at room temperature
- 2 teaspoons pure vanilla extract
Coating and centers
- 1/4 cup (50 g) granulated sugar, for rolling
- 24–30 chocolate kiss candies, unwrapped
- Classic milk chocolate kisses give nostalgic flavor, but dark chocolate or caramel-filled kisses taste amazing too.
Pantry shortcuts and notes
- Use a hand mixer or stand mixer to cream the butter and sugars quickly, but a sturdy whisk and some elbow grease also work.
- Pre-scoop and freeze dough balls on a sheet pan, then store them in a freezer bag so you bake fresh cookies whenever you want.
- Use parchment paper sheets to prevent sticking and make cleanup super fast.
Equipment
- Large mixing bowl
- Hand mixer or stand mixer with paddle attachment (optional but helpful)
- Rubber spatula
- Measuring cups and spoons or a digital kitchen scale
- Small cookie scoop (about 1 tablespoon size)
- Baking sheets
- Parchment paper or silicone baking mats
- Cooling rack
Quick Tips & substitutions
- Soften butter until it yields easily to a finger press but still holds its shape; too soft butter makes cookies spread too much.
- Use room-temperature egg so it blends smoothly with the creamed butter and sugar.
- Chill the dough for 20–30 minutes if your kitchen runs warm or if the dough feels sticky; chilled dough holds shape better.
- Swap all-purpose flour with a 1:1 gluten-free baking blend if you need a gluten-free version.
- Use coconut oil (solid but scoopable) instead of butter for a dairy-free base, and pair it with dairy-free chocolate chunks on top.
- Roll dough balls in coarse sugar or colored sanding sugar for extra crunch and sparkle.
- Use chocolate chunks or chocolate discs in the center if you do not have chocolate kisses.
- Bake one test cookie first; adjust time by 1–2 minutes if it spreads too much or stays too puffy.
How to Make Chocolate Blossom Cookies Recipe
Mix the dry ingredients
Add flour, cocoa powder, baking soda, and salt to a medium bowl. Whisk until the cocoa breaks up and everything looks evenly combined. Set the bowl aside near your mixer so you grab it easily.
Cream butter and sugars
Place softened butter, granulated sugar, and brown sugar in a large mixing bowl. Beat on medium speed for 2–3 minutes until the mixture looks light, fluffy, and slightly paler. Scrape down the sides of the bowl so no butter clings to the edges.
Add egg and vanilla
Crack the egg into the butter mixture and pour in the vanilla extract. Beat again on medium speed just until the egg disappears and the mixture looks smooth and glossy. Scrape the bowl once more to keep everything even.
Combine wet and dry
Add the dry ingredient mixture to the bowl with the wet ingredients. Mix on low speed until the flour almost disappears and a soft dough forms. Switch to a spatula and fold a few times to catch any dry pockets, but stop once the dough looks uniform so you avoid tough cookies.
Chill the dough briefly
Cover the bowl and place it in the fridge for 20–30 minutes. This short chill time helps the dough firm up and keeps the cookies thick and chewy. Unwrap the chocolate kisses while the dough chills so you grab them quickly during baking.
Preheat and prep pans
Heat your oven to 350°F (175°C). Line two baking sheets with parchment paper or silicone baking mats. Pour the 1/4 cup of granulated sugar into a small shallow bowl for rolling.
Shape and coat the dough
Scoop about 1 tablespoon of dough and roll it into a smooth ball between your palms. Roll each ball in the bowl of sugar until coated on all sides. Place the dough balls on the prepared baking sheets, spacing them about 2 inches apart.
Bake the cookies
Slide one baking sheet into the center of the oven. Bake for 8–10 minutes, until the cookies puff and the tops crack slightly but still look soft in the center. Pull the sheet out as soon as the edges set, since the cookies continue to firm up on the pan.
Press in the chocolate kisses
Work quickly while the cookies stay hot. Press one chocolate kiss straight down into the center of each cookie until the edges of the cookie crack a bit around it. Move the cookies to a cooling rack after 2–3 minutes so the bottoms do not overbake on the hot pan.
Cool and set
Let the cookies cool on the rack until the chocolate kisses lose their super glossy look and set enough to handle. The chocolate stays soft for a while, so keep curious fingers in check if you share with kids. Enjoy warm for gooey centers or at room temperature for classic, lunchbox-friendly texture.
Recipe Variations
- Gluten-free: Use a 1:1 gluten-free baking flour blend and check that your chocolate candies list gluten-free on the label.
- Vegan: Swap butter with vegan baking stick, use a flax egg (1 tablespoon ground flax + 3 tablespoons water), and top with dairy-free chocolate chunks.
- Low carb: Use a fine-textured almond flour blend, a granulated sugar substitute that measures like sugar, and sugar-free chocolate candies.
- Extra chocolate: Stir 1/2 cup mini chocolate chips into the dough before chilling.
- Mint chocolate: Use mint chocolate kisses and add 1/2 teaspoon peppermint extract to the dough.
- Peanut butter twist: Press mini peanut butter cups into the centers instead of chocolate kisses.
- Holiday version: Roll dough balls in red and green sanding sugar or crushed candy canes.
Ways to Serve Chocolate Blossom Cookies Recipe
- Pack them in lunchboxes with a small fruit cup for balance.
- Stack a few cookies with parchment between them and tie with twine for easy gifts.
- Serve warm with a glass of cold milk or your favorite non-dairy milk.
- Crumble a cookie over vanilla ice cream or frozen yogurt.
- Arrange them on a dessert board with sliced fruit and a few other small cookies.
Storage Success
Store cooled chocolate blossom cookies in an airtight container at room temperature for up to 4–5 days. Slip a small piece of bread or a tortilla in the container to keep the cookies soft; swap it out if it dries. Freeze baked cookies in a single layer on a sheet pan, then move them to a freezer bag and keep them up to 2 months. Thaw at room temperature or warm them in a low oven for a few minutes to bring back that just-baked texture.
Chocolate Blossom Cookies Recipe
Ingredients
Instructions
- Whisk together the flour, cocoa powder, baking soda, and salt in a medium bowl until evenly combined. Set aside.
- In a large mixing bowl, beat the softened butter, granulated sugar, and brown sugar on medium speed for 2–3 minutes, until light and fluffy. Scrape down the sides of the bowl.
- Add the egg and vanilla extract to the butter mixture and beat on medium speed just until smooth and glossy, scraping the bowl as needed.
- Add the dry ingredients to the wet ingredients and mix on low speed until a soft dough forms and the flour is almost fully incorporated. Finish folding with a spatula just until the dough looks uniform.
- Cover the bowl and chill the dough in the refrigerator for 20–30 minutes, until slightly firm. Meanwhile, unwrap the chocolate kisses.
- Preheat the oven to 350°F (175°C). Line two baking sheets with parchment paper or silicone baking mats. Place the 1/4 cup granulated sugar for rolling in a shallow bowl.
- Scoop about 1 tablespoon of dough and roll it between your palms into a smooth ball. Roll each ball in the sugar to coat completely and place on the prepared baking sheets about 2 inches apart.
- Bake one sheet at a time for 8–10 minutes, until the cookies are puffed, the tops are slightly cracked, and the centers still look soft. Remove from the oven.
- Immediately press one chocolate kiss into the center of each hot cookie until the edges crack lightly around the candy. Let the cookies sit on the baking sheet for 2–3 minutes, then transfer to a cooling rack.
- Cool until the chocolate kisses lose their very glossy look and are set enough to handle. Serve warm for gooey centers or at room temperature for a classic, lunchbox-friendly texture.
Notes
Approximate per 1 cookie (24 cookies total): 135 calories; fat 7 g; saturated fat 4 g; carbohydrates 18 g; fiber 1 g; sugars 13 g; protein 2 g; sodium 90 mg. Values will vary based on exact chocolate candies used, brands, and portion size.