
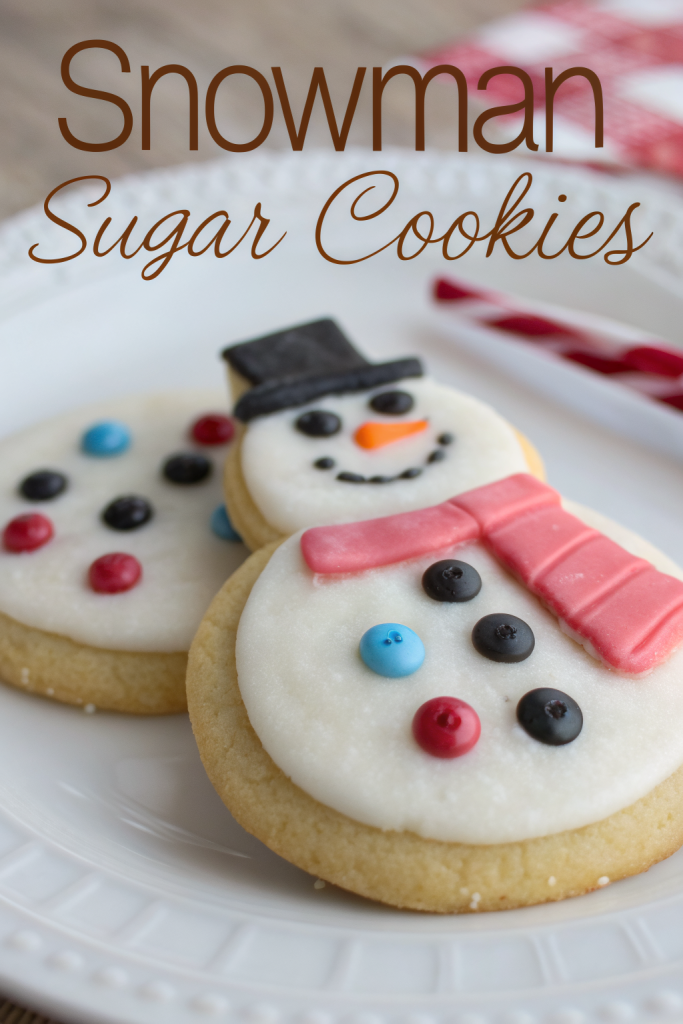
Melted Snowman Biscuits Recipe tastes like a soft sugar cookie met a gooey s’more and decided to wear a frosting scarf. It works perfectly for busy parents, classroom parties, or anyone who wants a cute holiday dessert in under 45 minutes. I first made these with my niece, and we laughed so hard at the “snowmen accidents” that they became a non-negotiable December tradition.
Why Melted Snowman Biscuits Recipe Is Worth It
This Melted Snowman Biscuits Recipe gives you bakery-level cuteness without bakery-level effort. You use simple ingredients, easy decorations, and a forgiving design that actually looks better when things get a little messy.
Kids love decorating these, and adults love eating them “for quality control.” The biscuits taste buttery and soft, the marshmallow heads stay gooey, and the icing ties everything together with just the right sweetness.
My kids begged to make this Melted Snowman Biscuits Recipe again the next weekend, and I didn’t even pretend to argue. ★★★★★
Ingredients You Need
You can build this Melted Snowman Biscuits Recipe with either homemade biscuit dough or a shortcut biscuit base. I’ll list both so you can choose your level of energy and caffeine.
Biscuit Base
Shortcut option (fast and easy):
- 1 can refrigerated flaky biscuits (8-count; I like Pillsbury Grands or a store brand that bakes up tall)
- 1 tablespoon melted butter (to brush on top after baking)
Homemade biscuit option:
- 2 cups all-purpose flour
- 1 tablespoon baking powder
- 2 teaspoons granulated sugar
- ½ teaspoon fine salt
- 6 tablespoons cold unsalted butter, cubed
- ¾ cup cold buttermilk (or ¾ cup milk + 1 teaspoon vinegar as a quick swap)
Snowman Decorations
- 8 large marshmallows (standard size, not jumbo)
- 1½–2 cups powdered sugar (for icing)
- 2–3 tablespoons milk or heavy cream (adjust for icing thickness; plant milk works too)
- ½ teaspoon vanilla extract (or almond extract for a bakery-style flavor)
- Black decorating gel or black food coloring + a tiny bit of icing (for eyes and buttons)
- Orange decorating gel or orange sprinkles / mini orange candies (for noses)
- Assorted sprinkles, mini chocolate chips, or colored candy-coated chocolates (for scarves, buttons, and “puddles”)
You can use store-bought white cookie icing if you want a squeeze-bottle shortcut. It saves time and keeps things tidy, especially with kids.
Equipment List
- Large mixing bowl
- Pastry cutter or two forks (if making biscuits from scratch)
- Measuring cups and spoons
- Baking sheet
- Parchment paper or silicone baking mat
- Cooling rack
- Small bowls for icing and colored details
- Toothpicks or a small food-safe paintbrush (for tiny faces and buttons)
Quick Tips & substitutions
- Use canned biscuits on busy days and homemade biscuits when you want that from-scratch flavor.
- Roll or press canned biscuits slightly flatter before baking so the “snow puddle” has more surface area.
- Swap marshmallows with white chocolate truffles if you want a richer “snowman head.”
- Mix powdered sugar with just enough milk to make thick but pourable icing that slowly spreads.
- Use plant-based butter, non-dairy milk, and vegan marshmallows for a dairy-free or vegan-friendly version.
- Keep black and orange decorating gels on hand; they save time and keep faces from smudging.
- Chill the baked biscuits for 5–10 minutes before icing so the icing flows slowly instead of running off.
- Work on a parchment-lined surface to catch drips and keep cleanup easy.
How to Make Melted Snowman Biscuits Recipe
Step 1: Prep the Oven and Pan
Preheat your oven to 400°F (200°C) for canned biscuits or 425°F (220°C) for homemade biscuits. Line a baking sheet with parchment paper or a silicone baking mat. This helps biscuits bake evenly and keeps the bottoms from over-browning.
Step 2: Make the Biscuit Dough (If Going Homemade)
Add flour, baking powder, sugar, and salt to a large bowl and whisk to combine. Toss in the cold butter cubes and cut them into the flour with a pastry cutter or two forks until the mixture looks like coarse crumbs with pea-sized bits of butter. Pour in the cold buttermilk and stir just until the dough comes together and no dry pockets remain.
Turn the dough onto a lightly floured surface and gently pat it into a rectangle about ¾-inch thick. Fold the dough in half, pat it out again, and repeat 2–3 times to build flaky layers. Cut out 8 rounds with a biscuit cutter or a floured glass, and place them on the prepared baking sheet.
Step 3: Bake the Biscuits
Place the biscuits in the hot oven and bake until golden and puffed. Canned biscuits usually take 12–15 minutes, and homemade biscuits usually take 13–16 minutes, depending on your oven. Rotate the pan halfway through baking so they brown evenly.
Remove the biscuits from the oven when the tops look golden and the centers feel set. Brush the tops lightly with melted butter while they still feel hot. Transfer the biscuits to a cooling rack and let them cool for about 10 minutes so the icing doesn’t slide right off.
Step 4: Mix the Icing
Add powdered sugar to a medium bowl and stir in vanilla. Start with 2 tablespoons of milk or cream and whisk until smooth. Add more liquid a teaspoon at a time until the icing flows off the spoon in a thick ribbon that slowly disappears back into the bowl.
You want icing that spreads on its own but doesn’t run like water. If it looks too thin, add a spoonful of powdered sugar. If it looks too thick and clumpy, add a tiny splash of milk and whisk again.
Step 5: Attach the Marshmallow Heads
Place the slightly cooled biscuits on the parchment-lined baking sheet or a wire rack set over parchment. Add a small spoonful of icing to the center of each biscuit and press a marshmallow on top. This icing acts like glue and keeps the marshmallow from tipping over.
Angle the marshmallow slightly so it looks like the snowman slumped to one side. You can even press gently to flatten one side a bit for extra “melting” drama. Work one biscuit at a time so the icing under the marshmallow doesn’t set before you attach it.
Step 6: Create the Melting Snow Puddle
Spoon icing around each marshmallow head and over the biscuit, letting it drip and spread in uneven shapes. Think “oops, this snowman spent too long in the sun,” not “perfect circle.” Gently nudge the icing with the back of the spoon so it flows around the edges.
Leave a little biscuit peeking through in spots for a rustic look, or cover it completely for a snowy blanket. If you want thicker puddles, let the first layer set for a few minutes and then add a second spoonful of icing on top.
Step 7: Add Faces and Buttons
Use black decorating gel or a tiny bit of black-tinted icing to dot on two eyes and a few buttons down the front of the icing puddle. A toothpick helps you place tiny dots without smearing. Draw a small smile or a surprised “O” mouth for extra personality.
Add an orange dot or tiny orange sprinkle on the marshmallow as the carrot nose. Angle it slightly off-center so each snowman looks quirky and unique. If you use mini chocolate chips, press them gently into the icing while it still feels soft.
Step 8: Dress Them with Scarves and Details
Use thin strips of fruit leather, licorice laces, or long sprinkles to create scarves around the base of the marshmallow head. Press them lightly into the soft icing so they stay put. Add colorful sprinkles or small candies as buttons, mittens, or “melted” accessories around the puddle.
You can draw little stick arms with chocolate or black gel that stretch out into the icing. Kids love to give each snowman a different expression and accessory, so hand them a few safe tools and let them go wild. Just keep an eye on the candy-to-mouth ratio.
Step 9: Let the Icing Set
Leave the decorated Melted Snowman Biscuits on the counter for 20–30 minutes so the icing firms up. This step helps the decorations stay in place when you move or stack them lightly. Once the icing sets, transfer the biscuits to a serving platter.
If your kitchen feels warm, you can chill the tray in the fridge for 10–15 minutes to speed up the process. Serve them slightly warm or at room temperature so the marshmallows stay soft and chewy.
Recipe Variations
- Gluten-free: Use a gluten-free biscuit mix or gluten-free canned biscuits, and dust your surface with gluten-free flour when shaping.
- Vegan: Use plant-based butter, non-dairy milk, vegan marshmallows, and a vegan-friendly biscuit dough or canned biscuit brand.
- Low carb-ish: Use an almond flour biscuit recipe and a powdered sweetener that measures like sugar, then keep decorations minimal.
- Chocolate lovers: Add mini chocolate chips to the biscuit dough or drizzle melted chocolate over the icing puddles.
- Peppermint twist: Stir crushed peppermint candies into the icing and use peppermint candies as buttons.
- Spiced snowmen: Add cinnamon and nutmeg to the biscuit dough or icing for a cozy holiday flavor.
Ways to Serve Melted Snowman Biscuits Recipe
- Serve with hot cocoa topped with whipped cream and extra mini marshmallows.
- Pair with cold milk or chocolate milk for a kid-friendly dessert plate.
- Add to a holiday cookie tray as the “fun” centerpiece treat.
- Pack in festive boxes for neighbor gifts or teacher treats.
- Set up a decorating station at a winter party and let guests personalize their own snowmen.
Storage Success
Store leftover Melted Snowman Biscuits in a single layer in an airtight container at room temperature for up to 2 days. If you need to stack them, place parchment between layers and handle them gently so the faces stay intact. Keep them away from direct heat or sunlight so the icing and marshmallows don’t sag.
You can chill them in the fridge for 3–4 days, but let them sit at room temperature for 10–15 minutes before serving so the marshmallows soften again. I usually stash one in the back of the container as a “baker’s tax” and enjoy it with coffee the next morning.
Melted Snowman Biscuits Recipe
Ingredients
Instructions
- Preheat the oven to 400°F (200°C) for canned biscuits or 425°F (220°C) for homemade biscuits. Line a baking sheet with parchment paper or a silicone baking mat.
- If making homemade biscuits, whisk together the flour, baking powder, sugar, and salt. Cut in the cold butter until the mixture looks like coarse crumbs, then stir in the cold buttermilk just until a soft dough forms.
- Turn the dough onto a lightly floured surface, gently pat into a 3/4‑inch thick rectangle, fold over on itself 2–3 times, then cut into 8 rounds and place on the prepared baking sheet. If using canned biscuits, place 8 biscuits on the sheet and lightly press them a bit flatter for more surface area.
- Bake the biscuits until puffed and golden, about 12–15 minutes for canned biscuits or 13–16 minutes for homemade, rotating the pan halfway through. Brush hot biscuits lightly with melted butter and cool about 10 minutes on a rack.
- Meanwhile, make the icing by whisking powdered sugar, vanilla, and 2 tablespoons milk or cream until smooth. Add more liquid a teaspoon at a time until the icing is thick yet pourable and slowly runs off the spoon.
- Place the slightly cooled biscuits on parchment. Spoon a small blob of icing in the center of each biscuit and press a marshmallow on top, angling it slightly so it looks like a melting snowman head.
- Spoon more icing around each marshmallow, letting it drip and spread over the biscuit in irregular puddles. Nudge it gently with the back of the spoon to create a melted-snow effect.
- Add faces and buttons while the icing is still soft, using black gel or tinted icing for eyes, mouth, and buttons, and an orange dot or sprinkle for the carrot nose. Press in mini chocolate chips or small candies if using.
- Decorate with scarves and details by wrapping thin candy strips or licorice laces around the marshmallow base and adding sprinkles or candies as extra “melted” accessories and arms if desired.
- Let the decorated snowman biscuits sit at room temperature for 20–30 minutes, or briefly chill, until the icing sets before serving or transferring to a platter.
Notes
Approximate per 1 snowman biscuit (using canned biscuits, icing, and marshmallow, decorations will vary): 260–310 calories; fat 10–13 g; saturated fat 5–7 g; carbohydrates 40–48 g; fiber 0–1 g; sugars 18–25 g; protein 3–5 g; sodium 480–620 mg. Values will vary based on biscuit type, amount of icing, and decorations used.