
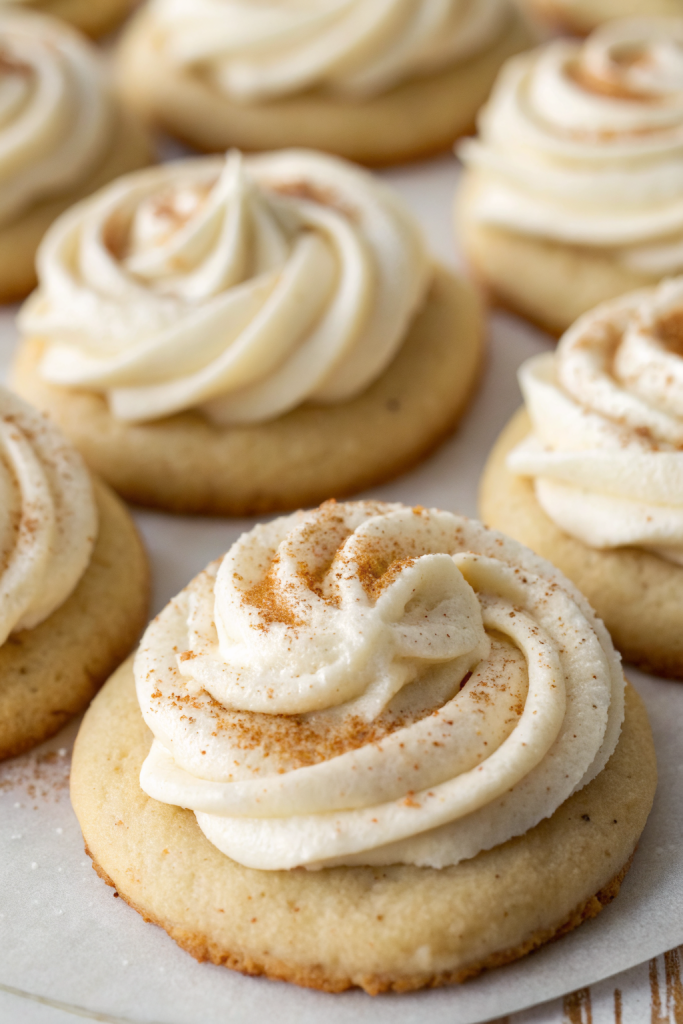
Eggnog Snickerdoodle Thumbprint Cookies Recipe tastes like a cozy mug of eggnog collided with a soft, cinnamon-sugar snickerdoodle and decided to show up in cookie form. This recipe works well for holiday parties, cookie exchanges, or anyone who wants a festive dessert in about 1 hour from start to finish. I test-baked these while wearing fuzzy socks in July, so you know my commitment level runs deep.
Why Make This Eggnog Snickerdoodle Thumbprint Cookies Recipe at Home
You control the eggnog flavor, the level of cinnamon, and the size of each cookie, so every batch turns out exactly how you like it. Store-bought holiday cookies often taste one-note, while these thumbprints hit creamy, spiced, and buttery all at once.
You also use simple pantry ingredients that you probably already own, plus a small splash of actual eggnog for the filling. The recipe scales easily, so you can bake a half batch on a weeknight or double it for a cookie platter.
“These Eggnog Snickerdoodle Thumbprint Cookies taste like Christmas in one bite and vanish from the cookie tray in minutes. ★★★★★”
Ingredients You Need
Cookie Dough
- 2 ¾ cups (330 g) all-purpose flour
- 1 teaspoon cream of tartar
- 1 teaspoon baking soda
- ½ teaspoon fine sea salt
- 1 teaspoon ground cinnamon
- ½ teaspoon ground nutmeg
- 1 cup (2 sticks / 226 g) unsalted butter, softened to cool room temperature
- 1 cup (200 g) granulated sugar
- ¼ cup (55 g) packed light brown sugar
- 1 large egg, room temperature
- 1 large egg yolk, room temperature
- 2 teaspoons pure vanilla extract
I like King Arthur or Gold Medal flour because they give consistent texture. Use real butter, not margarine, since butter flavor carries the spices better. Bring the egg and yolk to room temperature so they mix smoothly and keep the dough tender.
Cinnamon Sugar Coating
- ¼ cup (50 g) granulated sugar
- 1 ½ teaspoons ground cinnamon
You can add a pinch of nutmeg to the coating if you want extra holiday flavor. Use fresh spices when possible, since older jars lose punch and make the cookies taste flat.
Eggnog Thumbprint Filling
- 3 tablespoons unsalted butter, melted
- ¼ cup (60 ml) full-fat eggnog, room temperature
- 1 ¼ cups (150 g) powdered sugar, sifted
- ¼ teaspoon ground nutmeg
- ¼ teaspoon ground cinnamon
- ½ teaspoon pure vanilla extract
- Pinch of fine sea salt
Use thick, full-fat eggnog for the richest flavor and texture. If your eggnog tastes very sweet, reduce the powdered sugar by 2 tablespoons and taste as you go. You can use store-brand eggnog here; the spices and vanilla in the filling boost the flavor.
Optional Garnish
- Extra ground nutmeg for sprinkling
- Tiny pinch of cinnamon sugar on top of each filled cookie
Equipment
- Large mixing bowl and medium mixing bowl
- Hand mixer or stand mixer with paddle attachment
- Measuring cups and spoons
- Rubber spatula
- Small bowl for cinnamon sugar
- Baking sheets
- Parchment paper or silicone baking mats
- Small cookie scoop (about 1 tablespoon size)
- Measuring spoon or your thumb to press the centers
- Wire cooling racks
Tips & Mistakes
- Chill the dough for 20 to 30 minutes if your kitchen feels warm, so the cookies hold shape and do not spread too much.
- Roll the dough balls evenly so they bake at the same rate and you avoid underbaked and overbaked cookies on one tray.
- Press the thumbprint gently and only halfway down; if you press too deep, the cookie can crack around the edges.
- Re-press the centers right after baking while the cookies still feel soft, since they puff in the oven.
- Use room-temperature eggnog in the filling so it mixes smoothly and does not cause the butter to seize.
- Taste the filling and adjust nutmeg and cinnamon to your preference, since eggnog brands vary in sweetness and spice.
- Let cookies cool completely before you add the eggnog filling, so the filling sets instead of melting and running.
- Store filled cookies in a single layer or with parchment between layers so the tops stay neat and do not stick.
How to Make Eggnog Snickerdoodle Thumbprint Cookies Recipe
Step 1: Mix the Dry Ingredients
Add flour, cream of tartar, baking soda, salt, cinnamon, and nutmeg to a medium bowl. Whisk until everything looks evenly combined and no streaks of spices remain. Set the bowl aside.
Step 2: Cream Butter and Sugars
Place the softened butter, granulated sugar, and brown sugar in a large mixing bowl. Beat with a hand mixer or stand mixer on medium speed for 2 to 3 minutes until the mixture looks light, fluffy, and slightly paler. Scrape down the sides of the bowl so everything mixes evenly.
Step 3: Add Egg, Yolk, and Vanilla
Add the egg, egg yolk, and vanilla extract to the butter mixture. Beat on medium speed until the mixture looks smooth and glossy, about 30 to 45 seconds. Scrape the bowl again to catch any butter stuck on the bottom.
Step 4: Combine Wet and Dry
Pour the dry ingredients into the wet ingredients in two additions. Mix on low speed until the flour almost disappears, then switch to a spatula and fold gently until no dry streaks remain. Stop mixing as soon as the dough comes together so the cookies stay soft and tender.
If the dough feels very sticky and soft, cover the bowl and chill it for 20 to 30 minutes. Slightly firm dough makes shaping easier and helps the thumbprints hold their centers.
Step 5: Prepare Cinnamon Sugar and Pans
Line baking sheets with parchment paper or silicone baking mats. In a small bowl, stir together the granulated sugar and cinnamon for the coating. Set the bowl near your baking sheets.
Step 6: Shape and Coat the Dough Balls
Scoop about 1 tablespoon of dough for each cookie and roll it into a smooth ball between your palms. Roll each ball in the cinnamon sugar mixture until fully coated. Place the coated dough balls on the prepared baking sheets, leaving about 2 inches between them.
Step 7: Press the Thumbprints
Use your thumb, the back of a small measuring spoon, or the handle of a wooden spoon to press a shallow indentation in the center of each dough ball. Aim for about halfway down, not all the way through. If the edges crack slightly, pinch them back together so the filling stays put later.
Step 8: Bake the Cookies
Heat your oven to 350°F (175°C). Bake one sheet at a time on the center rack for 9 to 11 minutes, until the edges look set and the tops look slightly puffed but still soft. The cookies should stay pale with just a hint of golden color on the bottom.
Right when you pull the tray from the oven, gently press the centers again with the same tool you used before. This step deepens the thumbprint and makes more room for filling. Transfer the cookies to a wire rack and let them cool completely.
Step 9: Mix the Eggnog Filling
While the cookies cool, whisk the melted butter, eggnog, vanilla, nutmeg, cinnamon, and salt in a medium bowl. Add the powdered sugar gradually, whisking until the mixture turns smooth and thick but still spoonable. If the filling looks too thin, add 1 to 2 tablespoons more powdered sugar; if it looks too thick, add 1 teaspoon more eggnog.
Step 10: Fill the Thumbprints
Use a small spoon or piping bag to fill each cooled cookie center with the eggnog mixture. Fill almost to the top, but leave a tiny rim so the filling does not spill over. Sprinkle a light pinch of nutmeg or cinnamon sugar on top of each filled cookie if you want extra flair.
Let the filled cookies sit at room temperature for about 20 to 30 minutes so the filling sets. After that, move them to the fridge if your kitchen runs warm or if you plan to store them longer.
Variations I've Tried
I swapped half the cinnamon in the dough with chai spice and loved the cozy twist with the eggnog filling. I also added ¼ teaspoon almond extract to the dough once, which gave a bakery-style aroma that worked nicely with nutmeg. One batch used brown butter in place of regular butter, and that version tasted extra nutty and rich, almost like a caramel-eggnog mashup.
You can roll the dough balls in a mix of cinnamon, nutmeg, and a tiny pinch of cloves for a stronger spice profile. I also tested a chocolate version by adding 2 tablespoons cocoa powder and reducing flour slightly, which gave a hot-cocoa-meets-eggnog vibe that my friends devoured.
How to Serve Eggnog Snickerdoodle Thumbprint Cookies Recipe
Serve these Eggnog Snickerdoodle Thumbprint Cookies on a holiday dessert tray with classic sugar cookies and chocolate chip cookies for contrast. Pair them with hot cocoa, chai tea, or a warm latte so the spices in the cookies play off the drink. Kids love them with cold milk, while adults often sneak a second cookie with their coffee. I like to plate them on a small stand and sprinkle a tiny bit of nutmeg on the platter for a festive look.
How to store
- Store cookies in an airtight container in the fridge for up to 5 days; keep them in a single layer or separate layers with parchment.
- Freeze unfilled baked cookies for up to 2 months, then thaw at room temperature and add fresh eggnog filling before serving.
- Freeze filled cookies on a baking sheet until firm, then move them to a container for up to 1 month; thaw in the fridge so the filling stays stable.
- Enjoy chilled cookies straight from the fridge or let them sit at room temperature for 10 to 15 minutes; the filling softens slightly and tastes extra creamy.
Eggnog Snickerdoodle Thumbprint Cookies Recipe
Ingredients
Instructions
- In a medium bowl, whisk together the flour, cream of tartar, baking soda, salt, cinnamon, and nutmeg until evenly combined. Set aside.
- In a large mixing bowl, beat the softened butter, granulated sugar, and brown sugar with a hand mixer or stand mixer on medium speed for 2 to 3 minutes, until light, fluffy, and slightly paler. Scrape down the sides of the bowl.
- Add the egg, egg yolk, and vanilla extract to the butter mixture. Beat on medium speed until smooth and glossy, about 30 to 45 seconds, scraping the bowl as needed.
- Add the dry ingredients to the wet ingredients in two additions, mixing on low speed until the flour is almost incorporated. Switch to a spatula and fold gently just until no dry streaks remain. If the dough feels very soft or sticky, cover and chill for 20 to 30 minutes.
- Line baking sheets with parchment paper or silicone baking mats. In a small bowl, stir together the granulated sugar and cinnamon for the coating.
- Scoop about 1 tablespoon of dough for each cookie and roll into smooth balls. Roll each ball in the cinnamon sugar mixture to coat completely and place on the prepared baking sheets about 2 inches apart.
- Use your thumb or the back of a small measuring spoon to press a shallow indentation in the center of each dough ball, going about halfway down without pressing through. Gently pinch together any large cracks around the edges.
- Preheat the oven to 350°F (175°C). Bake one sheet at a time on the center rack for 9 to 11 minutes, until the edges look set and the tops are puffed but still soft and pale with only light color on the bottom.
- Immediately after removing the cookies from the oven, gently press the centers again with the same tool to deepen the thumbprints. Transfer the cookies to a wire rack and cool completely.
- While the cookies cool, make the filling: in a medium bowl whisk together the melted butter, eggnog, vanilla, nutmeg, cinnamon, and salt. Gradually whisk in the powdered sugar until the mixture is smooth, thick, and spoonable. Adjust with a little more powdered sugar if too thin or a splash more eggnog if too thick.
- When the cookies are completely cool, use a small spoon or piping bag to fill each thumbprint with the eggnog filling, almost to the top but not overflowing. Sprinkle lightly with nutmeg or cinnamon sugar if desired, then let stand at room temperature for 20 to 30 minutes so the filling sets before serving or chilling.
Notes
Approximate per cookie (about 30 cookies total): 150 calories; fat 7 g; saturated fat 4 g; carbohydrates 20 g; fiber 0 g; sugars 13 g; protein 2 g; sodium 90 mg. Values will vary based on specific ingredients, brands, and cookie size.