
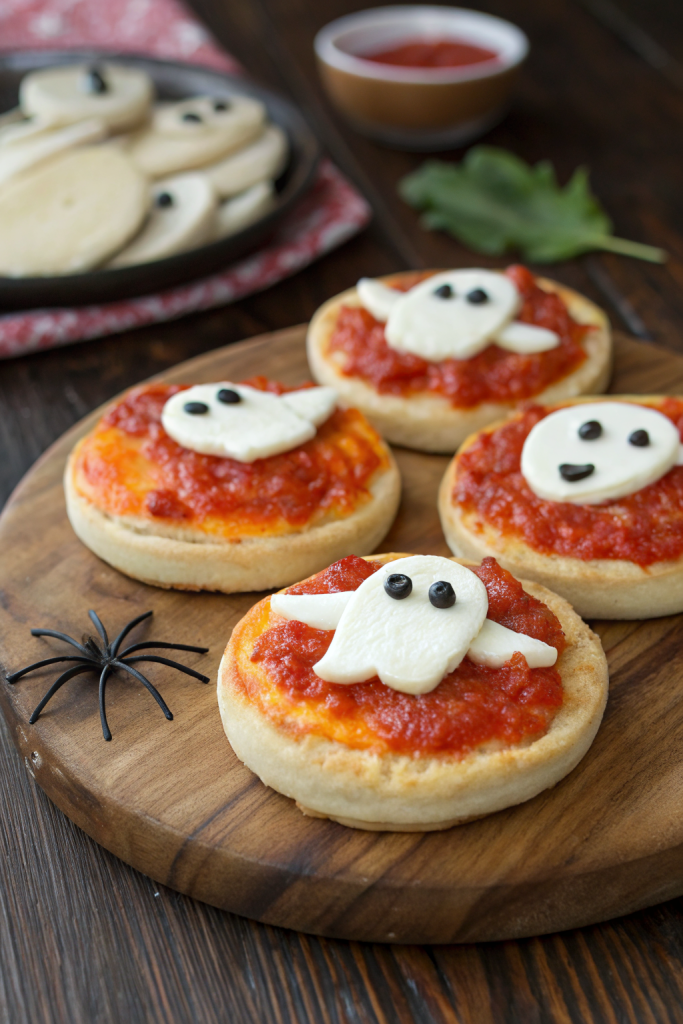
Easy Mini Halloween Pizzas Recipe tastes like cheesy, saucy, crispy little bites of a pizzeria party that crashed your costume night in the best way. This recipe works perfectly for busy parents, Halloween parties, or anyone who wants a fun themed dinner or snack in about 25 minutes start to finish. I test these every October with my nieces, and they judge harder than any food critic on the internet.
Why Easy Mini Halloween Pizzas Recipe Is Worth It
Mini Halloween pizzas turn a regular pizza night into a hands-on activity that kids and adults actually want to help with. You get all the flavor of classic pizza, but in snack-size form that fits on a party tray or lunchbox.
You also control the toppings, which means you keep picky eaters happy and still sneak in a veggie or two. Cleanup stays easy, the bake time stays short, and you skip the stress of complicated Halloween recipes that need 47 ingredients and a culinary degree.
“These Easy Mini Halloween Pizzas vanished faster than the candy bowl, and the kids asked for them again the next night. ★★★★★”
Ingredients You Need
Base & Sauce
- Mini pizza crusts or bases
- English muffins, split
- Mini naan or flatbreads
- Small pita rounds
- Canned biscuit dough, pressed flat into 3–4 inch circles
- Pizza sauce (jarred marinara or pizza sauce works great; I like Rao’s or Trader Joe’s for good flavor)
- Olive oil or neutral oil spray (light brush on the base helps crisp it)
Cheese
- Low-moisture mozzarella cheese, shredded
- String cheese sticks (perfect for mummy “bandages”)
- Provolone or sliced mozzarella (cut into ghost shapes with a small knife or cookie cutter)
- Optional: Parmesan for extra cheesy flavor
Toppings for Halloween Faces & Shapes
Mix and match these to build pumpkins, mummies, spiders, and monster faces:
- Black olives (sliced into rings or chopped for spider bodies and eyes)
- Pepperoni slices (mini or regular; cut into triangles for eyes or mouths)
- Bell peppers (orange, green, yellow; cut into thin strips or tiny shapes)
- Mushrooms, thinly sliced
- Red onion, thinly sliced
- Cherry tomatoes, sliced
- Fresh basil or baby spinach (for monster hair or pumpkin stems)
- Corn kernels or pineapple tidbits if your crew loves sweet toppings
Pantry Shortcuts & Notes
- Use pre-shredded mozzarella to save time; choose a low-moisture blend so the pizzas bake crisp, not soggy.
- Use jarred sliced olives and pre-sliced pepperoni so you only assemble and bake.
- Use store-bought pizza dough and cut it into circles with a biscuit cutter or glass if you want a more “from scratch” feel without extra work.
Equipment
- Baking sheet (or two, if you double the batch)
- Parchment paper or a silicone baking mat
- Small bowls for toppings (helps kids build their own pizzas)
- Small sharp knife or mini cookie cutters (for ghost, pumpkin, or bat shapes)
- Cooling rack (optional, but helps keep bottoms crisp)
Quick Tips & substitutions
- Use English muffins or mini naan when you want the fastest base with zero dough handling.
- Toast the bases in the oven for 3–4 minutes before topping to keep them crisp under the sauce.
- Pat mushrooms, olives, and pineapple dry with a paper towel so they do not add extra moisture.
- Cut string cheese into thin strips to build mummy bandages that melt but still show lines.
- Use black olive slices or tiny dots of sauce for eyes on ghosts and mummies.
- Swap regular mozzarella with dairy-free shreds for a vegan version.
- Use gluten-free mini crusts, tortillas, or pita to keep everything gluten-free.
- Bake on parchment so the cheese that melts over the edge peels off easily.
- Keep toppings light so the pizzas bake evenly and the faces still show.
- Set up a topping bar and let kids design their own monster or pumpkin pizzas.
How to Make Easy Mini Halloween Pizzas Recipe
Step 1: Prep the Oven and Pans
Preheat your oven to 400°F (200°C). Line a baking sheet with parchment paper or a silicone mat. Arrange your mini crusts in a single layer with a little space between each one.
Step 2: Par-Bake the Bases
Brush or spray the tops lightly with oil. Slide the tray into the oven and bake for 3–4 minutes until the edges just start to feel dry and slightly firm. Pull the tray out and set it on the counter while you gather toppings.
Step 3: Add Sauce
Spoon 1–2 tablespoons of pizza sauce onto each mini crust. Spread the sauce almost to the edge, but leave a small border for a nice crust. Keep the layer thin so the pizzas stay crisp and not soggy.
Step 4: Add Cheese Layer
Sprinkle shredded mozzarella over each base, keeping it even but not too thick. For ghost pizzas, place a slice of mozzarella or provolone on top in a ghost shape instead of shredded cheese. For mummies, skip the shredded cheese and use string cheese strips later as bandages.
Step 5: Build Halloween Designs
Ghost Pizzas
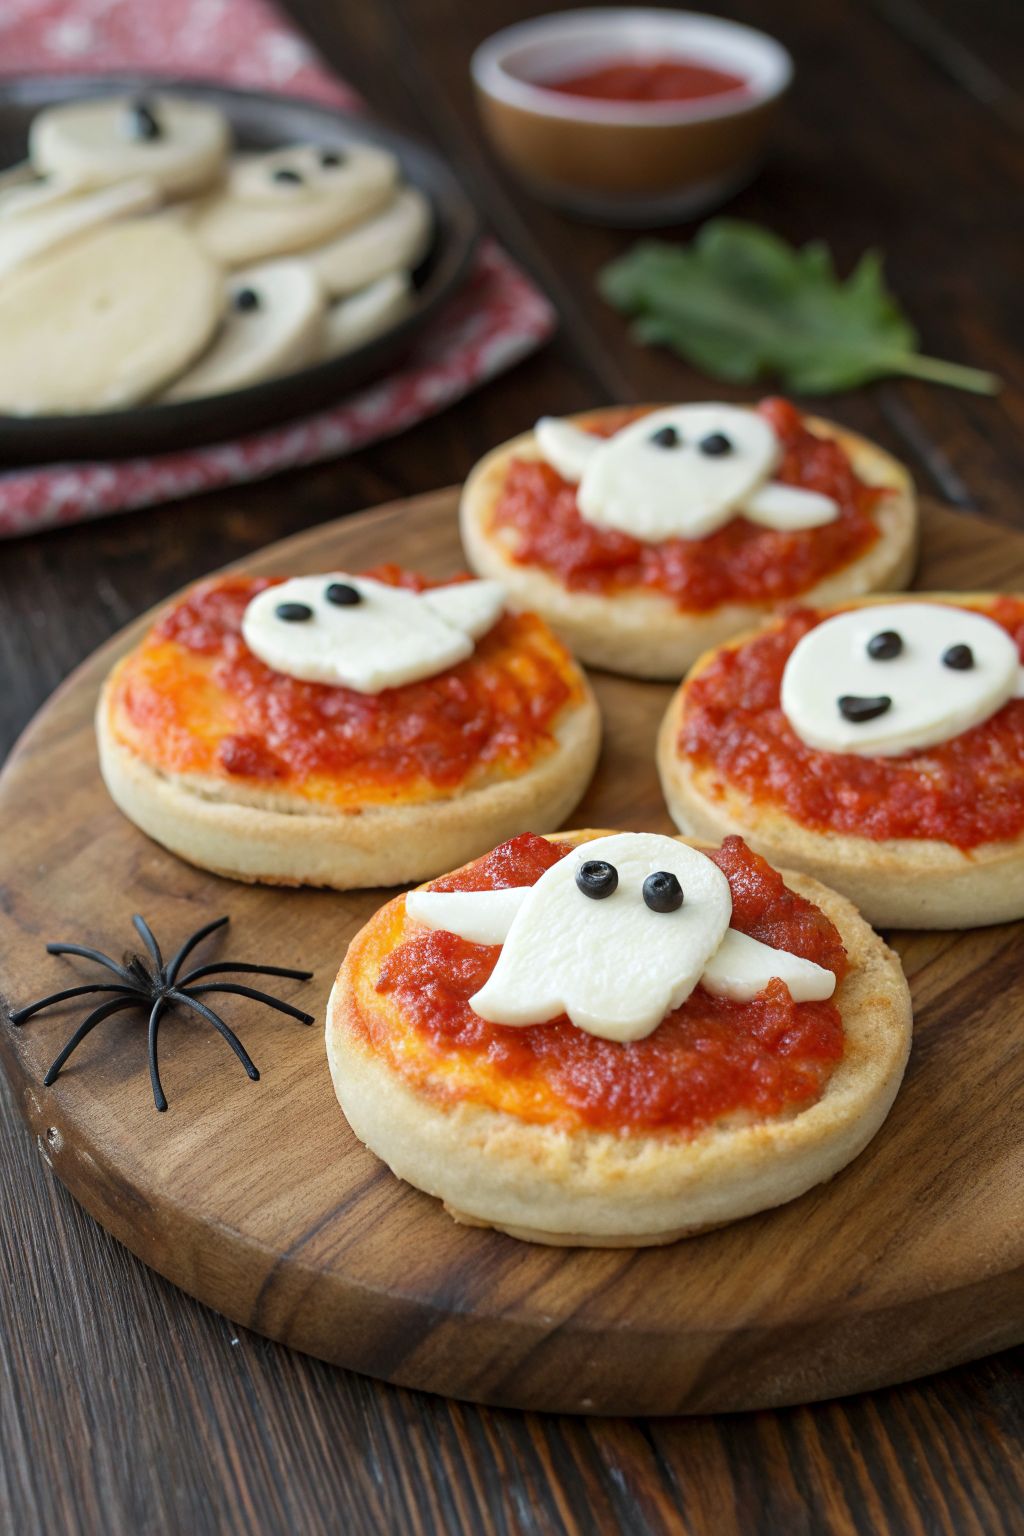
Place a slice of mozzarella or provolone in a ghost-like blob shape on top of the sauce. Add two tiny olive pieces or dots of sauce for eyes. You can add a small mouth with a sliver of olive if you want a spooky expression.
Mummy Pizzas
Lay thin strips of string cheese across the sauce in a crisscross pattern to look like bandages. Leave a small gap near the top for the face. Add two olive slices or pepperoni bits as eyes peeking through the bandages.
Jack-o’-Lantern Pizzas
Use shredded mozzarella as the base cheese. Add a layer of orange bell pepper strips or pepperoni slices to form a pumpkin shape. Cut small triangles of pepperoni or olives for eyes and a jagged mouth, and use a tiny piece of green pepper or basil as the stem.
Spider or Monster Pizzas
Place a whole olive or half an olive in the center as the spider body. Use thin olive strips as legs. For monsters, use peppers, mushrooms, and olives to build wild hair, big eyes, and goofy mouths.
Step 6: Bake Until Bubbly
Return the tray to the oven. Bake for 8–10 minutes, until the cheese melts and the edges of the crusts turn golden. Check at the 8-minute mark so the toppings stay cute and not over-browned.
Step 7: Cool Slightly and Serve
Remove the pizzas from the oven and slide them onto a cooling rack or cutting board. Let them cool for 3–5 minutes so the cheese sets and little hands do not burn. Serve warm and watch everyone pick their favorite spooky face.
Recipe Variations
- Gluten-free: Use gluten-free mini crusts, tortillas, or pita rounds; double-check sauce and toppings for gluten-free labels.
- Vegan: Use dairy-free mozzarella shreds, skip pepperoni, and load up veggies and olives; use vegan pepperoni or sausage crumbles if you like.
- Low carb: Use low-carb tortillas, cauliflower rounds, or mini portobello mushroom caps as the base.
- Protein boost: Add diced grilled chicken, turkey pepperoni, or crumbled cooked turkey sausage.
- Extra veggie: Add finely chopped spinach under the cheese, or top with bell peppers, mushrooms, and onions.
- Spicy version: Add red pepper flakes, jalapeño slices, or spicy pepperoni for the adults.
Ways to Serve Easy Mini Halloween Pizzas Recipe
- Serve on a big platter with a side of carrot sticks, cucumber slices, and ranch or hummus.
- Pack a couple of cooled mini pizzas in lunchboxes with fruit and a small treat.
- Offer them as a pre-trick-or-treat dinner so kids eat something real before candy.
- Set up a “decorate your own” station at a Halloween party and bake trays as guests finish their designs.
- Pair with tomato soup or veggie soup for a cozy Halloween dinner.
Storage Success
Let the mini Halloween pizzas cool completely, then place them in a single layer in an airtight container or stack them with parchment between layers. Store them in the fridge for up to 3 days. Reheat them in a 375°F oven or toaster oven for 5–7 minutes until the crust crisps again and the cheese melts. Freeze baked and cooled pizzas on a tray, then move them to a freezer bag and reheat from frozen for easy Halloween snacks all season.
Easy Mini Halloween Pizzas Recipe
Ingredients
Instructions
- Preheat the oven to 400°F (200°C). Line a baking sheet with parchment paper or a silicone baking mat and arrange the mini crusts in a single layer with a little space between each one.
- Lightly brush or spray the tops of the crusts with olive oil. Par-bake for 3–4 minutes, until the edges just start to feel dry and slightly firm. Remove the tray from the oven.
- Spoon 1–2 tablespoons of pizza sauce onto each crust, spreading it almost to the edge while leaving a small border for the crust.
- For regular mini pizzas and jack-o’-lantern or monster designs, sprinkle each base with shredded mozzarella (and a little Parmesan if using). For ghost pizzas, place a ghost-shaped slice of provolone or mozzarella on top of the sauce instead of shredded cheese. For mummy pizzas, skip the shredded cheese for now and plan to use string cheese strips as bandages.
- Build Halloween designs: For ghost pizzas, add tiny olive pieces or dots of sauce for eyes and an optional olive sliver for a mouth. For mummy pizzas, lay strips of string cheese across the sauce in a crisscross pattern, leaving a small gap for the face, then add two olive slices or pepperoni bits as eyes. For jack-o’-lantern pizzas, arrange shredded cheese, then orange bell pepper strips or pepperoni in a pumpkin shape, using small triangles of pepperoni or olives for eyes and a jagged mouth plus a piece of green pepper or basil for the stem. For spider or monster pizzas, use whole or halved olives for bodies, thin olive strips for legs, and peppers, mushrooms, onions, tomatoes, and greens to create hair, eyes, and mouths.
- Return the tray to the oven and bake for 8–10 minutes, until the cheese is melted and bubbly and the crust edges are golden. Check at about 8 minutes so the designs stay visible and do not over-brown.
- Remove the pizzas from the oven and transfer them to a cooling rack or cutting board. Let cool for 3–5 minutes so the cheese sets and they are safe for small hands. Serve warm and let everyone choose their favorite spooky face.
Notes
Approximate per mini pizza (using an English muffin half, sauce, mozzarella, olives, and a few pepperoni slices): 160–190 calories; fat 7–9 g; saturated fat 3–4 g; carbohydrates 18–22 g; fiber 1–2 g; sugars 3–4 g; protein 7–9 g; sodium 380–480 mg. Values will vary based on crust type, toppings, cheese amount, and exact portion size.
Leave a Reply