
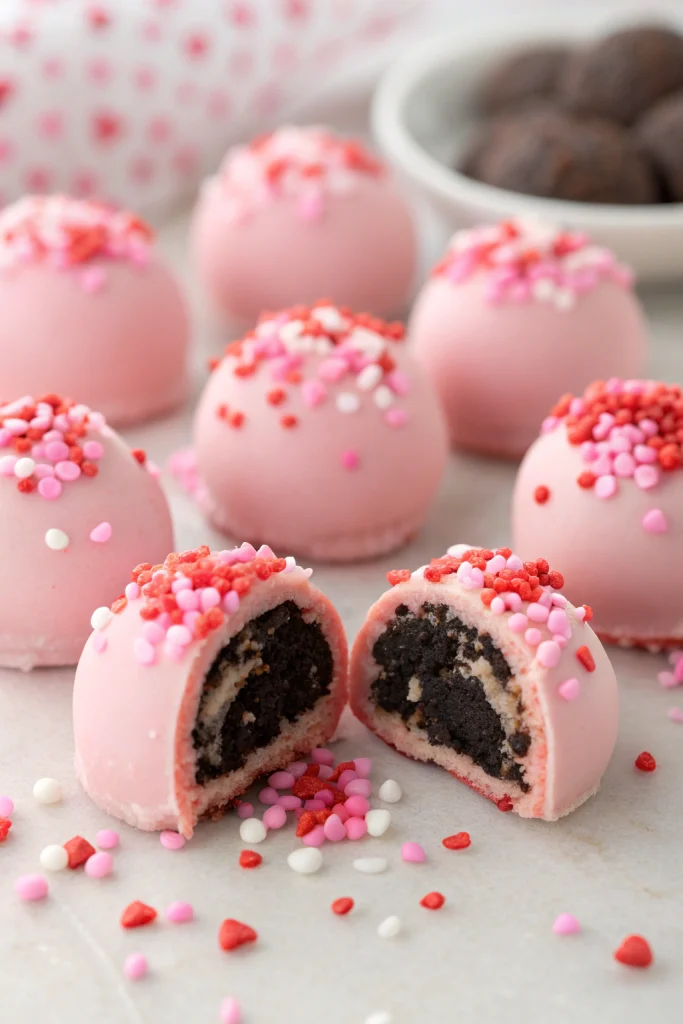
Oreo Truffle Balls with Pink Candy Coating taste like a mash-up of cookies-and-cream cheesecake and rich chocolate truffles, but in a bite-sized, party-ready package. They suit anyone who wants a no-bake dessert that looks fancy but takes about 30–40 minutes of hands-on time. I first made these for a last-minute baby shower, and they disappeared so fast my own kids thought I forgot to bring any home.
Why Oreo Truffle Balls with Pink Candy Coating Is Worth It
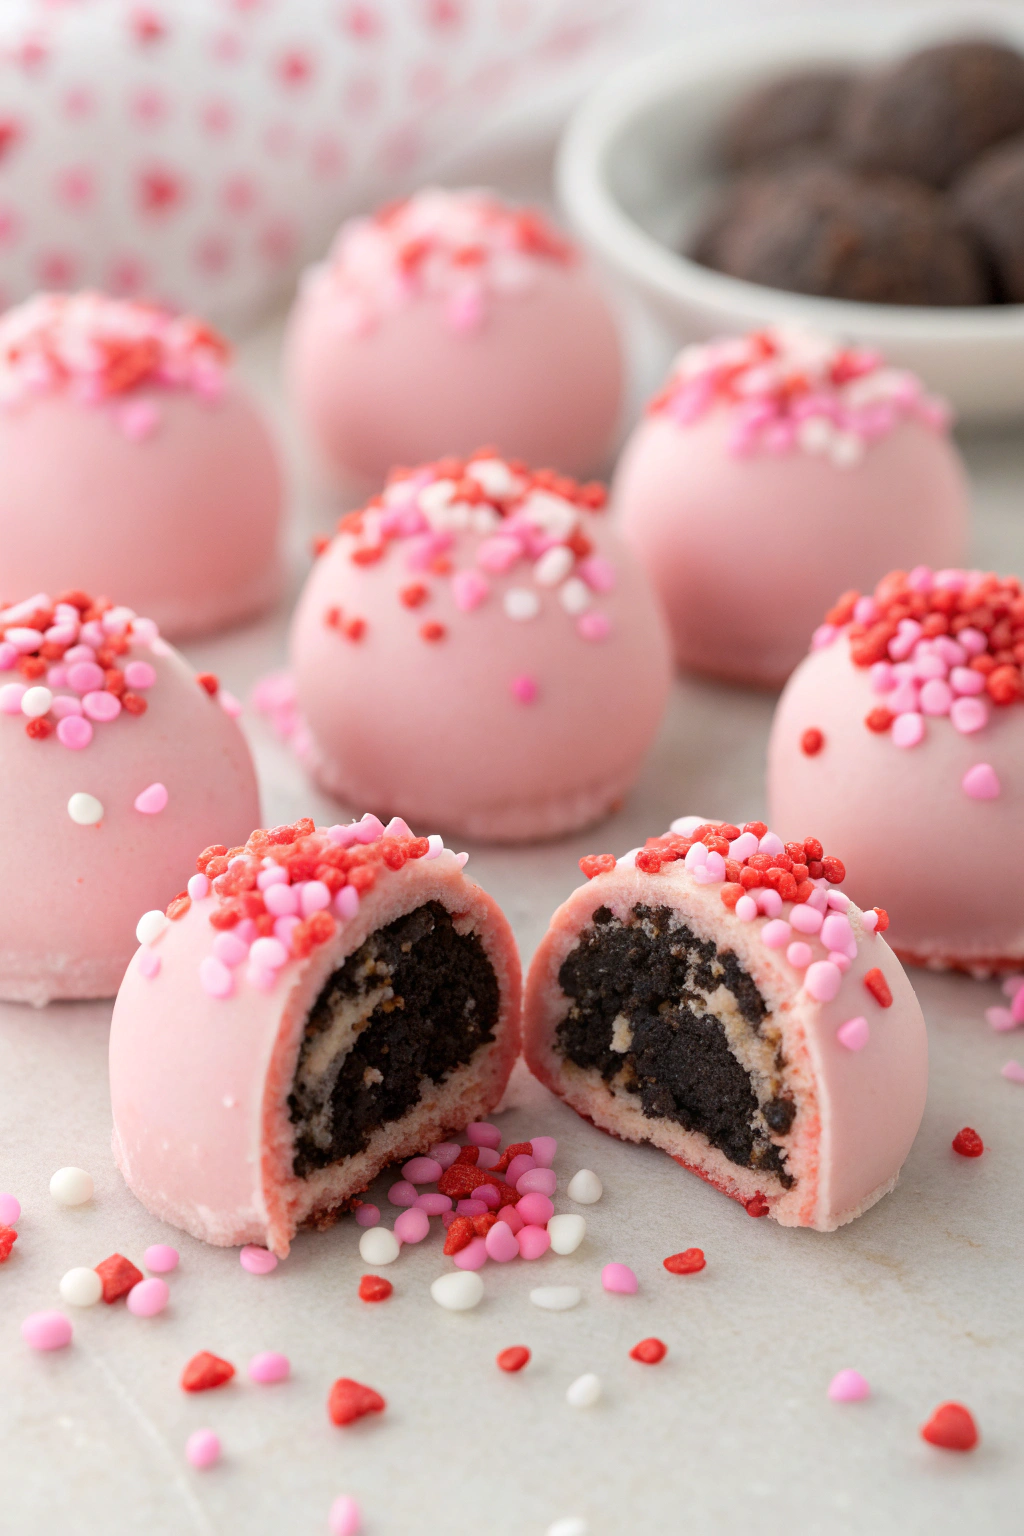
Oreo Truffle Balls with Pink Candy Coating hit that perfect sweet spot between nostalgic and classy. You crush a childhood favorite cookie, mix it with cream cheese, then cover it in a glossy pink shell that looks like it came from a boutique bakery.
You only need a handful of ingredients, no oven, and very little skill. The pink candy coating makes them ideal for baby showers, Valentine’s Day, birthdays, or any time you want a dessert table that looks like you actually planned ahead.
“These Oreo Truffle Balls with Pink Candy Coating vanished in minutes at my daughter’s party. Everyone asked which bakery made them, and they could not believe they came from my very average kitchen.”
Ingredients You Need
For the Oreo truffle centers:
- 36 Oreo cookies
- Classic chocolate Oreos work best. Use double-stuf only if you like a softer, sweeter center.
- 6–8 oz full-fat cream cheese, softened
- Use block-style cream cheese, not whipped. Start with 6 oz, then add more if the mixture feels too dry.
- 1 tsp vanilla extract
- Pinch of fine sea salt
- This small amount balances the sweetness and gives the truffles more depth.
For the pink candy coating:
- 16 oz pink candy melts or pink-colored vanilla candy coating
- Brands like Wilton or Ghirardelli melt smoothly and coat evenly.
- 1–2 tsp refined coconut oil or vegetable shortening
- This helps thin the candy coating so it covers the truffles without clumping.
- Optional: 2–3 drops oil-based candy coloring
- Use this if you want a deeper or custom shade of pink. Water-based color can cause the coating to seize.
Decorations (optional but fun):
- White sprinkles, nonpareils, or sanding sugar
- Crushed Oreo crumbs for garnish
- Mini heart sprinkles for Valentine’s Day or baby showers
Equipment:
- Food processor or a sturdy zip-top bag and rolling pin
- Mixing bowl and spatula
- Small cookie scoop or tablespoon measure
- Baking sheet
- Parchment paper or silicone baking mat
- Microwave-safe bowl or double boiler for melting candy
- Forks or dipping tools
- Cooling rack (optional, but handy)
Quick Tips & substitutions
- Use regular Oreos for the most balanced texture; flavored Oreos work, but some taste sweeter and need a pinch more salt.
- Chill the Oreo mixture until firm before rolling; soft mixture leads to lopsided truffle balls.
- If you lack a food processor, crush cookies in a zip-top bag with a rolling pin until very fine.
- If the mixture feels sticky, chill longer or add 1–2 crushed cookies.
- If the mixture feels dry and crumbly, add 1–2 teaspoons of softened cream cheese.
- Thin candy melts with a tiny amount of coconut oil or shortening until they flow like thick syrup.
- If candy coating thickens while you dip, rewarm it in short bursts and stir well.
- Use gluten-free chocolate sandwich cookies for a gluten-free version.
- Swap dairy cream cheese with a thick dairy-free cream cheese and vegan sandwich cookies for a dairy-free option.
- Store finished Oreo Truffle Balls with Pink Candy Coating in the fridge so the coating stays crisp and the centers stay fudgy.
How to Make Oreo Truffle Balls with Pink Candy Coating
Step 1: Crush the Oreos
Add the Oreo cookies to a food processor. Pulse until the cookies turn into fine, even crumbs with no big chunks. Set aside 1–2 tablespoons of crumbs if you want to sprinkle some on top later.
If you use a zip-top bag, press out the air, seal it, and crush the cookies with a rolling pin. Roll until you see only fine crumbs and no big pieces.
Step 2: Mix the truffle filling
Add the Oreo crumbs to a mixing bowl. Add softened cream cheese, vanilla, and a pinch of salt. Stir with a spatula or mix with clean hands until the mixture looks thick, glossy, and uniform.
Scoop up a bit and squeeze it in your hand. It should hold together like playdough, not crumble. Adjust with a touch more cream cheese or extra crumbs if needed.
Step 3: Chill and roll into balls
Line a baking sheet with parchment paper. Use a small cookie scoop or tablespoon to portion the mixture into even mounds on the sheet. Aim for 1–1.5 inch balls so they stay easy to dip and eat in one or two bites.
Roll each portion between your palms until smooth and round. Place the rolled truffle balls back on the lined sheet. Chill in the fridge for at least 30 minutes, or in the freezer for 15 minutes, until firm.
Step 4: Melt the pink candy coating
Add the pink candy melts to a microwave-safe bowl. Microwave in 20–30 second bursts, stirring after each burst, until mostly melted. Stir in 1–2 teaspoons of coconut oil or shortening until the coating turns smooth and pourable.
If you want a deeper pink color, stir in a drop or two of oil-based candy coloring. Mix well so the color looks even. Keep the bowl over a warm towel or near the stove to help maintain fluid texture while you dip.
Step 5: Dip the Oreo truffle balls
Work with a few chilled truffle balls at a time and keep the rest in the fridge. Drop one ball into the melted pink coating. Use a fork to gently roll it around until fully covered.
Lift the truffle with the fork and tap the fork on the edge of the bowl to shake off extra coating. Slide the coated truffle back onto the parchment-lined sheet using a toothpick or another fork. Repeat with the remaining truffle balls.
Step 6: Decorate while the coating sets
Sprinkle decorations over the truffles while the pink coating still feels wet and glossy. Add white sprinkles, crushed Oreo crumbs, or themed sprinkles for your event. Work in small batches so the coating does not set before you decorate.
If you want a drizzle effect, melt a small amount of white candy melts. Use a spoon or piping bag to drizzle thin lines over the set pink coating. This simple step makes them look bakery-level with almost no extra effort.
Step 7: Chill and serve
Place the finished Oreo Truffle Balls with Pink Candy Coating in the fridge until the coating hardens completely. This usually takes about 15–20 minutes. Once set, transfer them to a serving platter or airtight container.
Serve them chilled or slightly cool. The centers taste like creamy Oreo cheesecake, and the pink shell adds a sweet snap with every bite.
Recipe Variations
- Gluten-free: Use gluten-free chocolate sandwich cookies and confirm your candy melts list gluten-free on the label.
- Dairy-free / vegan: Use dairy-free cream cheese, vegan sandwich cookies, and dairy-free candy coating.
- Low sugar-ish: Use reduced-sugar sandwich cookies and a sugar-free candy coating, then add a bit more salt and vanilla for flavor.
- Flavor twist: Add 1/2 teaspoon almond extract, peppermint extract, or orange extract to the filling.
- Texture boost: Mix in 1–2 tablespoons mini chocolate chips or finely chopped nuts into the Oreo mixture.
- Color play: Use white candy melts and tint them different shades of pink for an ombré platter.
- Holiday themes: Add themed sprinkles for Valentine’s Day, baby showers, bridal showers, or birthdays.
Ways to Serve Oreo Truffle Balls with Pink Candy Coating
- Arrange them on a tiered dessert stand with fresh berries for contrast.
- Pack them in mini cupcake liners and box them as edible gifts.
- Add them to a dessert charcuterie board with fruit, pretzels, and other bite-sized treats.
- Use them as a fun topping for bowls of vanilla ice cream.
- Serve them at baby showers or gender reveals with a mix of pink and white truffle balls.
- Add them to lunchbox treats or after-school snack plates for special occasions.
Storage Success
Store Oreo Truffle Balls with Pink Candy Coating in an airtight container in the fridge. Separate layers with parchment paper so they do not stick or smudge each other. They keep well for about 5–7 days and still taste rich and creamy.
If you plan ahead, freeze the undipped truffle balls for up to 2 months, then thaw in the fridge before coating. Serve them chilled so the pink candy shell stays firm and the centers stay fudgy and smooth.
Oreo Truffle Balls with Pink Candy Coating
Ingredients
Instructions
- Line a baking sheet with parchment paper and set aside.
- Place the Oreo cookies in a food processor and pulse until they form fine crumbs.
- Add the softened cream cheese to the cookie crumbs and process or mix until a smooth, thick dough forms with no streaks of cream cheese.
- Scoop out about 1 tablespoon of the mixture at a time and roll into smooth balls. Place each ball on the prepared baking sheet.
- Chill the truffle balls in the refrigerator for at least 1 hour, or in the freezer for 20–30 minutes, until very firm.
- Near the end of chilling time, place the pink candy melts (or pink-tinted white chocolate) and shortening, if using, in a microwave-safe bowl. Heat in 20–30 second bursts, stirring between each, until melted and smooth.
- Using a fork or dipping tool, dip each chilled truffle ball into the melted pink candy coating, letting excess drip off. Return to the parchment-lined baking sheet.
- Immediately top with sprinkles or nonpareils before the coating sets, if using.
- Refrigerate until the candy coating is completely firm, about 15–20 minutes. Store the truffles in an airtight container in the refrigerator until ready to serve.
Notes
Approximate per 1 truffle (1 of 24): 140 calories; fat 9 g; saturated fat 5 g; carbohydrates 15 g; fiber 0 g; sugars 12 g; protein 2 g; sodium 85 mg. Values will vary based on exact brands, type of candy coating used, and portion size.
Leave a Reply