
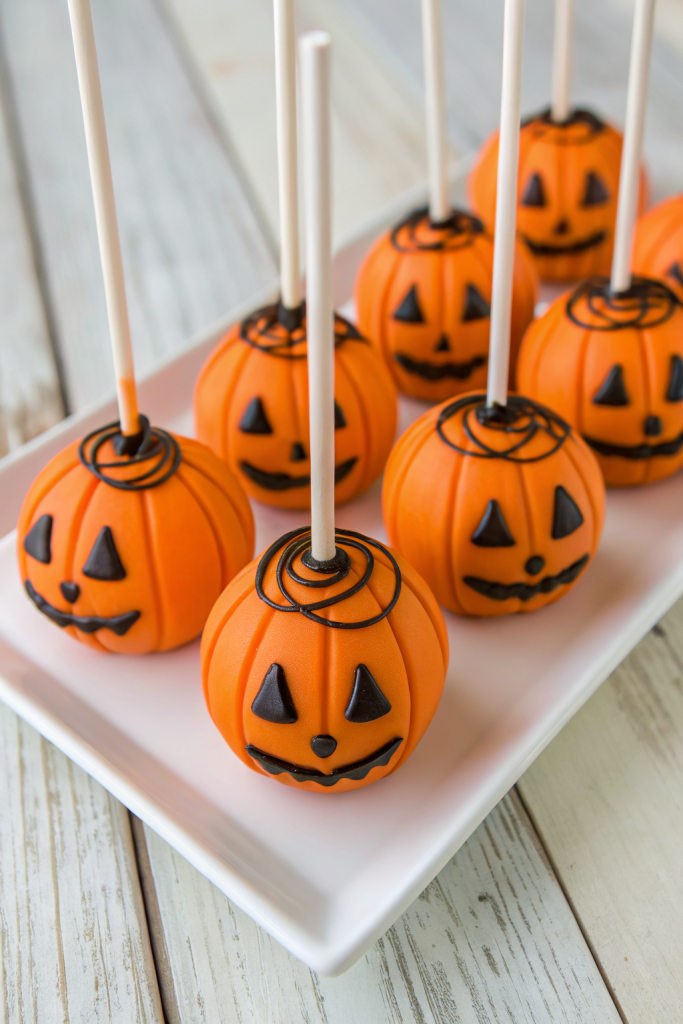
Pumpkin Marshmallow Lollipops Recipe tastes like a pumpkin pie latte met a campfire s'more and decided to become candy on a stick, and it works way better than it should. It fits busy parents, fall party hosts, and anyone who wants a no-bake pumpkin dessert in about 30 minutes. I tested these while my kids tried to steal them off the tray, so you know they passed the real-life snack test.
Why Make This Pumpkin Marshmallow Lollipops Recipe at Home
You control the sweetness, the pumpkin spice level, and the quality of chocolate, so these pumpkin marshmallow pops taste way better than store-bought candy. You also skip weird preservatives and use pantry ingredients you probably already own.
Kids love to help dip and decorate, and adults call them “fancy” even though they come together in under half an hour. They travel well to school parties, bake sales, and fall gatherings, and they do not crumble like cupcakes in the car.
“These pumpkin marshmallow lollipops taste like bite-size pumpkin pie truffles on a stick, and they disappear from the dessert table in minutes. ★★★★★”
Ingredients You Need
Main ingredients
-
Large marshmallows
Use the standard size, not mini and not jumbo. Jet-Puffed or store brand both work. -
Pumpkin puree
Use 100% pure pumpkin, not pumpkin pie filling. Libby’s gives consistent texture, but any thick puree works. -
Pumpkin pie spice
Use a store blend or mix your own with cinnamon, nutmeg, ginger, and cloves. Start small, then adjust to taste. -
Ground cinnamon
Boosts the pumpkin flavor and adds warmth. -
White chocolate chips or white candy melts
Candy melts coat more smoothly and set faster. White chocolate tastes richer but can seize if you overheat it. -
Orange candy melts or orange food coloring (oil-based)
Candy melts give the easiest pumpkin color. If you use white chocolate, tint it with oil-based color so it does not clump. -
Salted butter, melted
Adds flavor to the pumpkin coating and helps it cling to the marshmallows. -
Powdered sugar
Thickens the pumpkin mixture so it sticks and does not drip. -
Vanilla extract
Rounds out the flavor and makes the pumpkin taste more dessert-like.
For decorating
-
Dark or milk chocolate chips
Use them to pipe little pumpkin lines or faces. Any brand melts fine for this small amount. -
Sprinkles
Use fall colors, gold, or chocolate jimmies. Avoid large hard sprinkles on the dipping area so they do not fall off. -
Crushed graham crackers or gingersnaps (optional)
Add a pumpkin pie crust vibe. Pulse them into fine crumbs so they cling well.
Sticks and equipment
-
Lollipop sticks or paper straws
Lollipop sticks hold better, but cute paper straws look festive. If you use straws, push them in gently so they do not bend. -
Microwave-safe bowls
Use separate bowls for white chocolate and dark chocolate. Choose narrow, deep bowls for easier dipping. -
Parchment paper or silicone baking mat
Prevents sticking and keeps the bottoms smooth. -
Baking sheet or tray
Holds the pops while they set in the fridge. -
Toothpicks or a small piping bag
Helps you draw pumpkin lines or faces with melted chocolate. -
Small whisk and spatula
Whisk for the pumpkin mixture, spatula for scraping bowls clean.
Tips & Mistakes
- Use cold marshmallows so the pumpkin coating sets faster and does not slide.
- Dry the tops of the marshmallows if any condensation forms, or the coating will slip.
- Push the sticks in straight and about halfway so the pops do not wobble or crack.
- Mix the pumpkin puree with powdered sugar gradually so the mixture stays thick and spreadable, not runny.
- Heat chocolate in short bursts in the microwave and stir often so it does not scorch or seize.
- Thin thick chocolate with 1 teaspoon neutral oil at a time instead of more heat.
- Work in small batches so the chocolate stays fluid and the pumpkin coating does not dry out.
- Chill dipped pops on a flat tray so they keep their shape and do not slide.
- Avoid water near the chocolate, since even a drop can cause grainy texture.
- Use candy melts if you feel nervous about white chocolate, since they coat more easily and set more predictably.
How to Make Pumpkin Marshmallow Lollipops Recipe
Step 1: Prep the marshmallows and sticks
Line a baking sheet with parchment or a silicone mat. Open the bag of large marshmallows and set them in a single layer.
Insert a lollipop stick or paper straw into the center of each marshmallow, about halfway through.
Set the tray aside while you mix the pumpkin coating.
Step 2: Mix the pumpkin coating
In a small bowl, whisk together 3 tablespoons pumpkin puree, 1 tablespoon melted butter, 1 teaspoon vanilla, 1 teaspoon pumpkin pie spice, 1/4 teaspoon cinnamon, and a small pinch of salt.
Add 1/2 cup powdered sugar, a few tablespoons at a time, whisking until smooth and thick.
You want a texture like soft frosting that clings to a spoon and does not run.
If it looks too thin, add more powdered sugar by the tablespoon; if it looks too thick, add a tiny splash of milk.
Step 3: Coat the marshmallows in pumpkin
Hold a marshmallow by the stick and use a small spatula or spoon to spread the pumpkin mixture over the sides and top.
Leave a small ring of plain marshmallow at the very bottom so it does not stick to the parchment.
Set each coated marshmallow back on the tray.
Chill the tray in the fridge for 10 to 15 minutes so the pumpkin layer firms up.
Step 4: Melt the white or orange coating
Place 2 cups white chocolate chips or orange candy melts in a microwave-safe bowl.
Microwave for 20 to 30 seconds at a time, stirring between each burst, until smooth and fluid.
If the chocolate looks thick, stir in 1 to 2 teaspoons neutral oil until it flows like warm syrup.
Keep the bowl over a mug of hot water if your kitchen runs cool so the coating stays melted.
Step 5: Dip the pumpkin marshmallows
Take the chilled tray from the fridge.
Hold one marshmallow by the stick and dip it into the melted coating, tilting the bowl so you cover the pumpkin layer completely.
Lift it out and gently tap the stick on the edge of the bowl so excess coating drips off and the surface smooths out.
Set the dipped pop back on the parchment, or stand it upright in a foam block if you want a perfectly round shape.
Step 6: Decorate the lollipops
While the coating still feels tacky, sprinkle on fall sprinkles or crumbled graham crackers.
If you want pumpkin lines, melt 1/4 cup dark or milk chocolate chips in a small bowl.
Transfer the melted chocolate to a piping bag or a zip-top bag with a tiny corner snipped off.
Pipe vertical lines from top to bottom to mimic pumpkin ridges, or add little jack-o-lantern faces.
Step 7: Chill and set
Place the finished lollipops back on the tray and move the tray to the fridge.
Chill for 15 to 20 minutes until the chocolate coating feels firm and dry to the touch.
Once set, gently peel each lollipop off the parchment.
Arrange them upright in a jar or lay them in a single layer on a clean tray.
Variations I've Tried
- Salted caramel pumpkin pops: Drizzle warm salted caramel over the set pops and sprinkle a tiny pinch of flaky salt on top. The sweet-salty combo tastes like a fancy candy shop treat.
- Gingersnap crunch pops: Roll the freshly dipped pops in finely crushed gingersnaps. The spicy crunch pairs perfectly with the pumpkin marshmallow center.
- Chocolate pumpkin pops: Add 1 tablespoon cocoa powder to the pumpkin mixture and use dark chocolate for dipping. These taste richer and slightly less sweet.
- Mini pumpkin marshmallow bites: Use mini marshmallows on toothpicks, dip them halfway, and serve them as bite-size treats for younger kids or snack boards.
How to Serve Pumpkin Marshmallow Lollipops Recipe
Serve these pumpkin marshmallow lollipops on a fall dessert board with sliced apples, caramel dip, and chocolate-covered pretzels. Stand them in a mason jar filled with sugar or rice so they stay upright and look like a pumpkin bouquet. Pack them in treat bags with a little ribbon for classroom parties or Halloween handouts. Pair them with hot chocolate, warm apple cider, or a pumpkin spice latte for a cozy snack break.
How to store
- Room temperature: Keep the lollipops in an airtight container at cool room temperature for up to 2 days, away from direct sunlight or heat.
- Fridge: Store in a single layer in a sealed container for 4 to 5 days; let them sit at room temperature for 10 minutes before serving so the marshmallow softens.
- Freezer: Freeze on a tray until solid, then move to a freezer bag or container and keep up to 1 month; thaw in the fridge overnight so condensation does not ruin the coating.
- Reheating / refreshing: Do not actually reheat them, but if the coating looks dull, let the lollipops sit at room temperature for 15 minutes so the chocolate softens slightly and tastes smoother again.
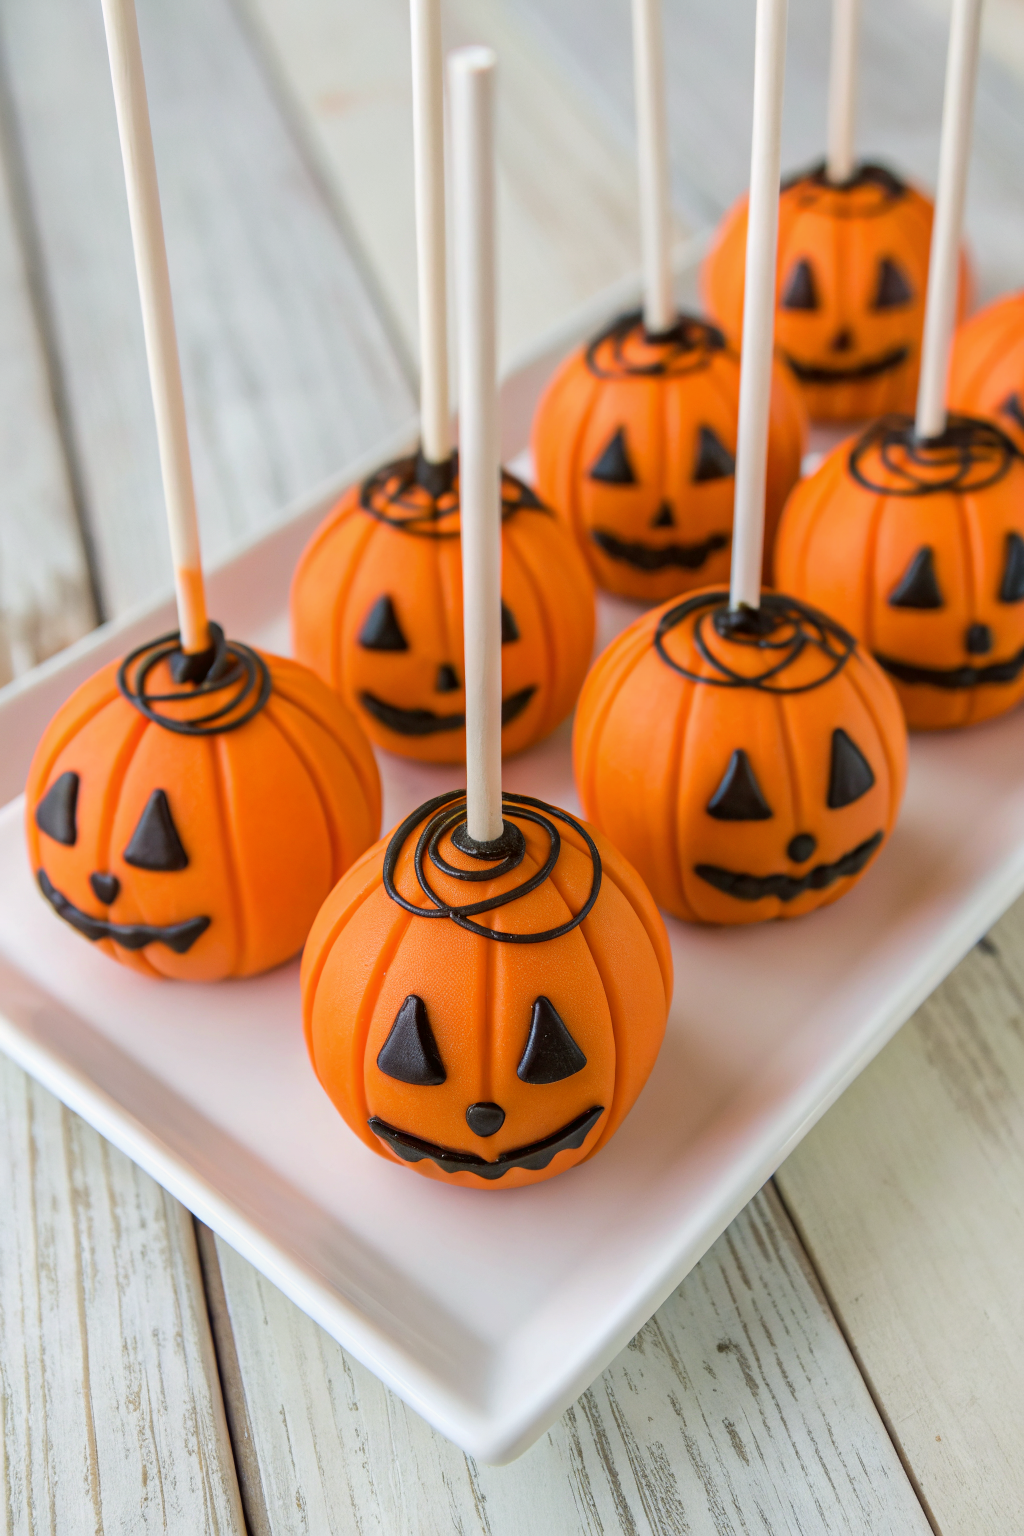
Pumpkin Marshmallow Lollipops Recipe
Ingredients
Instructions
- Line a baking sheet with parchment paper or a silicone baking mat. Arrange the large marshmallows in a single layer.
- Insert a lollipop stick or paper straw into the center of each marshmallow, pushing it about halfway through. Set the tray aside.
- In a small bowl, whisk together the pumpkin puree, melted butter, vanilla extract, pumpkin pie spice, ground cinnamon, and a pinch of salt until smooth.
- Whisk in the powdered sugar a few tablespoons at a time until the mixture is thick and spreadable, like soft frosting. If it is too thin, add a bit more powdered sugar; if it is too thick, add a tiny splash of milk.
- Hold a marshmallow by the stick and use a small spatula or spoon to spread the pumpkin mixture over the sides and top of the marshmallow.
- Leave a small ring of plain marshmallow at the very bottom so it does not stick to the parchment. Place the coated marshmallow back on the tray and repeat with the remaining marshmallows.
- Chill the tray in the refrigerator for 10–15 minutes so the pumpkin layer firms up.
- Place the white chocolate chips or orange candy melts in a microwave-safe bowl.
- Microwave in 20–30 second bursts, stirring after each, until completely melted and smooth. If the coating seems thick, stir in 1–2 teaspoons of neutral oil until it flows like warm syrup.
- Remove the chilled tray from the refrigerator. Holding a marshmallow by the stick, dip it into the melted coating, tilting the bowl as needed to fully cover the pumpkin layer.
- Lift the pop out and gently tap the stick against the side of the bowl so excess coating drips off and the surface smooths. Set the dipped pop back on the parchment or stand it upright in a foam block. Repeat with all marshmallows.
- While the coating is still tacky, add fall sprinkles or roll the pops lightly in crushed graham crackers or gingersnaps, if using.
- For pumpkin lines or faces, melt the dark or milk chocolate chips in a small microwave-safe bowl in short bursts, stirring until smooth.
- Transfer the melted chocolate to a small piping bag or zip-top bag with a tiny corner snipped off. Pipe vertical lines down the sides for pumpkin ridges or add simple jack-o-lantern faces.
- Place the decorated lollipops back on the tray and refrigerate for 15–20 minutes, or until the chocolate coating is firm and dry to the touch.
- Gently peel each lollipop off the parchment. Serve standing upright in a jar or arranged in a single layer on a tray.
Notes
Approximate per 1 lollipop (1 of 24): 130 calories; fat 6 g; saturated fat 4 g; carbohydrates 20 g; fiber 0 g; sugars 18 g; protein 1 g; sodium 25 mg. Values will vary based on chocolate type, candy melts, decorations, and portion size.
Leave a Reply