
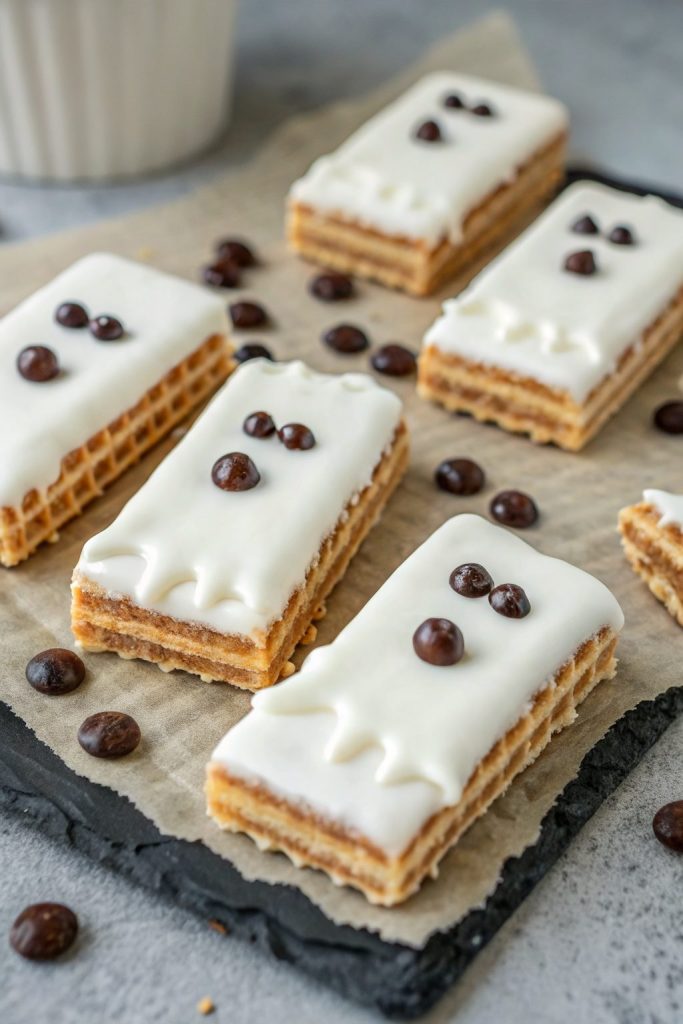
Chocolate Dipped Ghost Wafer Cookies Recipe tastes like a crunchy vanilla cookie hugged by creamy white chocolate with just enough spooky charm to make kids giggle and adults snack “for quality control.” This recipe works perfectly for busy parents, Halloween party hosts, or anyone who wants a cute dessert in about 30 minutes from start to finish. I tested these while my own kids circled the kitchen like tiny sharks, so you know they pass the real-life chaos test.
Why Choose This Chocolate Dipped Ghost Wafer Cookies Recipe
This Chocolate Dipped Ghost Wafer Cookies Recipe uses simple store-bought wafer cookies, so you skip mixing dough and chilling time. You just dip, decorate, and chill, which makes this a low-stress Halloween dessert that still looks like you spent all afternoon on it.
Kids can help with almost every step, from dipping to adding the little ghost faces. Cleanup stays easy, the ingredient list stays short, and the results look adorable on any Halloween dessert table.
“These Chocolate Dipped Ghost Wafer Cookies disappeared from the party platter in minutes and everyone asked for the recipe ★★★★★”
Ingredients You’ll Need
Main ingredients
- 1 package vanilla wafer cookies
- Any brand works; I like Keebler or store-brand wafers because they hold their shape.
- 12 ounces white chocolate chips or white candy melts
- Candy melts set a bit firmer and usually give a smoother finish.
- 1 tablespoon refined coconut oil or vegetable shortening
- This helps the coating turn glossy and smooth.
- Mini chocolate chips
- Use these for the ghost eyes and mouths.
- Optional: black gel icing
- Great backup if you run out of mini chips or want more expressive faces.
Flavor twists and substitutions
- Swap vanilla wafers with chocolate wafers for “nighttime” ghosts.
- Use gluten free wafer cookies if you need a gluten free Halloween dessert.
- Add 1 teaspoon vanilla extract or almond extract to the melted white chocolate for extra flavor.
- Sprinkle a tiny pinch of flaky sea salt on a few ghosts for a sweet-salty bite.
Pantry shortcuts
- Use pre-made white candy coating bark if you keep it in your pantry.
- Use pre-made candy eyes instead of mini chocolate chips for an even faster decorating step.
- Use parchment sheets or silicone baking mats so you skip scraping stuck chocolate off trays.
Equipment list
- Baking sheet or large tray
- Parchment paper or silicone baking mat
- Microwave safe bowl or heatproof bowl for double boiler
- Spoon or small silicone spatula
- Fork or dipping tool
- Toothpicks for fixing faces or popping air bubbles
- Cooling rack (optional, but handy if your kitchen runs warm)
Tips & Tricks
- Dry your wafer cookies completely before dipping so the chocolate coating sticks well.
- Melt the white chocolate in short bursts in the microwave, about 20 seconds at a time, and stir often to avoid scorching.
- Add coconut oil or shortening a little at a time until the coating flows like thick syrup.
- Work with small batches of wafers so the chocolate stays warm and smooth.
- Hold each wafer over the bowl and tap your wrist lightly so extra chocolate drips off and the coating looks neat.
- Lay the dipped cookies on parchment, not directly on a plate, so they release cleanly after they set.
- Add the chocolate chip eyes and mouths while the coating still feels wet so they stick firmly.
- Chill the tray briefly in the fridge if your kitchen feels warm, but do not leave them there for hours or condensation may form later.
- Use a toothpick to nudge chocolate chips into place or fix any smudged faces.
- Store the finished cookies in a cool, dry spot so the white chocolate stays bright and smooth.
How to Make Chocolate Dipped Ghost Wafer Cookies Recipe
Step 1: Prep the tray and ingredients
Line a baking sheet with parchment paper or a silicone baking mat.
Open the wafer cookies and set them in a single layer so you can grab them quickly.
Pour the mini chocolate chips into a small bowl so you can reach them easily while you decorate.
Step 2: Melt the white chocolate
Add the white chocolate chips and coconut oil or shortening to a microwave safe bowl.
Microwave on 50 percent power for 20 seconds, then stir well.
Repeat in 15 to 20 second bursts, stirring between each round, until the mixture turns smooth and glossy.
If the chocolate still feels too thick, stir in a tiny bit more coconut oil until it coats a spoon easily.
Step 3: Dip the wafer cookies
Hold one wafer cookie at a time and dip it into the melted white chocolate.
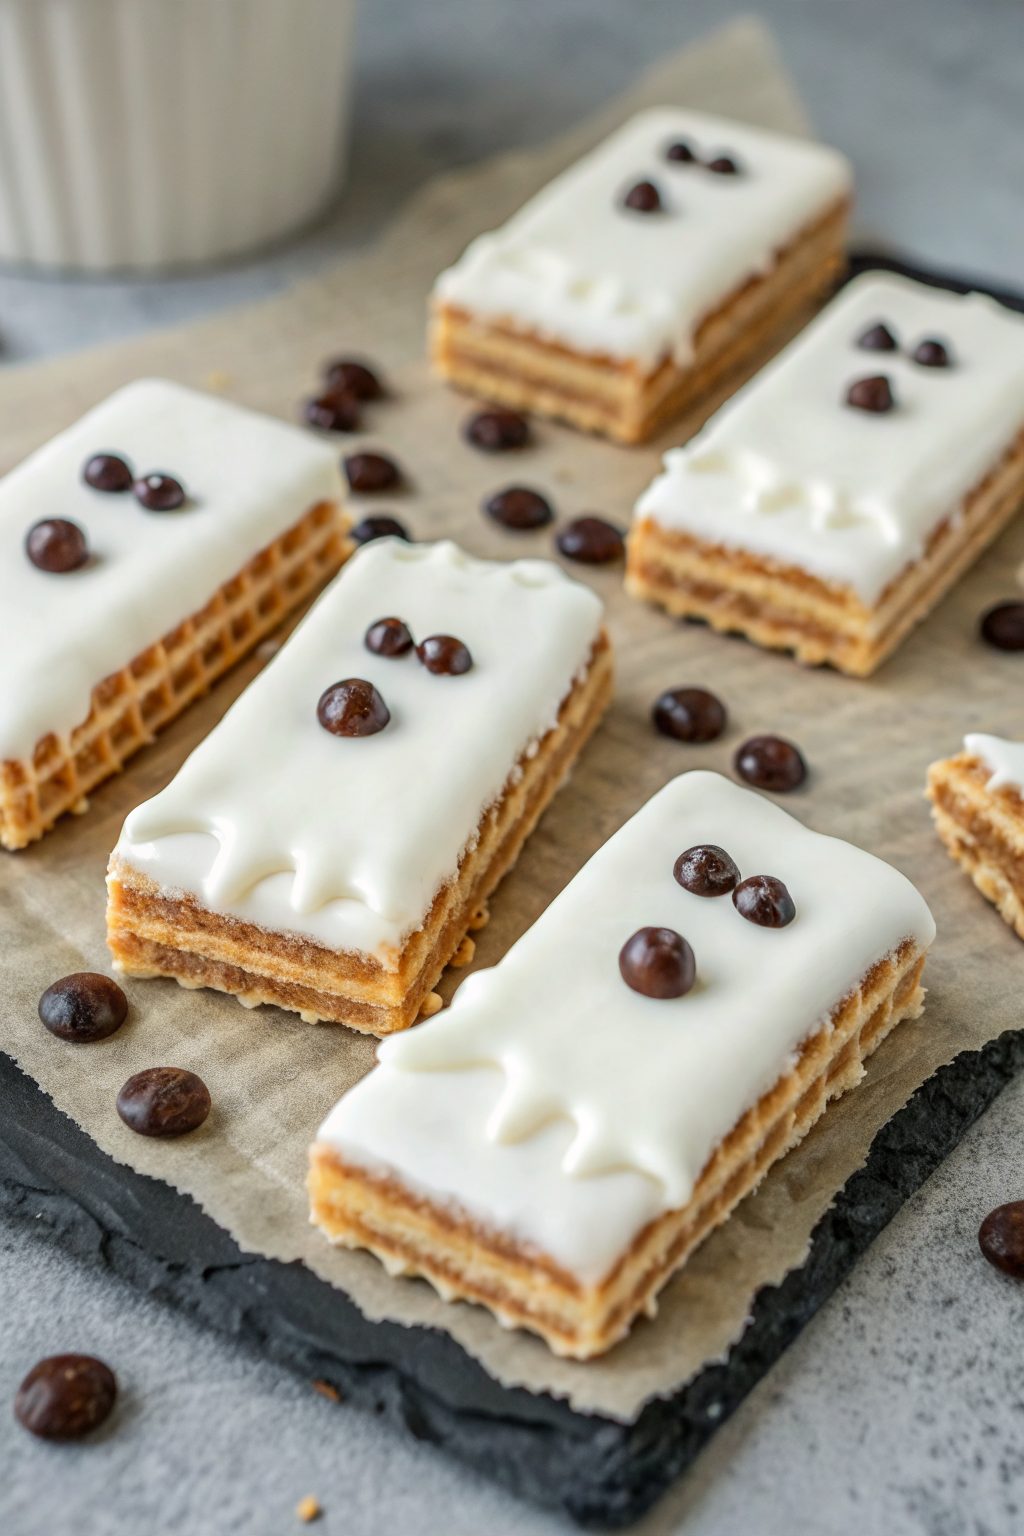
Cover at least two thirds of the cookie so it looks like a little ghost body with a plain cookie “tail.”
Lift the cookie out with a fork, then tap the fork gently on the edge of the bowl so extra chocolate drips off.
Slide the dipped cookie onto the prepared baking sheet and repeat with the remaining wafers.
Step 4: Add the ghost faces
While the coating still feels wet, press two mini chocolate chips near the top of each dipped wafer for eyes.
Add one more mini chip below the eyes for a round “O” mouth or tilt it sideways for a little smirk.
If you use candy eyes, press them gently into the soft coating, then draw a tiny mouth with black gel icing.
Work in small batches so the coating does not set before you finish the faces.
Step 5: Let the ghosts set
Place the baking sheet in the fridge for about 10 to 15 minutes so the coating firms up.
Check one cookie by touching the side lightly; the chocolate should feel firm and not tacky.
Once the ghosts set, transfer them carefully to a serving plate or airtight container.
Keep them in a cool spot until party time so the white chocolate stays neat.
Step 6: Optional decorating extras
Drizzle a little leftover melted white chocolate over the set ghosts for a “sheet” effect.
Add a tiny sprinkle of black or orange sanding sugar at the bottom of the ghost bodies for a festive touch.
Use colored gel icing to give a few ghosts eyebrows or surprised expressions.
Let any extra decorations dry fully before stacking the cookies.
What to Serve with Chocolate Dipped Ghost Wafer Cookies Recipe
Serve these Chocolate Dipped Ghost Wafer Cookies with cold milk, hot cocoa, or a simple vanilla milkshake for a kid friendly Halloween treat. They also pair nicely with a platter of fresh fruit like strawberries, apple slices, and grapes so the snack table has some balance. Add a bowl of popcorn or kettle corn for a sweet and salty mix that everyone can grab. If you host a party, set the ghost cookies on a tiered stand with other bite sized treats so they stand out as the cute centerpiece.
Storage Options
- Store the cookies in an airtight container at room temperature for 3 to 4 days in a cool, dry spot.
- If your kitchen runs warm, keep them in the fridge for up to 1 week and let them sit at room temperature for 10 minutes before serving.
- Freeze the cookies in a single layer on a tray, then move them to a freezer bag or container and keep them up to 2 months.
- Thaw frozen cookies in the fridge, then bring them to room temperature before serving so the coating stays smooth and avoids condensation.
Chocolate Dipped Ghost Wafer Cookies Recipe
Ingredients
Instructions
- Line a baking sheet with parchment paper or a silicone baking mat. Open the vanilla wafer cookies and arrange them in a single layer so they are easy to grab. Pour the mini chocolate chips into a small bowl for easy access.
- Place the white chocolate chips or candy melts and the coconut oil or shortening in a microwave-safe bowl. Microwave on 50 percent power for 20 seconds, then stir well. Continue microwaving in 15 to 20 second bursts, stirring between each, until the mixture is smooth and glossy. If the coating is too thick, stir in a small amount of additional coconut oil until it flows like thick syrup.
- Hold one wafer cookie at a time and dip it into the melted white chocolate, covering at least two thirds of the cookie so it resembles a ghost body with a plain cookie tail. Lift the cookie out with a fork and gently tap the fork on the edge of the bowl to let excess coating drip off. Slide the dipped cookie onto the prepared baking sheet and repeat with the remaining wafers, working in small batches so the coating stays warm and smooth.
- While the coating is still wet, press two mini chocolate chips near the top of each dipped wafer to form eyes. Add one more mini chocolate chip below the eyes for an open mouth, or angle it slightly for a smirk. If using candy eyes and black gel icing, press the eyes into the soft coating and pipe a small mouth with the gel. Use a toothpick to nudge any chips or decorations into place.
- Place the baking sheet in the refrigerator for 10 to 15 minutes, or until the coating is firm and no longer tacky to the touch. Once set, carefully transfer the ghost cookies to a serving plate or an airtight container and keep them in a cool, dry spot until serving.
- If desired, drizzle leftover melted white chocolate over the set cookies for a layered ghost-sheet effect, or add a light sprinkle of black or orange sanding sugar near the bottom of the ghosts. Allow any extra decorations to dry completely before stacking or storing the cookies.
Notes
Approximate per 1 cookie (assuming about 24 cookies): 120 calories; fat 6 g; saturated fat 4 g; carbohydrates 16 g; fiber 0 g; sugars 12 g; protein 1 g; sodium 60 mg. Values will vary based on brands, exact cookie size, and decorations used.
Leave a Reply