
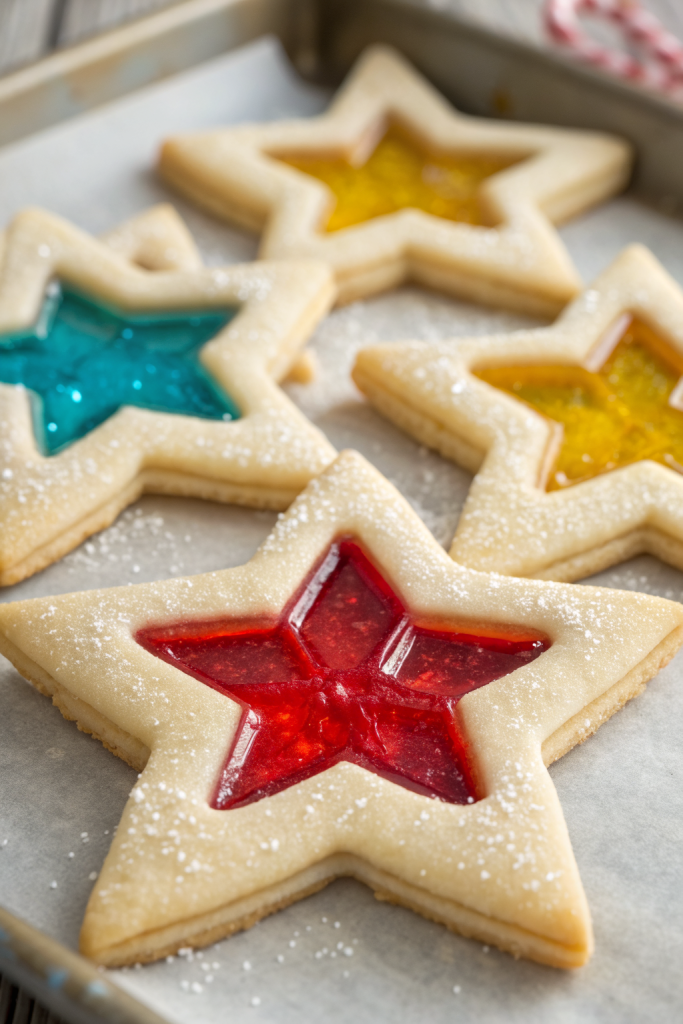
Easy Stained Glass Cookies Recipe tastes like buttery sugar cookies with a fruity candy crunch, and it works perfectly for holidays, bake sales, or baking with kids in about 1 hour total. This recipe suits beginners and busy bakers who want something that looks impressive without fancy tools or pastry school skills. I still remember the first time my nephew saw these in the oven and yelled, “The cookies have windows!” and I knew they would stay in my holiday rotation forever.
Why Make This Easy Stained Glass Cookies Recipe at Home
You get bakery-level, colorful cookies with simple pantry ingredients and a bag of hard candy. The dough rolls easily, holds its shape, and the candy centers melt into shiny “glass” that kids and adults love.
You control the flavors, colors, and sweetness, so the cookies never taste artificial or overly sugary. You also avoid mystery ingredients and decorate cookies and tree ornaments in one fun baking session.
“These stained glass cookies looked like I bought them from a fancy bakery, but my kids and I made them in one afternoon and ate almost the whole batch. ★★★★★”
Ingredients You Need
Here is everything you need for this Easy Stained Glass Cookies Recipe. I include notes on brands, swaps, and shortcuts so you can use what you already have.
Cookie dough ingredients
-
All-purpose flour: 2 ¾ cups
- Use a standard American all-purpose flour like King Arthur or Gold Medal.
- Spoon and level the flour so the dough stays tender and not dry.
-
Baking powder: 1 teaspoon
- Gives a slight lift so the cookies stay light, not dense.
-
Fine sea salt: ½ teaspoon
- Balances the sweetness from both dough and candy.
- Table salt works in a pinch; use a tiny bit less.
-
Unsalted butter, softened: 1 cup (2 sticks)
- Use real butter, not margarine, for the best flavor.
- If you only have salted butter, reduce added salt to a pinch.
-
Granulated sugar: 1 cup
- White sugar keeps the dough pale so the stained glass centers stand out.
-
Large eggs: 2, at room temperature
- Room temperature eggs mix more easily and keep the dough smooth.
-
Pure vanilla extract: 2 teaspoons
- I like Nielsen-Massey or Costco vanilla, but any pure vanilla works.
- Avoid imitation vanilla if possible, since the flavor stands front and center.
-
Almond extract (optional): ¼ teaspoon
- Adds a bakery-style flavor that pairs nicely with fruity candy.
- Skip it if you bake for anyone with nut allergies.
Candy “glass” centers
- Assorted clear hard candies: about 25 to 30 pieces
- Jolly Ranchers, Life Savers, or any clear fruit hard candy work well.
- Use separate bowls for each color so the centers stay bright and not muddy.
- Avoid chewy candies or filled candies since they do not melt cleanly.
Pantry shortcuts and substitutions
- Use pre-crushed hard candy if you find it in baking aisles to save time.
- Swap half the vanilla with lemon extract for a citrus twist that matches lemon candies.
- Use store-bought sugar cookie dough in a pinch, but chill it very well so it holds cut-out shapes.
Equipment list
You do not need special tools, just a few basics.
- Rolling pin
- Mixing bowls and hand mixer or stand mixer
- Measuring cups and spoons
- Baking sheets
- Parchment paper or silicone baking mats
- Cooling racks
- Cookie cutters:
- Larger shapes like stars, trees, hearts, or circles
- Smaller cutters to punch out the “window” centers
- Small zip-top bags or a sturdy plastic bag and a rolling pin to crush candy
- Toothpick or skewer if you want to poke holes for hanging ornaments
Tips & Mistakes
- Chill the dough at least 1 hour so the cookies keep crisp edges and do not spread.
- Roll the dough to about ¼ inch thickness so it stays sturdy but still bakes through before the candy overcooks.
- Line baking sheets with parchment so the melted candy releases easily and does not glue itself to the pan.
- Crush candy into small pieces, about pea size, so it melts evenly without burning.
- Fill the cut-out centers only about three-quarters full so the candy does not overflow onto the cookie.
- Keep candy colors separate if you want clear, bright “glass” and mix colors only when you want a marbled look.
- Bake one test cookie tray first so you can adjust baking time for your oven.
- Let cookies cool completely on the parchment before you move them so the candy centers set and do not crack.
- Store candy in a dry place before baking since sticky or humid candy clumps and melts unevenly.
- Avoid very tiny cookie cutters for the outer shape since they break more easily around the candy center.
How to Make Easy Stained Glass Cookies Recipe
Step 1: Mix the dry ingredients
Add flour, baking powder, and salt to a medium bowl. Whisk until everything looks evenly combined and no streaks of baking powder remain. Set the bowl aside.
Step 2: Cream butter and sugar
Place softened butter and granulated sugar in a large mixing bowl. Beat with a hand mixer or stand mixer on medium speed for about 2 to 3 minutes until the mixture looks light and fluffy. Scrape down the sides of the bowl so everything mixes evenly.
Step 3: Add eggs and flavorings
Crack in the eggs one at a time, mixing well after each addition. Add vanilla extract and almond extract if you use it, then mix again until the mixture looks smooth and creamy. Scrape the bowl again so no butter lumps hide at the bottom.
Step 4: Combine wet and dry ingredients
Add the dry ingredients to the butter mixture in two additions. Mix on low speed just until the flour disappears and the dough comes together. Stop mixing as soon as the dough looks uniform so the cookies stay tender.
Step 5: Chill the dough
Divide the dough into two equal portions and flatten each into a disk. Wrap each disk tightly in plastic wrap. Chill the dough in the refrigerator for at least 1 hour or up to 2 days.
Step 6: Crush the candy
Unwrap the hard candies and separate them by color into small zip-top bags. Seal each bag and crush the candies with a rolling pin or the bottom of a heavy pan until you see small pieces. Set the crushed candy aside in bowls so you can grab pinches easily while you work.
Step 7: Preheat the oven and prep pans
Heat your oven to 350°F (175°C). Line baking sheets with parchment paper or silicone baking mats. Keep one baking sheet in the fridge while you roll the first batch so the cookies stay cold.
Step 8: Roll out the dough
Lightly flour your work surface and rolling pin. Roll one dough disk to about ¼ inch thickness. If the dough sticks, sprinkle a tiny bit more flour or roll between two sheets of parchment.
Step 9: Cut cookie shapes and centers
Use larger cookie cutters to cut shapes from the rolled dough and place them on the lined baking sheet. Use a smaller cutter to punch out the center of each cookie to create the “window” space. If you want to hang the cookies, use a skewer or straw to poke a small hole near the top for ribbon.
Step 10: Fill centers with candy
Spoon crushed candy into the center cut-outs, filling each space about three-quarters full. Keep the candy level with the dough surface, not mounded too high. Use one color per cookie or mix colors for a marbled stained glass effect.
Step 11: Bake the cookies
Place the baking sheet in the oven and bake for 8 to 11 minutes. The cookie edges should look set and very lightly golden while the candy centers look melted and glossy. Pull the tray out as soon as the candy melts fully so it stays clear and does not darken.
Step 12: Cool and set
Leave the cookies on the baking sheet until the candy centers cool and harden completely, about 10 to 15 minutes. Slide the parchment with cookies onto a cooling rack to finish cooling. Once fully cool, gently peel cookies off the parchment and thread ribbon through any ornament holes.
Variations I've Tried
I swap vanilla with half lemon extract and use yellow and green candies for a bright citrus version that tastes fresh and zesty. I also add ½ teaspoon ground cinnamon and a pinch of nutmeg to the dough for a cozy holiday batch with red and green candy centers.
Sometimes I use heart cutters and pink candies for Valentine’s Day and add a tiny drizzle of white chocolate around the edges. I also tried a “galaxy” version with dark blue and purple candies and a sprinkle of edible glitter on the cookie edges for a fun space-themed party.
How to Serve Easy Stained Glass Cookies Recipe
Serve these Easy Stained Glass Cookies on a big platter so the colors catch the light and steal the show on any dessert table. Pair them with cold milk, hot cocoa, or a simple mug of tea or coffee for adults. Kids love to hold them up to the light before they eat them, so expect a lot of cookie selfies. They also work as edible ornaments, gift box toppers, or party favors in clear treat bags.
How to store
- Room temperature: Store cookies in an airtight container at room temperature for up to 5 days. Place parchment between layers so the candy centers do not stick together.
- Refrigerator: You can chill the baked cookies for up to 1 week, but let them come back to room temperature before serving so the texture softens slightly.
- Freezer (baked cookies): Freeze in a single layer, then transfer to a container or freezer bag for up to 2 months, with parchment between layers. Thaw at room temperature in the closed container so condensation does not form on the candy.
- Freezer (cookie dough): Freeze the dough disks tightly wrapped for up to 2 months. Thaw in the fridge overnight, then roll, cut, and bake as usual.
- Reheating: If the cookies feel a bit stale, warm them on a parchment-lined baking sheet in a 275°F oven for 3 to 4 minutes, then cool again so the candy centers reset.
Easy Stained Glass Cookies Recipe
Ingredients
Instructions
- In a medium bowl, whisk together the all-purpose flour, baking powder, and fine sea salt until well combined. Set aside.
- In a large mixing bowl, beat the softened butter and granulated sugar with a hand mixer or stand mixer on medium speed for 2 to 3 minutes, until light and fluffy. Scrape down the sides of the bowl.
- Add the eggs one at a time, mixing well after each addition. Mix in the vanilla extract and almond extract (if using) until the mixture is smooth and creamy, scraping the bowl as needed.
- Add the dry ingredients to the butter mixture in two additions, mixing on low speed just until the flour disappears and a soft dough forms. Do not overmix.
- Divide the dough into two equal portions, flatten each into a disk, wrap tightly in plastic wrap, and chill in the refrigerator for at least 1 hour or up to 2 days.
- Unwrap the hard candies and separate them by color into small zip-top bags. Seal the bags and crush the candies with a rolling pin or the bottom of a heavy pan until you have small, pea-size pieces. Transfer to small bowls and set aside.
- Preheat the oven to 350°F (175°C). Line baking sheets with parchment paper or silicone baking mats.
- Lightly flour your work surface and rolling pin. Working with one dough disk at a time, roll the dough to about 1/4 inch thickness. Add a little more flour if the dough sticks, or roll between sheets of parchment if needed.
- Use larger cookie cutters to cut shapes from the dough and transfer them to the prepared baking sheets. Use a smaller cutter to punch out the center of each cookie to create a window. If you want to hang the cookies, use a skewer or straw to poke a small hole near the top of each cookie.
- Spoon crushed candy into each cut-out center, filling the space about three-quarters full and keeping the candy level with the dough surface. Use one color per cookie or mix colors for a marbled stained glass effect.
- Bake the cookies for 8 to 11 minutes, until the cookie edges look set and very lightly golden and the candy centers are fully melted and glossy. Do not overbake or the candy may darken.
- Let the cookies cool completely on the baking sheet until the candy centers are firm, about 10 to 15 minutes. Then slide the parchment onto a cooling rack to finish cooling. Once fully cool, gently peel the cookies from the parchment and, if desired, thread ribbon through the holes to use as ornaments.
Notes
Approximate per cookie (1 of about 30): 130 calories; fat 6 g; saturated fat 3.5 g; carbohydrates 18 g; fiber 0 g; sugars 11 g; protein 2 g; sodium 70 mg. Values are estimates and will vary based on exact candy type, cookie size, and brands used. Storage
Store at room temperature in an airtight container for up to 5 days, with parchment between layers so candy centers do not stick. Cookies can be frozen for up to 2 months; thaw at room temperature in a closed container so condensation does not form on the candy.