
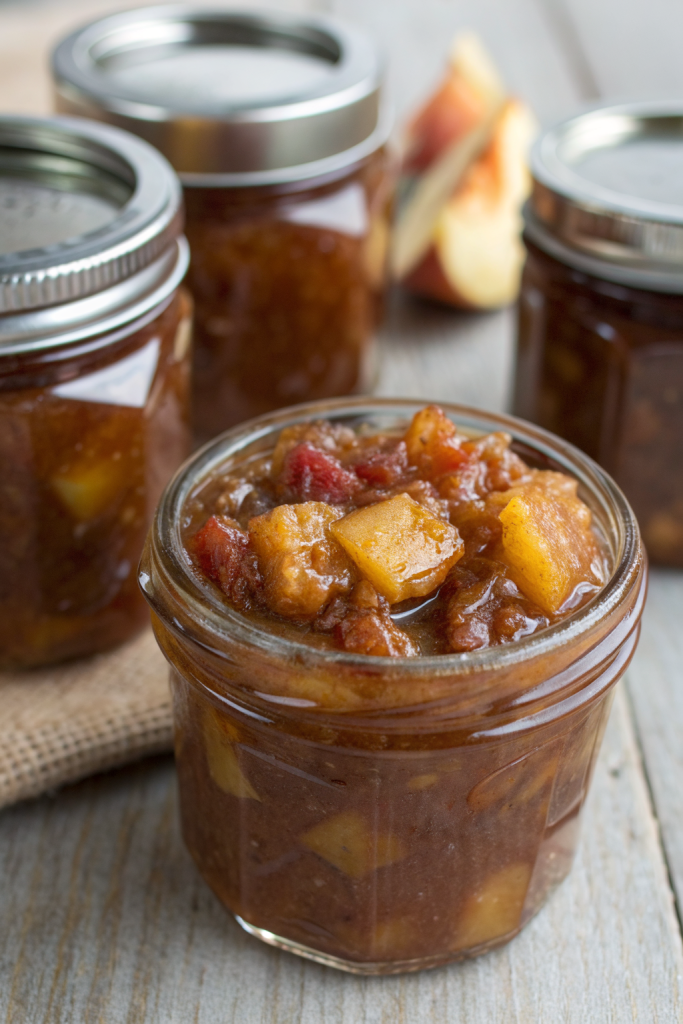
Homemade Apple Pie Jam Recipe tastes like a spoonable slice of warm apple pie, with cozy cinnamon, brown sugar, and soft apple chunks in every bite. It works perfectly for busy home cooks who want a fall-flavored spread in about 1 hour from start to finish. I test jam recipes in a tiny apartment kitchen, so if it passes my “small stove, big flavor” test, it earns a spot here.
Why Homemade Apple Pie Jam Recipe Is Worth It
This jam packs all the flavor of classic apple pie without rolling a single crust. You get tender apples, rich spices, and a thick, glossy spread that tastes amazing on toast, biscuits, pancakes, or straight from the spoon.
You also control the sweetness, spice level, and texture, which store-bought jars rarely match. The recipe uses simple pantry ingredients and basic equipment, so beginners can handle it and seasoned cooks can tweak it.
“This Homemade Apple Pie Jam Recipe tastes like grandma’s pie filling in a jar, and I want it on everything. ★★★★★”
Ingredients You Need
Here’s what you need to make one batch of Homemade Apple Pie Jam Recipe (about 4–5 half-pint jars, depending on how thick you cook it). I include easy swaps and notes from my own kitchen testing.
Apples
- 3 pounds apples (about 6–7 medium), peeled, cored, and finely chopped
- Use a mix of tart and sweet apples for best flavor.
- Great combo: 2 Granny Smith (tart), 2 Honeycrisp, 2 Gala or Fuji.
- Avoid super soft apples like Red Delicious because they turn mushy fast.
Sweeteners
- 1 ¾ to 2 cups granulated sugar
- Use 1 ¾ cups for a less-sweet jam and 2 cups for a more dessert-style spread.
- You can swap up to ½ cup with light brown sugar for deeper caramel notes.
- ¼ cup packed light brown sugar
- This adds that “pie filling” flavor and a hint of molasses.
Liquid & thickener
- ½ cup apple juice or apple cider (not vinegar)
- Shelf-stable juice works great and keeps things simple.
- 2 tablespoons lemon juice (bottled works fine and keeps acidity consistent)
- 1 (1.75-ounce) box powdered pectin (regular, not low-sugar)
- I usually use Sure-Jell or Ball brand, but any standard powdered pectin works.
Spices & flavor
- 1 ½ teaspoons ground cinnamon
- ¼ teaspoon ground nutmeg
- ¼ teaspoon ground allspice (optional but tasty)
- 1 teaspoon vanilla extract
- Small pinch of salt (about ⅛ teaspoon) to balance sweetness
Optional add-ins
- 1 tablespoon unsalted butter (helps reduce foam while boiling)
- ½ teaspoon ground ginger for a warmer, spicier twist
- ½ cup very finely chopped, toasted pecans or walnuts (stir in at the end, not for canning)
Equipment list
- Large heavy-bottomed pot or Dutch oven (wide surface helps jam thicken faster)
- Cutting board and sharp knife or apple corer/peeler
- Measuring cups and spoons
- Potato masher or sturdy spoon (to break down apples as they cook)
- Long-handled heatproof spatula or spoon for stirring
- Ladle and canning funnel (helpful but not essential if you just refrigerate)
- 4–5 clean half-pint jars with lids (mason jars or similar)
- Water bath canner or large deep pot with rack (only if you plan to can the jam)
Quick Tips & substitutions
- Use a mix of tart and sweet apples to keep the jam bright and not cloying.
- Chop apples small (pea to corn-kernel size) for a spreadable jam that still has texture.
- Stir often while the jam cooks so sugar does not scorch on the bottom.
- Keep heat at a steady simmer to boil, not a wild volcano, so the jam thickens evenly.
- Swap up to ½ cup of white sugar with brown sugar for a deeper, caramel-like flavor.
- Use bottled lemon juice if you plan to can the jam, since it keeps acidity consistent.
- Skip nuts if you want to can the jam; add nuts only for fridge or freezer storage.
- If you prefer less spice, cut cinnamon to 1 teaspoon and skip allspice.
- If the jam thickens too much, stir in a tablespoon or two of hot apple juice to loosen it.
- If you do not want to can, just cool the jam and refrigerate or freeze in jars.
How to Make Homemade Apple Pie Jam Recipe
Step 1: Prep the apples
Peel, core, and finely chop the apples into small pieces. Aim for small dice so the apples soften quickly and give a spreadable texture. Toss the chopped apples into a large bowl as you work to keep your cutting board clear.
Sprinkle the apples with the lemon juice and stir to coat. This keeps the color bright and adds the acidity that helps the jam set and taste balanced. Set the bowl aside while you set up the pot.
Step 2: Combine apples, juice, and spices
Add the chopped apples, apple juice or cider, granulated sugar, brown sugar, cinnamon, nutmeg, allspice (if using), and salt to your large pot. Stir well so the apples coat evenly with sugar and spices. The mixture looks dry at first, but the apples release juice as they heat.
Set the pot over medium heat. Stir until the sugar dissolves and the mixture turns glossy and syrupy. Add the butter now if you want to reduce foam later.
Step 3: Soften the apples
Bring the mixture to a gentle simmer. Cook 10–15 minutes, stirring often, until the apples soften and turn tender but not mushy. The liquid should look slightly thicker and more syrup-like.
Use a potato masher or the back of a sturdy spoon to mash some of the apples. Keep some chunks for texture if you like a more rustic jam. If you want a smoother spread, mash more thoroughly.
Step 4: Add pectin
In a small bowl, whisk the powdered pectin with ¼ cup sugar (taken from your measured sugar if you have not added it all yet, or just use an extra ¼ cup if you already added everything). This helps the pectin disperse and prevents clumps.
Sprinkle the pectin-sugar mixture over the simmering apples while you stir constantly. Stir well for 1–2 minutes so the pectin dissolves and mixes evenly.
Step 5: Boil to set
Turn the heat to medium-high and bring the mixture to a full rolling boil that you cannot stir down. Stir constantly so nothing sticks. Boil hard for 1 full minute while you keep stirring.
After 1 minute, lower the heat slightly but keep the jam at a lively simmer. Cook another 5–10 minutes, stirring often, until the jam thickens. The time can vary based on your pot and stove.
Step 6: Check the thickness
Use the spoon test. Scoop up a spoonful of jam and let it cool for 20–30 seconds. Tilt the spoon and watch how the jam falls.
If it drips in a thin stream, cook a few more minutes. If it falls in thicker drops and slowly sheets off the spoon, you have a good jam consistency. Keep in mind the jam thickens more as it cools.
You can also use the cold plate test. Place a small plate in the freezer while the jam cooks. Drop a little hot jam on the cold plate, wait 30 seconds, then push it with your finger. If it wrinkles slightly and holds a soft mound, it set nicely.
Step 7: Finish with vanilla
Once the jam reaches your preferred thickness, turn off the heat. Stir in the vanilla extract. Taste carefully (it stays hot) and adjust the spice level with a pinch more cinnamon if you want.
Skim off any foam from the surface with a spoon if you want a clearer jam. Foam does not hurt flavor, but it can look bubbly in jars.
Step 8: Jar the jam (refrigerator or freezer method)
If you do not plan to can the jam, ladle the hot jam into clean jars, leaving about ½ inch of space at the top. Wipe rims clean, add lids, and let the jars cool to room temperature.
Once cool, move the jars to the refrigerator for up to 3 weeks or the freezer for up to 6 months. Leave extra headspace for freezer jars so the jam has room to expand.
Step 9: Water bath canning option
If you want shelf-stable jars, set up a water bath canner or large deep pot with a rack. Wash jars and lids in hot soapy water and rinse well. Keep jars hot in simmering water until you fill them.
Ladle hot jam into hot jars, leaving ¼ inch headspace. Wipe rims, center lids, and screw on bands until fingertip tight. Place jars on the rack in the canner, cover with at least 1–2 inches of water, and bring to a boil.
Process half-pint jars in boiling water for 10 minutes (adjust for altitude if needed). When time ends, turn off heat, remove the lid, and let jars sit in the hot water 5 minutes. Move jars to a towel-lined counter and let them cool undisturbed.
Once cool, check that lids sealed by pressing the center; it should not flex up and down. Label jars with name and date. Store sealed jars in a cool, dark place.
Recipe Variations
- Gluten-free: The base recipe uses naturally gluten-free ingredients; just check labels on pectin and apple juice.
- Vegan: Use vegan sugar (some brands label it) and skip the butter; the jam still cooks beautifully.
- Lower sugar: Use a low- or no-sugar pectin and follow that package’s sugar guidelines, then keep the same spices and apples.
- No refined sugar: Use a low-sugar pectin and sweeten with honey or maple syrup, then cook until thick; note that flavor changes slightly.
- Extra chunky: Cut apples into slightly larger pieces and mash only lightly for a pie-filling style texture.
- Spiced chai twist: Add ¼ teaspoon ground cardamom and ¼ teaspoon ground cloves with the other spices.
- Caramel apple version: Swap ½ cup of the sugar with dark brown sugar and add an extra pinch of salt.
- Nutty apple pie jam: Stir in ½ cup finely chopped toasted pecans or walnuts after you turn off the heat (fridge or freezer storage only).
Ways to Serve Homemade Apple Pie Jam Recipe
- Spread on toast, English muffins, bagels, or warm biscuits.
- Spoon over pancakes, waffles, or French toast instead of syrup.
- Swirl into plain yogurt or cottage cheese for a quick breakfast.
- Use as a filling for crepes or dessert quesadillas with a little cream cheese.
- Warm slightly and spoon over vanilla ice cream or frozen yogurt.
- Layer in parfaits with granola and yogurt.
- Spread inside grilled cheese with sharp cheddar for a sweet-savory twist.
- Use as a filling for hand pies, thumbprint cookies, or cake layers.
Storage Success
Cool the jam completely before you move jars to the refrigerator or pantry. Store refrigerated jam in tightly sealed jars for up to 3 weeks, and always use a clean spoon when you scoop some out. Keep canned, sealed jars in a cool, dark cupboard for up to 1 year, then chill after opening.
If you freeze the jam, leave extra headspace in the jar, and use it within 6 months for best flavor and texture. Label every jar with the date and any fun variation notes so you know which batch you reach for next time.
Homemade Apple Pie Jam Recipe
Ingredients
Instructions
- Peel, core, and finely chop the apples into small pieces. Place them in a large bowl and toss with the lemon juice to keep the color bright and add acidity.
- Add the chopped apples, apple juice or cider, granulated sugar, brown sugar, cinnamon, nutmeg, allspice (if using), and salt to a large heavy-bottomed pot. Stir well to coat the apples with sugar and spices. Add the butter if using.
- Set the pot over medium heat and cook, stirring often, until the sugar dissolves and the mixture becomes glossy and syrupy.
- Bring the mixture to a gentle simmer and cook for 10–15 minutes, stirring frequently, until the apples are tender but not mushy and the liquid looks slightly thickened.
- Use a potato masher or the back of a sturdy spoon to mash some of the apples to your preferred texture, leaving some small chunks if you like a rustic jam.
- In a small bowl, whisk the powdered pectin with 1/4 cup of the sugar (taken from the measured sugar or added separately). Sprinkle this mixture over the simmering apples while stirring constantly. Continue stirring for 1–2 minutes until the pectin is fully dissolved and evenly distributed.
- Increase the heat to medium-high and bring the jam to a full rolling boil that cannot be stirred down. Boil hard for 1 minute, stirring constantly so it does not scorch.
- Reduce the heat slightly to maintain a lively simmer and cook for another 5–10 minutes, stirring often, until the jam thickens. To test, place a spoonful on a spoon and let it cool 20–30 seconds; if it falls in thick drops and slowly sheets off the spoon, it is ready.
- Turn off the heat and stir in the vanilla extract. Taste carefully and adjust the spices with a pinch more cinnamon if desired. Skim off any foam from the surface if you prefer a clearer jam.
- For refrigerator or freezer storage, ladle the hot jam into clean jars, leaving about 1/2 inch of headspace. Wipe the rims, add lids, and let cool to room temperature before refrigerating for up to 3 weeks or freezing for up to 6 months.
- For water bath canning, ladle hot jam into hot, sterilized half-pint jars, leaving 1/4 inch headspace. Wipe rims, apply lids, and screw bands fingertip tight. Process in a boiling water bath for 10 minutes (adjusting for altitude as needed). Turn off heat, let jars sit 5 minutes, then remove to a towel-lined counter to cool. Check seals once cool and store sealed jars in a cool, dark place for up to 1 year.
Notes
Approximate per 1-tablespoon serving (about 48 servings per batch): 35 calories; fat 0 g; saturated fat 0 g; carbohydrates 9 g; fiber 0 g; sugars 8 g; protein 0 g; sodium 5 mg. Values will vary based on exact apple variety, sugar amount used, and final yield.