
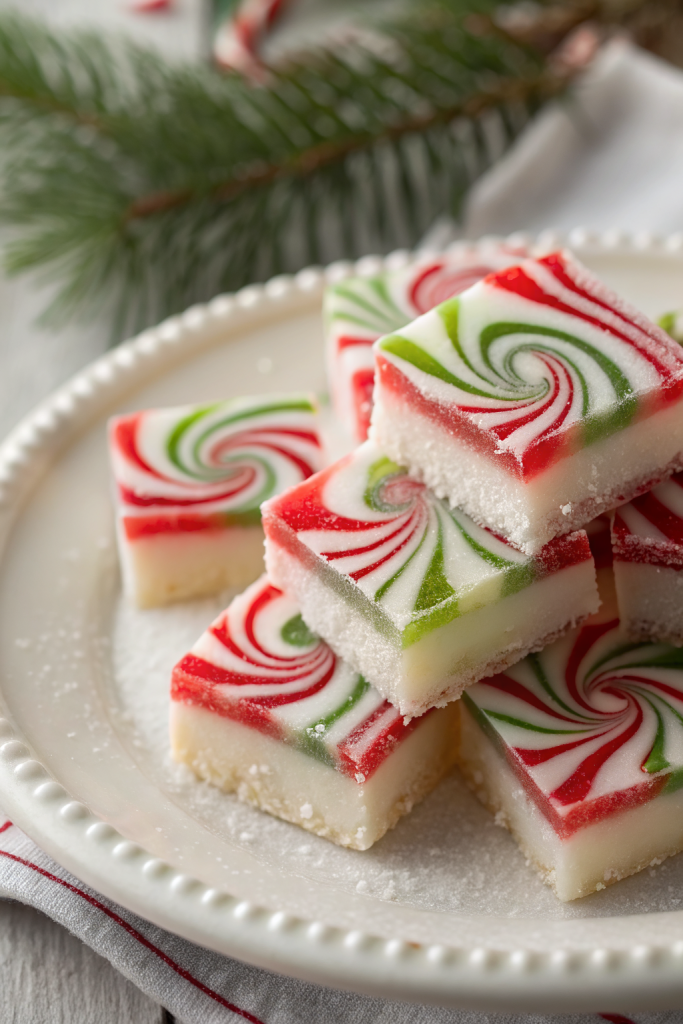
Soft Christmas Peppermints Recipe tastes like a creamy, melt-in-your-mouth candy cane that skipped the crunch and went straight for cozy. It works perfectly for beginners, kids, and anyone who wants a quick holiday treat in about 45 minutes, including shaping time. I still make these with the same old fork I used in my first apartment kitchen, and it feels like visiting an old friend every December.
Why Choose This Soft Christmas Peppermints Recipe
These soft Christmas peppermints feel creamy, cool, and tender instead of hard and sticky. They dissolve on your tongue and taste like a cross between a candy cane and a fluffy mint frosting.
You mix everything in one bowl, so cleanup stays easy. The recipe uses simple pantry ingredients, no thermometer, and no stovetop boiling, which keeps stress levels low during holiday chaos.
“These soft Christmas peppermints taste like little clouds of minty frosting, and they vanish from the cookie tray every single year. ★★★★★”
Ingredients You’ll Need
Main ingredients
-
Cream cheese, softened
Use full-fat brick cream cheese for the best texture. Avoid whipped tubs because they add too much air and moisture. -
Unsalted butter, softened
Room temperature butter helps the dough come together smoothly. Salted butter works in a pinch; just skip any extra salt. -
Powdered sugar
You need a lot of powdered sugar to form a dough, usually 6 to 7 cups. Use a fresh bag so it does not clump; store brands work just as well as name brands. -
Peppermint extract
Use pure peppermint extract, not mint extract, which can taste like toothpaste. Start with less, then add more to taste since peppermint can turn strong quickly. -
Vanilla extract (optional but tasty)
A little vanilla rounds out the mint flavor and gives a bakery-style taste. Use real vanilla if you can, but imitation works fine in candy. -
Fine salt (optional)
A tiny pinch balances the sweetness. Skip it if you use salted butter. -
Gel food coloring
Red and green keep it classic for Christmas. Gel coloring works better than liquid because it keeps the dough firm and bright.
Optional add-ins
-
Almond extract
A drop or two with the peppermint gives a “candy shop” flavor. Use it lightly so it does not overpower the mint. -
Different flavors
Swap peppermint with spearmint, orange, or lemon extract for variety. Keep the total extract amount the same so the texture stays right.
Pantry shortcuts and notes
- If you only have salted butter, use it and skip the added salt.
- If you run low on powdered sugar, chill the dough longer so it firms up more.
- If you want less sweet mints, add a bit more cream cheese and a pinch of salt, then chill well before shaping.
Equipment list
- Large mixing bowl
- Hand mixer or stand mixer with paddle attachment
- Rubber spatula
- Measuring cups and spoons
- Small bowls for tinting colors
- Baking sheets or large trays
- Parchment paper or silicone baking mats
- Fork for pressing the pattern on top
- Airtight containers for storage
Tips & Tricks
- Soften cream cheese and butter until they feel cool but easily dent with a finger.
- Sift powdered sugar if it clumps, so the mints stay smooth.
- Add peppermint extract slowly and taste as you go to avoid a harsh flavor.
- Mix on low speed at first so powdered sugar does not puff all over your kitchen.
- If the dough feels sticky, add more powdered sugar a little at a time.
- If the dough feels dry or crumbly, add a teaspoon of cream or milk and mix again.
- Divide the dough before tinting so you keep clean, bright colors.
- Use gel food coloring and add just a tiny bit with a toothpick to control the shade.
- Chill the dough if it feels too soft to roll into balls.
- Roll mints the size of small marbles so they set properly and look cute on trays.
- Press each ball gently with a fork to give that classic peppermint look.
- Let the mints air-dry on the counter until the outside feels set and slightly firm.
- Rotate trays halfway through drying if your kitchen feels humid.
- Store different flavors in separate containers so the scents do not blend.
- Make these a day ahead so the flavors settle and the texture turns perfectly tender.
How to Make Soft Christmas Peppermints Recipe
Mix the base
-
Place softened cream cheese and softened butter in a large mixing bowl.
-
Beat with a hand mixer or stand mixer on medium speed until the mixture turns smooth and creamy, about 2 minutes.
-
Scrape down the sides of the bowl with a spatula so everything blends evenly.
-
Add vanilla extract, peppermint extract, and a tiny pinch of salt if you use it.
-
Mix again until the mixture looks silky and smells minty.
Add the powdered sugar
-
Turn the mixer to low speed.
-
Add powdered sugar 1 cup at a time, mixing after each addition.
-
Stop a few times to scrape the bowl so no streaks of cream cheese hide at the bottom.
-
Keep adding powdered sugar until a soft dough forms that feels like play dough.
-
You should pick up a piece and roll it without it sticking badly to your hands.
-
If it still feels sticky, add more powdered sugar a few tablespoons at a time.
Tint the dough
-
Divide the dough into two or three portions, depending on how many colors you want.
-
Place each portion in a separate small bowl.
-
Add a tiny amount of gel food coloring to one bowl, then knead it in with a spoon or gloved hands.
-
Adjust the color slowly so you do not overshoot the shade.
-
Repeat with the other portions using different colors, such as red and green.
-
Leave one portion white if you like a classic trio.
Chill for easier shaping
- Cover each bowl with plastic wrap.
- Chill the dough in the refrigerator for 20 to 30 minutes.
- This step helps the dough firm up and makes rolling much easier.
Shape the mints
-
Line baking sheets or trays with parchment paper or silicone mats.
-
Scoop small portions of dough with a teaspoon and roll them into smooth balls between your palms.
-
Aim for balls about ¾ inch wide so they stay bite-sized.
-
Place the balls on the prepared trays, leaving a little space between each one.
-
Press each ball gently with the tines of a fork to flatten slightly and create a crosshatch pattern.
-
Wipe the fork occasionally if it sticks, or dust it lightly with powdered sugar.
Dry the mints
-
Leave the trays at room temperature so the mints can dry.
-
Let them sit for at least 2 to 4 hours, or until the outside feels set and slightly firm.
-
The centers will stay soft and creamy.
-
If your kitchen feels humid, let them sit longer or move them to a cooler room.
-
Once they dry to your liking, transfer them to airtight containers.
Taste and adjust for next time
- Try one mint after it sets and note the flavor strength.
- If you want stronger mint next time, add a bit more peppermint extract.
- If you want milder mint, cut the extract slightly and add more vanilla.
What to Serve with Soft Christmas Peppermints Recipe
These soft Christmas peppermints sit perfectly on a cookie tray next to sugar cookies, gingerbread men, and chocolate fudge. Pair them with hot cocoa, peppermint hot chocolate, or a big mug of coffee or tea. Kids love them with cold milk, especially after decorating cookies or trimming the tree. They also travel well in tins, so they make easy neighbor gifts or teacher treats.
Storage Options
- Room temperature: Store mints in an airtight container at cool room temperature for 3 to 4 days. Keep layers separated with parchment so they do not stick.
- Refrigerator: Store in an airtight container in the fridge for up to 2 weeks. Let them sit at room temperature for 10 to 15 minutes before serving so they soften slightly.
- Freezer: Freeze in a well-sealed container for up to 2 months. Place parchment between layers and thaw in the fridge overnight, then bring to room temperature before serving.
Soft Christmas Peppermints Recipe
Ingredients
Instructions
- Place the softened cream cheese and softened butter in a large mixing bowl.
- Beat on medium speed with a hand mixer or stand mixer until smooth and creamy, about 2 minutes, scraping down the sides of the bowl as needed.
- Add the peppermint extract, vanilla extract if using, and a tiny pinch of salt if you are not using salted butter. Mix until the mixture looks silky and smells minty.
- Turn the mixer to low speed. Add the powdered sugar 1 cup at a time, mixing after each addition so no lumps remain.
- Stop occasionally to scrape the bowl to be sure no streaks of cream cheese or butter hide at the bottom.
- Continue adding powdered sugar until a soft, play-dough-like dough forms that you can roll without it sticking badly to your hands. If it still feels sticky, mix in a bit more powdered sugar a few tablespoons at a time.
- Divide the dough into two or three portions, depending on how many colors you want.
- Place each portion into a separate small bowl.
- Using gel food coloring, add a tiny amount to one portion and knead it in with a spoon or gloved hands until evenly tinted, adjusting the color slowly to reach your desired shade.
- Repeat with additional portions using different colors such as red and green, leaving one portion white if desired.
- Cover each bowl of tinted dough with plastic wrap.
- Refrigerate for 20 to 30 minutes so the dough can firm up and become easier to roll.
- Line baking sheets or trays with parchment paper or silicone baking mats.
- Scoop small portions of dough with a teaspoon and roll each portion between your palms into smooth balls about 3/4 inch wide.
- Place the balls on the prepared trays, leaving a little space between each one.
- Press each ball gently with the tines of a fork to flatten slightly and create a crosshatch pattern, wiping or dusting the fork with powdered sugar if it starts to stick.
- Let the trays stand at room temperature so the mints can dry.
- Allow the mints to sit for 2 to 4 hours, or until the outsides feel set and slightly firm while the centers remain soft and creamy.
- If your kitchen is very humid, increase the drying time or move the trays to a cooler, drier room.
- Once the mints are dry to your liking, transfer them to airtight containers for storage.
Notes
Approximate per 1 mint (about 1 of 60): 55 calories; fat 2.5 g; saturated fat 1.5 g; carbohydrates 8 g; fiber 0 g; sugars 8 g; protein 0.5 g; sodium 10 mg. Values are estimates and will vary based on exact ingredients, brands, and portion size.