
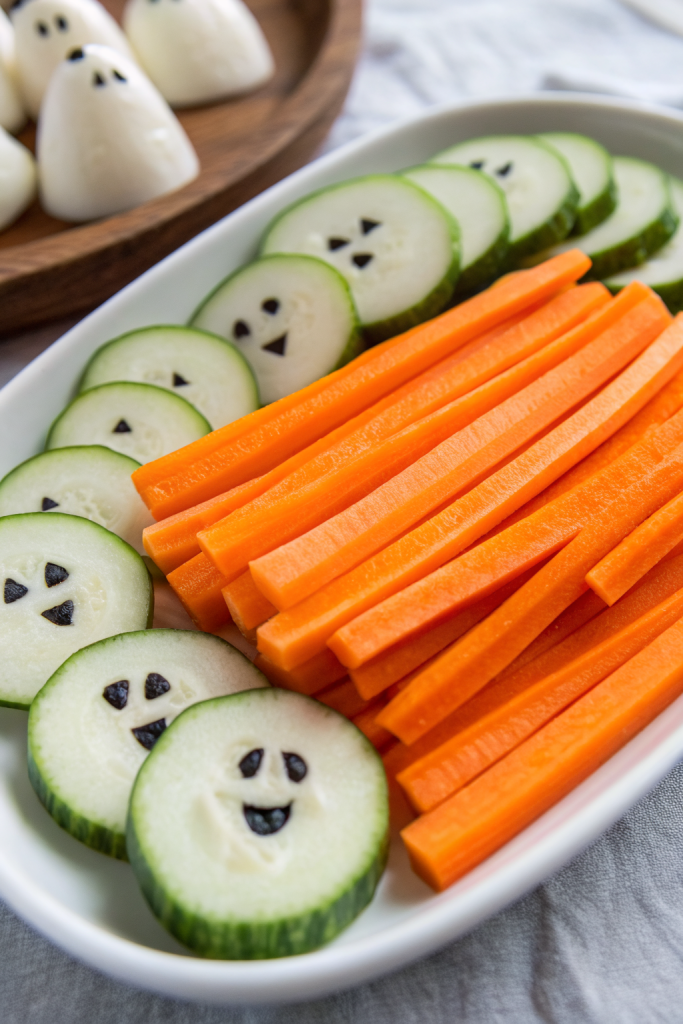
Spooky Veggie Plate Idea hits that perfect mix of crunchy, fresh, and just-creepy-enough to thrill kids and still impress adults, with bright flavors from crisp veggies and a zesty dip. It works best for Halloween parties, school events, or movie nights and takes about 25 to 30 minutes from chopping board to table. I started making this when my nieces refused “boring carrots,” and now they request the skeleton veggie platter every October.
Why Choose This Spooky Veggie Plate Idea
This Halloween veggie platter turns basic produce into ghosts, pumpkins, and a veggie skeleton, so kids actually reach for vegetables without bribery. It looks fun and colorful, but you still keep things light, fresh, and budget friendly.
You can prep most of it ahead, then assemble right before guests arrive, which saves a lot of stress. You also customize it easily for picky eaters, allergies, or what your store actually stocks that week.
“My kids attacked this spooky veggie plate before the candy bowl, which felt like a Halloween miracle. ★★★★★”
Ingredients You’ll Need
You can mix and match vegetables, but aim for lots of color and a mix of crunchy and juicy textures.
Veggies for a skeleton or monster face
- 1 large head of cauliflower, cut into florets (great for skulls or ghost shapes)
- 1 large head of broccoli, cut into florets (use as hair, trees, or a spooky forest border)
- 1 English cucumber, sliced into rounds and sticks (rounds for eyes, sticks for bones or fingers)
- 4 to 5 large carrots, peeled and cut into sticks and coins
- 1 red bell pepper, sliced into strips (mouth, eyebrows, “blood” accents)
- 1 orange bell pepper, sliced into strips or rings (mini pumpkin shapes)
- 1 yellow bell pepper, sliced into strips (teeth, lightning bolts, or sunbursts)
- 1 small jicama, peeled and sliced into sticks (pale “bones,” optional but fun)
- 1 cup sugar snap peas or green beans (fingers, ribs, or monster hair)
- 1 cup cherry or grape tomatoes (eyeballs, hearts, or “bubbling cauldron” clusters)
- 1 small bunch celery, cut into sticks (ribs, arms, or a veggie “graveyard fence”)
- 1 small purple cabbage, thinly sliced or separated into leaves (perfect for a spooky backdrop)
- 1 small bunch radishes, trimmed and halved (bloody eyeballs when you add olive slices)
Extra details for spooky faces
- 1 small can sliced black olives (pupils, nostrils, buttons)
- 1 small jar pimento-stuffed green olives (extra creepy eyeballs)
- A handful of fresh parsley or cilantro (hair, grass, or graveyard weeds)
Dips and sauces
You can use store bought dips or homemade versions. I often mix one homemade with one store bought to save time.
- 1 cup ranch dip or dressing (bottled ranch works fine; choose a thicker style for “cauldron” effect)
- 1 cup hummus, any flavor (classic or roasted red pepper look great)
- 1 cup guacamole (bright green slime or monster goo)
- 1 cup Greek yogurt, plain, plus:
- 1 tablespoon lemon juice
- 1 teaspoon garlic powder
- 1 teaspoon onion powder
- ½ teaspoon salt
- ½ teaspoon smoked paprika or chili powder
Stir the yogurt with seasonings to make a quick, tangy dip if you skip ranch.
Optional fun extras
- Edible candy eyes (check the baking aisle; use only on drier veggies so they do not melt)
- Small cookie cutters in pumpkin, bat, or ghost shapes (press into bell peppers, cucumber slices, or jicama)
- Pita chips or whole grain crackers around the edge for extra crunch
Equipment
- 1 large platter, cutting board, or sheet pan (a black tray looks especially spooky)
- Sharp chef’s knife and small paring knife
- Small bowls or ramekins for dips
- Paper towels to pat veggies dry so they do not slide around
- Plastic wrap or a large container if you plan to assemble ahead
Tips & Tricks
- Slice veggies in different shapes so the platter looks playful: sticks, coins, rings, and florets.
- Pat wet veggies dry with paper towels so they stay crisp and hold their place on the platter.
- Use the dips as “anchors” and build your skeleton or monster around the bowls.
- Keep colors grouped in clusters so the design reads clearly from across the room.
- Cut extra veggies and keep them chilled so you can refill empty spots quickly.
- Use a photo reference or sketch your design on paper if you feel nervous about arranging.
- Keep spicy dips on one side and mild dips on the other so kids know where to start.
- Prep veggies the night before, store them in containers, and assemble the platter right before serving.
- Use toothpicks to secure tricky pieces like olive eyes or radish halves, and warn guests about them.
- If kids help, assign them simple jobs like placing eyeballs or arranging “hair” so the design still looks clear.
How to Make Spooky Veggie Plate Idea
Step 1: Prep and cut the vegetables
Wash and dry all vegetables thoroughly so they stay crisp. Peel carrots and jicama, then cut them into sticks and coins. Slice cucumbers into rounds for eyes and sticks for bones or fingers. Cut bell peppers into strips and a few rings, then trim cauliflower and broccoli into bite size florets.
Step 2: Mix or pour the dips
Place small bowls or ramekins on your platter first, since they set the layout. Fill one with ranch or yogurt dip, one with hummus, and one with guacamole. If you mix the yogurt dip, stir yogurt with lemon juice, garlic powder, onion powder, salt, and smoked paprika until smooth. Smooth the tops of the dips so they look neat and ready for decoration.
Step 3: Build a veggie skeleton
Use a large oval or rectangular platter for the skeleton. Place a big pile of cauliflower florets at the top center to form the skull, then tuck two cucumber rounds or radish halves as eyes. Add sliced olives or pimento olives in the center of each eye, and use a small piece of red pepper for a mouth. Line up celery sticks or jicama sticks under the skull for the spine, then add shorter sticks across as ribs.
Arrange carrot sticks or snap peas as arms that stretch out from the ribs. Use more jicama or celery for legs, and finish with small piles of broccoli or bell pepper strips as hands and feet. Tuck cherry tomatoes around the skeleton as “scattered hearts” or “glowing orbs” for extra color. Keep the skeleton simple so guests still recognize it after a few people start snacking.
Step 4: Build a monster face platter
On a second platter or a large cutting board, spread purple cabbage or broccoli florets as a background. Place a round bowl of guacamole in the center as the monster nose or mouth. Arrange cucumber rounds in two big circles above the bowl for eyes, then top them with olive slices or cherry tomato halves. Use red bell pepper strips as eyebrows and a jagged mouth, and line up yellow pepper pieces as teeth.
Fill in the rest of the face with carrot coins, snap peas, and cherry tomatoes. Add parsley or cilantro on top as wild hair. If you use candy eyes, press them gently into drier veggies like cucumber or jicama so they stay put. Keep the face big and bold so kids recognize it instantly.
Step 5: Add ghosts, pumpkins, and a veggie graveyard
Use cauliflower florets as tiny ghosts around the edge of the platters. Add two small olive pieces to each floret for eyes, and press them in gently. Cut bell pepper slices with small cookie cutters to make pumpkin or bat shapes, then scatter them around the dips.
Line up celery sticks or jicama sticks at one side of the tray as a “graveyard fence.” Tuck radish halves behind the fence as tombstones. Cluster broccoli florets at the bottom of the platter as a spooky forest, and drop a few cherry tomatoes in between like glowing eyes.
Step 6: Chill and serve
Cover the platters loosely with plastic wrap and chill them until party time. Pull them out about 10 to 15 minutes before serving so the veggies taste crisp but not icy cold. Place small tongs or toothpicks nearby so guests can grab pieces easily. Keep extra veggies and dip in the fridge so you can refill empty spots and keep the design looking full.
What to Serve with Spooky Veggie Plate Idea
This Halloween veggie platter pairs nicely with kid friendly mains like baked chicken tenders, cheese quesadillas, or mini turkey sliders. You can also set it next to a big pot of tomato soup or butternut squash soup so guests dip veggies right into warm bowls. Add a simple fruit tray with orange slices, apple wedges, and grapes for a full snack spread. Offer drinks like sparkling water, apple cider, flavored seltzer, or fruit punch to keep the spooky theme fun and family friendly.
Storage Options
- Store leftover veggies in airtight containers in the fridge for up to 3 days, keeping wet items like tomatoes separate from dry ones.
- Keep dips covered in the fridge for 3 to 4 days, and stir them before serving again.
- Skip freezing raw veggies, since they lose their crisp texture after thawing.
- Use leftover veggies in salads, lunch boxes, or quick stir fries, and use leftover dips as sandwich spreads or toppings for baked potatoes.