
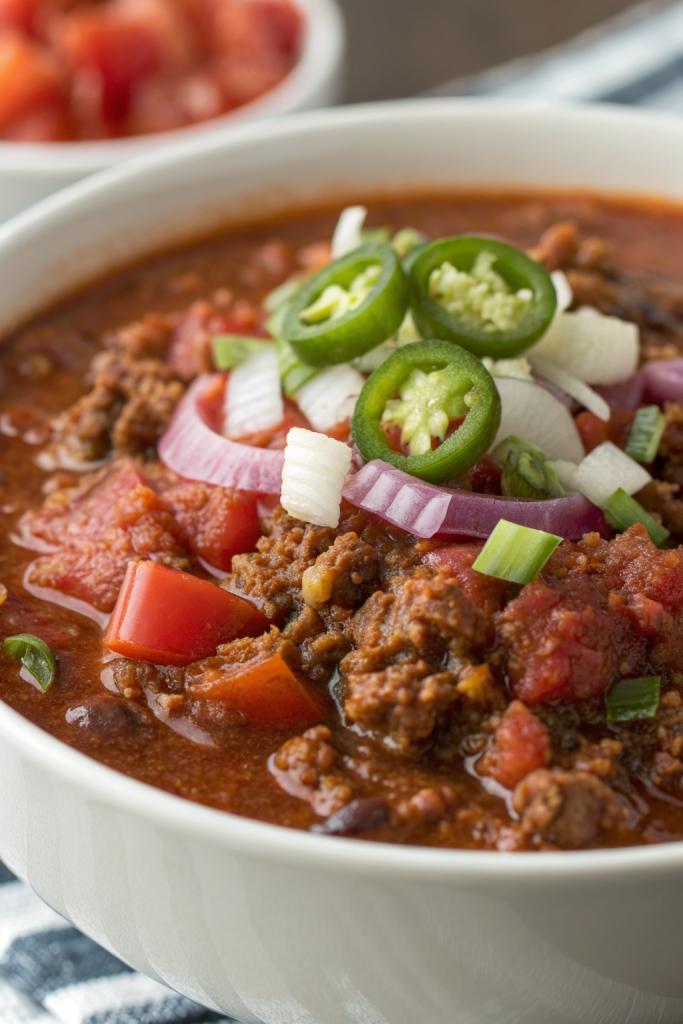
Texas Style Chili Recipe hits you with deep smoky flavor, tender chunks of beef, and a slow-building heat that keeps you going back for one more spoonful. It suits anyone who loves hearty comfort food and wants a big-batch dinner in about 2½ to 3 hours total, most of it hands-off simmer time. I first learned this style at a backyard cookoff in Austin, and I have tweaked it obsessively ever since.
Why Make This Texas Style Chili Recipe at Home
You control everything at home, from the heat level to the salt to how thick you like your bowl of Texas red. No beans sneak in, no sweet tomato overload, just rich chili gravy and beef that tastes like it simmered all afternoon.
Homemade chili also feeds a crowd without draining your wallet. You cook once, eat several times, and your fridge feels like a tiny chili restaurant that never closes.
“Deep, rich, meaty, and bold, this Texas Style Chili Recipe tastes like it came from a championship cookoff. ★★★★★”
Ingredients You Need
Main ingredients
- 3 pounds beef chuck roast, trimmed and cut into ½ to ¾ inch cubes
- Chuck gives tender bites and rich flavor. If you need a shortcut, use pre-cut stew meat, but pick the package with the most marbling.
- 2 tablespoons neutral oil (canola, avocado, or vegetable)
- Avoid strong flavored oils so the chili spices shine.
- 1 large yellow onion, finely chopped
- 1 medium jalapeño, seeded and minced
- Keep some seeds if you like more heat.
- 4 cloves garlic, minced
- 3 tablespoons tomato paste
- Tube tomato paste works great and keeps well in the fridge.
- 3 cups low-sodium beef broth
- Use low-sodium so you season to taste. I like Better Than Bouillon beef base for a pantry-friendly option.
- 1 tablespoon Worcestershire sauce
- 1 teaspoon soy sauce
- This adds umami and salt; use tamari if you want a gluten-free version.
Chili spice mix
Mix these in a small bowl before you start cooking:
- 3 tablespoons chili powder, Texas style if you can find it
- I like Gebhardt or Mexene for classic flavor.
- 1 tablespoon smoked paprika
- 2 teaspoons ground cumin
- 1 teaspoon ground coriander
- 1 teaspoon dried oregano (Mexican oregano if possible)
- 1 teaspoon kosher salt, plus more to taste
- 1 teaspoon freshly ground black pepper
- ½ teaspoon cayenne pepper
- Adjust up or down based on your heat tolerance.
- 1 teaspoon brown sugar
- This does not make the chili sweet; it just rounds out the acidity and bitterness.
Optional flavor boosters
These add depth, but you still get great chili without them:
- 1 tablespoon masa harina (corn flour) to thicken
- 1 teaspoon instant espresso powder or finely ground coffee
- 1 tablespoon apple cider vinegar or lime juice at the end to brighten
Toppings (optional but highly recommended)
- Shredded cheddar or Colby Jack
- Sour cream or plain Greek yogurt
- Chopped white or red onion
- Sliced green onions
- Fresh cilantro
- Crushed tortilla chips or corn chips
- Lime wedges
Equipment list
- Large heavy-bottomed pot or Dutch oven (5 to 7 quarts)
- Sharp chef’s knife and cutting board
- Wooden spoon or sturdy spatula
- Measuring cups and spoons
- Small bowl for spice mix
- Ladle for serving
Tips & Mistakes
- Brown the beef in batches so it sears and caramelizes instead of steaming.
- Pat the beef dry with paper towels before searing to get better browning.
- Do not rush the simmer; give it at least 90 minutes so the beef turns tender and the flavors meld.
- Taste the chili several times near the end and adjust salt, heat, and acidity gradually.
- Add cayenne or minced jalapeño in small amounts so you do not overshoot your heat level.
- Avoid too much tomato paste or broth, or you end up with soup instead of thick Texas chili.
- Stir the bottom of the pot often during simmering so nothing sticks or scorches.
- Add masa harina only near the end, or it can thicken too much and dull the flavor.
- Cool leftovers quickly in shallow containers so they keep a better texture and taste.
- Use fresh spices; old chili powder and cumin taste flat and give boring chili.
How to Make Texas Style Chili Recipe
Step 1: Prep the beef and veggies
Cut the beef chuck into ½ to ¾ inch cubes and trim any large chunks of hard fat. Pat the pieces dry with paper towels and season them lightly with salt and pepper. Chop the onion, mince the jalapeño, and mince the garlic so everything stands ready before you start cooking.
Step 2: Mix the chili spices
Add chili powder, smoked paprika, cumin, coriander, oregano, salt, pepper, cayenne, and brown sugar to a small bowl. Stir until the spices look evenly combined and no clumps remain. Keep this bowl near the stove so you add it at the right moment.
Step 3: Brown the beef
Heat 1 tablespoon of oil in your Dutch oven over medium-high heat until it shimmers. Add about one third of the beef in a single layer and let it sear without stirring for 2 to 3 minutes, then stir and brown the other sides. Transfer browned beef to a bowl and repeat with the remaining oil and beef, working in batches so the pot does not crowd.
Step 4: Cook the aromatics
Lower the heat to medium and add the chopped onion to the same pot. Stir and cook until the onion softens and turns golden at the edges, about 5 to 7 minutes. Add the jalapeño and garlic, then cook 1 to 2 minutes more until fragrant, and scrape up any browned bits from the bottom as you stir.
Step 5: Toast the spices and tomato paste
Add the tomato paste to the pot and stir it into the onions. Cook the paste for 1 to 2 minutes until it darkens slightly and smells rich. Sprinkle in the spice mix and stir constantly for about 30 to 45 seconds so the spices toast and bloom without burning.
Step 6: Deglaze and build the base
Pour in about 1 cup of the beef broth and stir, scraping the bottom to release every browned bit. Add the Worcestershire sauce and soy sauce, then stir again. Return the browned beef and any accumulated juices to the pot and mix everything together.
Step 7: Simmer low and slow
Add the remaining beef broth and stir to combine, then bring the pot just to a gentle boil. Turn the heat down to low so the chili barely simmers with small lazy bubbles. Cover the pot partially and cook for 90 minutes to 2 hours, stirring every 15 to 20 minutes, until the beef turns tender and the chili thickens.
Step 8: Adjust thickness and flavor
If you want a thicker Texas Style Chili Recipe, whisk the masa harina with 2 tablespoons of water in a small bowl to make a slurry. Stir the slurry into the chili and simmer another 10 minutes until it thickens slightly. Taste and adjust with more salt, cayenne, or a pinch of brown sugar if the flavor needs balance.
Step 9: Brighten and serve
Right before serving, stir in the espresso powder if you use it, then add the vinegar or lime juice. Taste again and tweak the seasoning one last time. Ladle the chili into bowls and add your favorite toppings like cheese, onion, cilantro, and a squeeze of lime.
Variations I've Tried
I sometimes swap half the beef chuck for pork shoulder, which gives a slightly sweeter, richer flavor. I also tried a version with fire-roasted diced tomatoes, which tasted great but leaned closer to regular chili, so I keep that for non-Texas nights. On busy weeknights, I cut the simmer time and use smaller beef cubes; the flavor still hits, but the texture feels a bit less silky.
I also like a smoked version where I add a small amount of chopped smoked brisket along with the beef chuck. That version tastes like a backyard barbecue in a bowl and impresses guests every time. When I cook for spice-sensitive friends, I cut the cayenne in half and offer hot sauce on the side so everyone customizes their own bowl.
How to Serve Texas Style Chili Recipe
Serve this Texas Style Chili Recipe in wide bowls so the chili cools slightly and thickens as it sits. Top it with shredded cheese, chopped onion, a dollop of sour cream or Greek yogurt, and plenty of fresh cilantro. It pairs perfectly with warm cornbread, baked potatoes, rice, or simple tortilla chips for scooping. I also like to spoon it over hot dogs, fries, or roasted vegetables for a hearty, no-bean chili feast.
How to store
- Cool the chili to room temperature within 1 to 2 hours, then transfer it to airtight containers.
- Store in the fridge for up to 4 days; the flavor usually improves by day two.
- Freeze in portioned containers or freezer bags for up to 3 months; label with the date so you track it easily.
- Reheat gently on the stove over medium-low heat with a splash of water or broth, or warm individual portions in the microwave in short bursts, stirring between each burst so it heats evenly.