
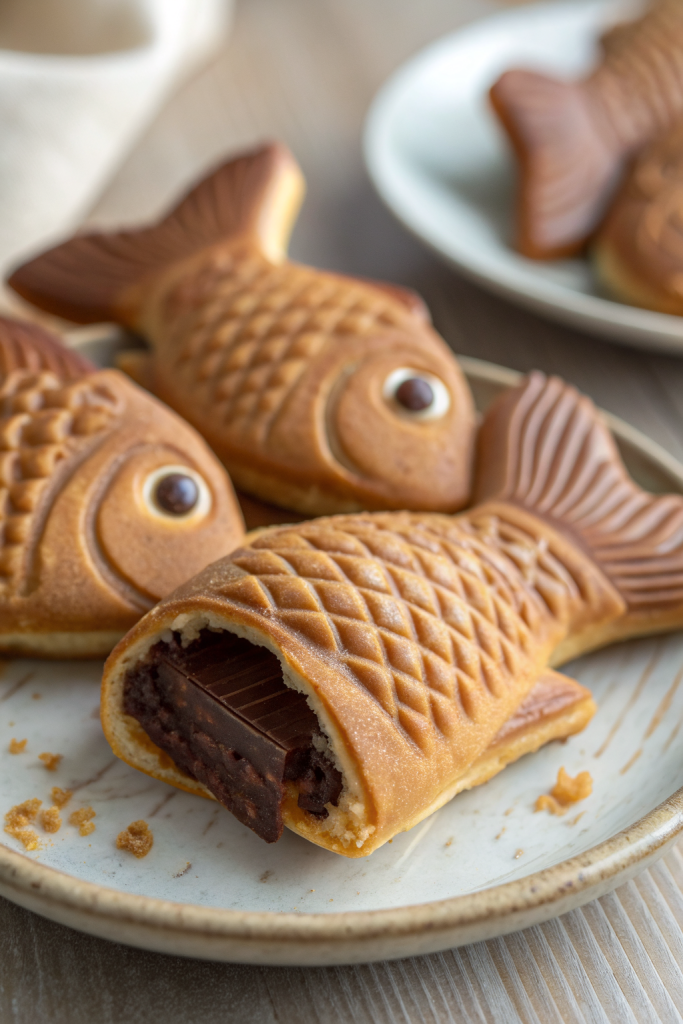
Taiyaki Japanese Fish Dessert Recipe tastes like a warm waffle cone hugged around sweet red bean paste, and it wins over anyone who loves cute desserts that also deliver real flavor. It works perfectly for weekend projects, date-night cooking, or fun baking with kids, and you can finish a batch in about 45–60 minutes once you get into a rhythm. I still remember burning my first taiyaki slightly and eating every single one anyway, because crispy edges taste like victory.
Why Taiyaki Japanese Fish Dessert Recipe Is Worth It
Taiyaki Japanese Fish Dessert Recipe gives you crisp, golden edges with a soft, fluffy interior and a rich, not-too-sweet filling. The fish shape adds charm, but the batter and filling bring the real magic, especially when you eat them hot off the pan.
You can customize taiyaki easily with different fillings, so everyone at the table gets a flavor they love. The recipe uses simple pantry ingredients, and a taiyaki pan does most of the visual “wow” work for you.
“This Taiyaki Japanese Fish Dessert Recipe tastes like a street stall in Tokyo moved into my kitchen, and I’m not mad about it. ★★★★★”
Ingredients You Need
Batter Ingredients
- 1 cup (130 g) all-purpose flour
- 1 tsp baking powder
- 2 tbsp sugar (granulated or caster)
- 1 large egg, room temperature
- ¾ cup (180 ml) milk (whole milk gives richer flavor; oat or soy milk also work)
- 1–2 tbsp neutral oil (canola, grapeseed, or light vegetable oil)
- ½ tsp vanilla extract (optional, but it adds nice aroma)
- Small pinch of salt
You can swap up to half the all-purpose flour with cake flour for a more tender bite. Use a good nonstick spray or brush the pan with oil to keep the fish shapes clean and easy to release.
Classic Sweet Red Bean Filling (Anko)
You can cook red bean paste from scratch, but I often use canned anko on busy days.
- ¾–1 cup sweet red bean paste (anko), tsubuan (chunky) or koshian (smooth)
- Pantry shortcut: use canned anko from brands like Shirakiku, Morinaga, or local Japanese brands.
- If the paste feels too stiff, stir in 1–2 tsp water or milk to loosen it slightly.
Optional Alternative Fillings
- Nutella or other chocolate-hazelnut spread
- Thick custard or pastry cream
- Sweetened cream cheese
- Peanut butter mixed with a little honey or sugar
- Matcha custard or matcha white chocolate spread
- Fruit jam (strawberry, raspberry, yuzu marmalade)
Keep fillings on the thicker side so they do not run out of the mold.
Equipment List
- Taiyaki pan (stovetop cast aluminum or cast iron)
- Small mixing bowls
- Whisk
- Measuring cups and spoons
- Small ladle or spouted cup for pouring batter
- Small spoon for filling
- Silicone brush or paper towel for oiling the pan
- Cooling rack
Quick Tips & substitutions
- Preheat the taiyaki pan over medium-low heat so the batter browns evenly and does not burn.
- Lightly oil the pan before each batch, even if it has a nonstick coating.
- Use chilled red bean paste or fillings; they hold shape better and stay centered.
- Do not overfill with batter; aim for about 70–80% full so it does not overflow.
- Spoon filling into the thicker belly area of the fish so each bite hits the center.
- Use oat milk or soy milk and an egg replacer to shift the batter toward vegan.
- Swap all-purpose flour with a 1:1 gluten-free baking blend if you need a gluten-free version.
- Keep heat on the lower side and cook a test fish first to dial in timing on your stove.
- Let cooked taiyaki cool on a rack so steam escapes and the edges stay crisp.
- If you want extra crispness, cook each side a bit longer until deep golden brown.
How to Make Taiyaki Japanese Fish Dessert Recipe
Mix the Batter
- Add flour, baking powder, sugar, and salt to a bowl. Whisk until the dry ingredients blend and no lumps remain.
- In another bowl, whisk egg, milk, oil, and vanilla extract until smooth.
- Pour the wet mixture into the dry mixture while you whisk gently. Stir until the batter looks smooth and pourable, like pancake batter.
- Let the batter rest for 5–10 minutes while you heat the pan; this helps the flour hydrate and gives a nicer texture.
Prep the Filling and Pan
- Scoop the red bean paste into a small bowl and stir it to loosen the texture slightly.
- Preheat the taiyaki pan over medium-low heat for a few minutes.
- Lightly brush both sides of the pan with oil, or spray with nonstick spray.
- Reduce heat to low-medium once the pan feels hot; you want gentle, even heat, not aggressive sizzling.
Fill the Taiyaki Molds
- Pour a thin layer of batter into one side of the taiyaki pan, just enough to cover the fish molds about 60–70%.
- Use the back of a spoon or a small spatula to nudge batter into the tail and fin tips so they fill completely.
- Add about 1–1½ tbsp red bean paste into the center of each fish, focusing on the belly area.
- Spoon a little more batter over the filling to cover it and bring the level close to the top of the mold.
Cook Until Golden and Fluffy
- Close the pan gently so the top molds meet the bottom molds.
- Cook over low-medium heat for about 2–3 minutes on the first side.
- Flip the entire pan and cook another 2–3 minutes on the second side.
- Open the pan slightly and peek at one taiyaki; if it looks pale, close the pan and cook 1–2 minutes more per side until deep golden brown.
Check Doneness and Adjust
- When the taiyaki turns golden brown and feels slightly firm when you tap it with tongs, remove one and cut it open.
- Check that the batter cooks through and no wet streaks remain around the filling.
- If the inside looks underdone, lower the heat slightly and extend the cooking time by 1–2 minutes per side for the next batch.
- Once you dial in the timing, cook the rest of the batter in batches, oiling the pan lightly between rounds.
Cool and Serve
- Transfer finished taiyaki to a cooling rack so steam escapes and the exterior stays crisp.
- Serve them warm for the best texture, when the outside still crunches and the filling feels soft and creamy.
- Dust with powdered sugar or drizzle with a thin line of chocolate sauce if you want extra sweetness.
- Enjoy them plain, or pair with ice cream or fruit for a café-style dessert plate.
Recipe Variations
- Gluten-free: Use a 1:1 gluten-free baking flour blend and add an extra tablespoon of milk if the batter feels thick.
- Vegan: Use plant milk, a flax egg or commercial egg replacer, and a vegan red bean paste or thick vegan chocolate spread.
- Low sugar: Cut sugar in the batter to 1 tbsp and use a less-sweet anko or unsweetened nut butter with a touch of sweetener.
- Matcha batter: Whisk 1–2 tsp matcha powder into the dry ingredients for a green tea twist.
- Cheese taiyaki: Add a small cube of mozzarella or mild cheese with the filling for a stretchy, savory-sweet version.
- Custard taiyaki: Fill with thick vanilla custard or pudding; chill the custard first so it holds shape.
- Chocolate overload: Use cocoa batter (swap 1–2 tbsp flour with cocoa powder) and fill with chocolate spread or chocolate chips.
Ways to Serve Taiyaki Japanese Fish Dessert Recipe
- Serve warm with a scoop of vanilla, matcha, or strawberry ice cream.
- Pack in lunchboxes as a fun dessert that kids love to show off.
- Plate with fresh berries and a drizzle of chocolate or strawberry sauce.
- Enjoy as a snack with hot green tea, hojicha, or milk.
- Stack a few on a platter for parties or potlucks and watch them vanish.
Storage Success
Let taiyaki cool completely on a rack, then store them in an airtight container at room temperature for up to 1 day. After that, move them to the fridge and keep them for 3–4 days, or freeze them for up to 1 month with parchment between layers. Reheat in a toaster oven or air fryer until the outside crisps again and the center warms through. Avoid microwaving too long, since that softens the exterior and turns the texture a bit rubbery.
Taiyaki Japanese Fish Dessert Recipe
Ingredients
Instructions
- In a bowl, whisk together the flour, baking powder, sugar, and salt until evenly combined.
- In a separate bowl, whisk the egg, milk, oil, and vanilla extract (if using) until smooth.
- Pour the wet ingredients into the dry ingredients while whisking gently until the batter is smooth and pourable, like pancake batter.
- Let the batter rest for 5–10 minutes to hydrate while you heat the pan.
- Place the sweet red bean paste in a small bowl and stir to loosen the texture slightly so it is easy to scoop.
- Preheat the taiyaki pan over medium-low heat for a few minutes.
- Lightly brush both sides of the taiyaki pan with neutral oil or spray with nonstick spray, then reduce heat to low-medium.
- Pour a thin layer of batter into one side of the taiyaki pan, filling each fish mold about 60–70% full.
- Use the back of a spoon to nudge the batter into the tail and fin areas so they are fully covered.
- Add about 1 to 1 1/2 tablespoons of red bean paste into the center of each fish, focusing on the thicker belly area.
- Spoon a little more batter over the filling to cover it and bring the level close to the top of the mold without overflowing.
- Close the pan so the top and bottom molds meet, then cook over low-medium heat for about 2–3 minutes.
- Flip the pan and cook the other side for another 2–3 minutes.
- Open the pan slightly to check one taiyaki; if pale, close and continue cooking 1–2 minutes more per side until deep golden brown and slightly crisp at the edges.
- Remove one taiyaki and cut it open to confirm the batter is cooked through with no wet streaks around the filling. Adjust heat or time slightly for the remaining batches if needed.
- Transfer cooked taiyaki to a cooling rack so steam can escape and the exterior stays crisp.
- Serve warm, optionally dusted with powdered sugar or paired with ice cream or fresh fruit.
Notes
Approximate per 1 taiyaki (1 of 8): 150–170 calories; fat 6 g; saturated fat 1 g; carbohydrates 23 g; fiber 1 g; sugars 8 g; protein 4 g; sodium 90 mg. Values will vary based on exact fillings, brands, and portion size.