

Yaki Onigiri Japanese Grilled Rice Balls Recipe tastes smoky, nutty, a little salty-sweet, and wildly comforting for something made mostly of rice. It works perfectly for busy home cooks who want a snack, lunchbox hero, or easy side dish in under 40 minutes. I first learned this in a tiny Tokyo izakaya, and I still chase that same toasty rice smell in my own kitchen.
Why Yaki Onigiri Japanese Grilled Rice Balls Recipe Is Worth It
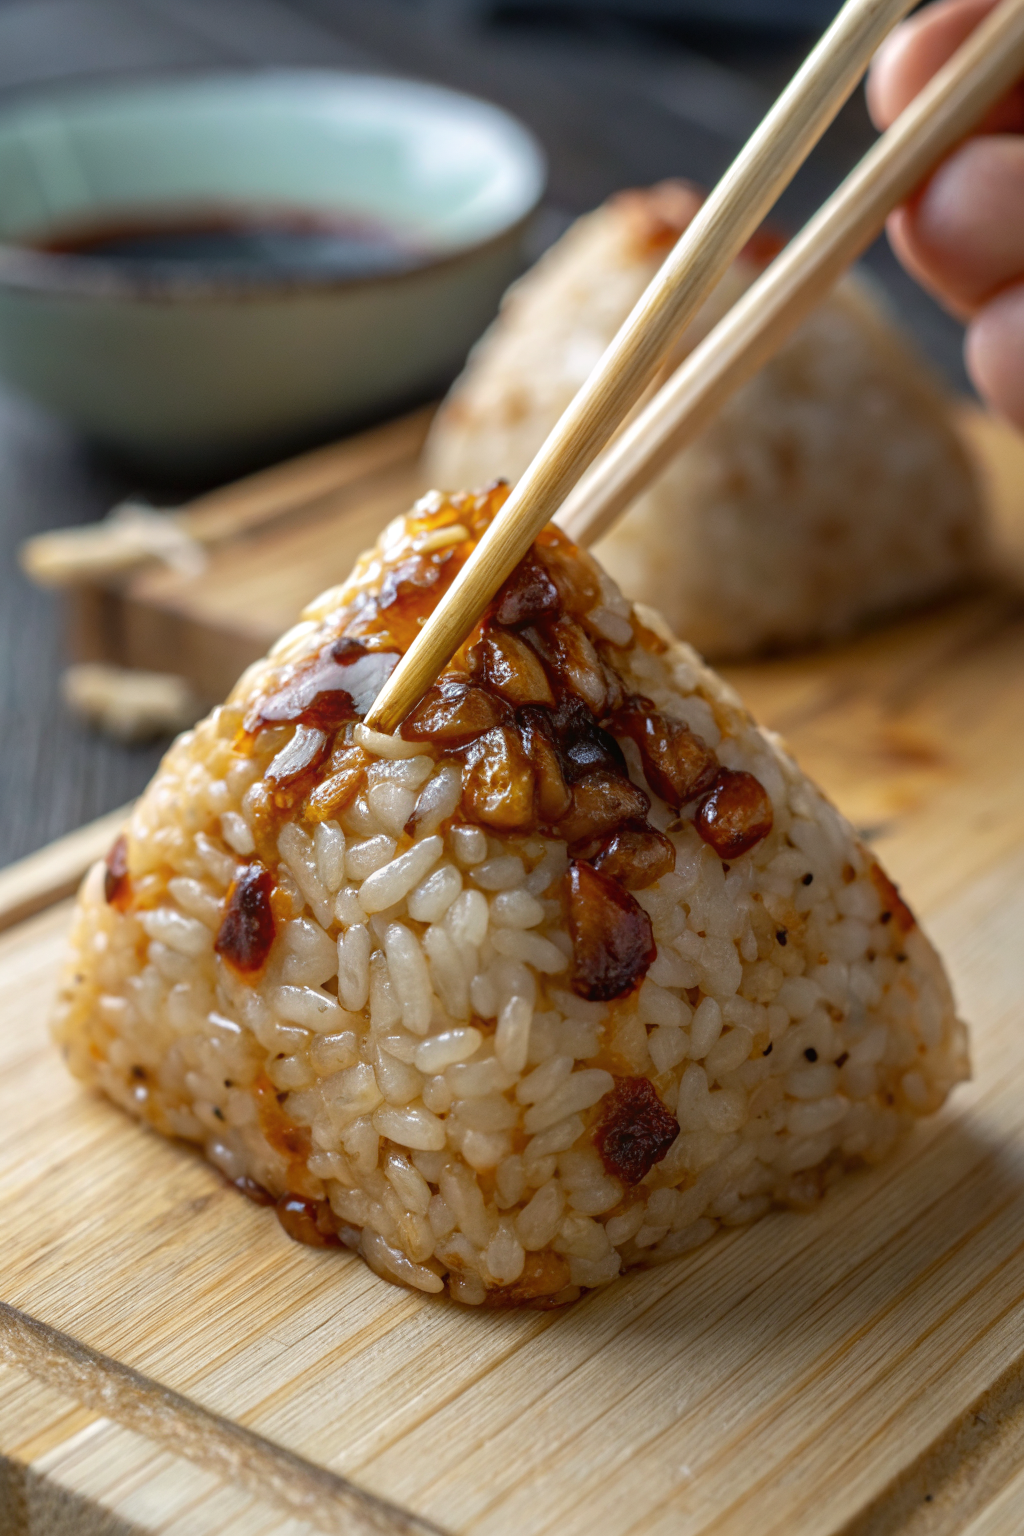
Yaki onigiri hits that magical spot between crispy and chewy, like the best part of the rice at the bottom of a pot but shaped into a cute triangle. The soy glaze adds umami and a little caramelization, so every bite tastes warm, savory, and deeply satisfying.
You can pack these grilled rice balls in bento boxes, serve them with miso soup, or keep a stash in the freezer for snack emergencies. The recipe uses simple pantry staples, and you can cook them on a skillet, grill pan, or outdoor grill, so no special gear stands between you and toasty rice happiness.
“This Yaki Onigiri Japanese Grilled Rice Balls Recipe tastes like crunchy, smoky rice magic and disappears from the plate in minutes. ★★★★★”
Ingredients You Need
Rice
- 2 cups uncooked Japanese short-grain rice (sushi rice style; brands like Kokuho Rose, Nishiki, or Tamaki Gold work great)
- 2 ¼ cups water (adjust slightly per rice package directions)
- ½ teaspoon fine sea salt
Soy glaze
- 2 tablespoons soy sauce (use tamari or gluten-free soy if you avoid gluten)
- 1 tablespoon mirin (Japanese sweet rice wine; swap with 1 tablespoon water + ½ teaspoon sugar if needed)
- 1 teaspoon sugar (white or light brown)
- 1 teaspoon toasted sesame oil
For shaping and grilling
- Neutral oil with high smoke point (canola, avocado, or grapeseed) for brushing pan and rice balls
- 1–2 tablespoons toasted sesame seeds (optional, for coating or sprinkling)
- 1–2 sheets nori (roasted seaweed), cut into strips or rectangles (optional but classic)
- Flaky sea salt, to taste
Optional flavor add-ins
- 1–2 tablespoons furikake rice seasoning (check label if you need gluten-free)
- 1 tablespoon finely chopped scallions
- 1 tablespoon finely chopped pickled plum (umeboshi) or pickled radish (takuan)
- 1 tablespoon cooked salmon flakes or canned salmon, well drained
- A pinch of shichimi togarashi (Japanese chili spice mix) for heat
Equipment
- Rice cooker or medium saucepan with lid
- Large bowl for mixing and cooling rice
- Small bowl of water and a pinch of salt for dipping hands
- Nonstick skillet, cast-iron skillet, grill pan, or outdoor grill
- Silicone brush or small spoon for glaze
- Spatula or tongs
Quick Tips & substitutions
- Use Japanese short-grain rice only; long-grain or jasmine rice will not hold shape well.
- Cook the rice slightly firm so it grills better and stays chewy instead of mushy.
- Cool the rice until warm, not hot, so you avoid burned fingers and keep the grains easier to shape.
- Dip your hands in lightly salted water before shaping to prevent sticking and to season the rice.
- Press the rice balls firmly so they hold together on the grill, but do not crush them into dense bricks.
- Use tamari instead of soy sauce if you want a gluten-free version.
- Swap mirin with a mix of water and sugar if you do not keep Japanese pantry items on hand.
- Use a nonstick or well-seasoned cast-iron pan with a thin oil layer to avoid stuck, broken rice balls.
- Brush glaze only after the rice surface turns dry and slightly crisp so it does not fall apart.
- Freeze extra grilled rice balls on a tray, then bag them for quick snacks later.
How to Make Yaki Onigiri Japanese Grilled Rice Balls Recipe
Cook the rice
- Rinse the rice under cold water. Swirl it with your hand and drain several times until the water runs mostly clear.
- Add the rinsed rice and measured water to a rice cooker or saucepan. Cook according to your rice cooker instructions, or bring to a boil on the stove, then cover and simmer on low until the water absorbs, about 15 minutes.
- Turn off the heat and let the rice sit covered for 10 minutes so the steam finishes the cooking and the texture evens out.
- Transfer the hot rice to a large bowl, sprinkle in the ½ teaspoon salt, and fluff gently with a rice paddle or spatula.
Cool and season the rice
- Spread the rice slightly in the bowl so steam can escape. Let it cool until warm but still pliable, about 10–15 minutes.
- If you want fillings or seasonings inside, mix in furikake, scallions, or small bits of salmon gently so you do not crush the grains.
- Keep a small bowl of water with a pinch of salt near your work area to dip your hands while shaping.
Shape the rice balls
- Wet your hands lightly in the salted water and rub them together. Take about ½ cup of warm rice in your hands.
- Press the rice together into a tight ball first, then shape it into a triangle by pressing the top corner between your thumbs and index fingers.
- Rotate and press gently until you get a firm triangle about 1 to 1 ½ inches thick.
- Place each shaped onigiri on a tray or plate. Repeat with the remaining rice, wetting your hands as needed.
Mix the soy glaze
- In a small bowl, stir together soy sauce, mirin, sugar, and toasted sesame oil until the sugar dissolves.
- Taste and adjust the sweetness or saltiness to your preference with a bit more sugar or soy.
- Keep the glaze near the stove with a brush or spoon ready.
Grill the onigiri
- Heat a nonstick or cast-iron skillet over medium heat and add a thin film of neutral oil. Swirl to coat the surface.
- Place the rice triangles in the pan with a little space between them. Cook without moving them for 3–4 minutes, until the bottom turns golden and feels firm.
- Flip gently with a spatula or tongs and cook the other side for another 3–4 minutes. Aim for a crisp, lightly browned crust, not a dark burn.
- If you use an outdoor grill or grill pan, oil the grates well and cook over medium heat, watching closely so the rice does not stick or fall apart.
Glaze and finish
- Once both sides feel crisp and lightly browned, lower the heat slightly. Brush a thin layer of soy glaze on the top side of each onigiri.
- Cook 30–60 seconds, then flip and brush the other side. The glaze will sizzle and cling to the crust.
- Cook another 30–60 seconds per side until the glaze caramelizes and smells toasty, flipping once or twice so it does not scorch.
- Transfer the grilled rice balls to a plate, sprinkle with sesame seeds, and wrap a strip of nori around the bottom if you like.
Recipe Variations
-
Gluten-free
- Use tamari or certified gluten-free soy sauce.
- Check furikake and shichimi labels, or season with plain sesame seeds and salt.
-
Vegan
- Keep the base recipe as is; it already counts as vegan.
- Add chopped pickled plum, pickled vegetables, or sautéed mushrooms inside for extra flavor.
-
Low carb–inspired
- Use smaller portions and pair with a big salad or miso soup loaded with vegetables.
- Shape mini onigiri to control serving size more easily.
-
Extra protein
- Add flaked cooked salmon, tuna, or shredded chicken inside the rice.
- Serve with miso soup that includes tofu and wakame.
-
Flavor add-ins
- Mix in furikake, chopped shiso leaves, or scallions with the rice.
- Sprinkle shichimi togarashi on top for a spicy kick.
Ways to Serve Yaki Onigiri Japanese Grilled Rice Balls Recipe
- Pack in bento boxes with sliced cucumbers, cherry tomatoes, and fruit.
- Serve alongside miso soup and a simple salad for a light meal.
- Offer as a snack with green tea or iced barley tea.
- Pair with grilled fish or teriyaki chicken as a side dish.
- Set out on a platter at potlucks or game nights as a finger food.
Storage Success
Let the grilled rice balls cool to room temperature before you store them so condensation does not make them soggy. Keep them in an airtight container in the fridge for up to 2 days, and reheat in a skillet over low heat or in a toaster oven until warm and crisp again. For longer storage, freeze them on a tray until solid, then move them to a freezer bag and keep them for up to 1 month. Reheat frozen yaki onigiri straight from the freezer in a covered skillet with a splash of water or in a toaster oven until hot in the center and crunchy on the outside.
Yaki Onigiri Japanese Grilled Rice Balls
Ingredients
Instructions
- In a small bowl, mix together the soy sauce, mirin, sugar, and sesame oil (if using) until the sugar dissolves. Set the glaze aside.
- Place the warm cooked rice in a large bowl and sprinkle with the sea salt. Gently fold to distribute the salt without smashing the grains.
- With damp hands, divide the rice into 8 equal portions. Shape each portion firmly into a triangle or round rice ball about the size of your palm, pressing enough so it holds together well.
- Preheat a nonstick skillet or grill pan over medium heat. Lightly brush the surface with neutral oil.
- Place the rice balls in the pan and cook for 3–4 minutes per side, or until a light golden crust forms and they feel firm when gently pressed.
- Brush the tops of the rice balls with some of the soy glaze, flip, and cook for 1–2 minutes to let the glaze caramelize lightly. Brush the second side with glaze, flip again, and cook another 1–2 minutes. Repeat once more if you like a stronger glaze flavor, taking care not to burn.
- Transfer the grilled rice balls to a plate. Sprinkle with toasted sesame seeds and wrap a strip of nori around each, if desired. Serve hot or warm.
Notes
Approximate per serving (1 of 4 servings): 220 calories; fat 4 g; saturated fat 0.5 g; carbohydrates 42 g; fiber 1 g; sugars 3 g; protein 5 g; sodium 520 mg. Values will vary based on exact ingredients, brands, and portion size.
Leave a Reply