
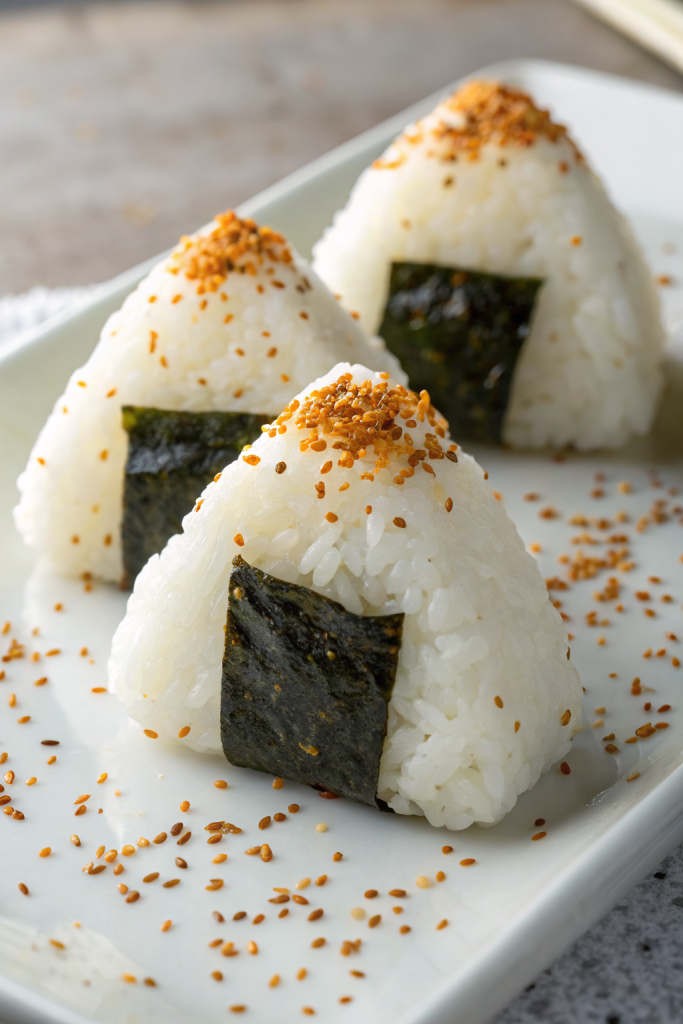
How to Make Tuna Mayo Onigiri tastes creamy, savory, a little tangy, and perfectly salty, wrapped in warm rice with a crisp nori hug. It works great for busy folks who want a quick 30-minute snack, lunchbox idea, or easy dinner that still feels a bit special. I started packing these for my own workdays years ago, and they still beat any sad desk salad by a mile.
Why Choose This Tuna Mayo Onigiri Recipe
This tuna mayo onigiri recipe uses simple pantry ingredients but delivers big flavor and satisfying texture. You get tender rice, rich tuna, and cool mayo with a hint of soy and sesame that tastes like comfort food in portable form.
You can prep everything ahead, shape the rice balls in minutes, and keep them in the fridge for grab-and-go meals. Kids usually love them, adults inhale them, and they travel well in lunchboxes or on road trips.
“These tuna mayo onigiri disappeared from the lunchbox before noon and tasted better than anything from the convenience store. ★★★★★”
Ingredients You’ll Need
Rice
- 2 cups uncooked Japanese short-grain rice
- Use sushi rice or any labeled “short-grain Japanese-style” rice.
- Brands like Kokuho Rose, Nishiki, or Calrose work nicely.
- 2 1/4 cups water for cooking rice
- 1/2 teaspoon fine sea salt
- 1 teaspoon rice vinegar (optional, for a subtle tang and shine)
Tuna Mayo Filling
- 1 can tuna in oil, 5 to 6 ounces, drained
- Tuna in oil gives richer flavor, but tuna in water works if you prefer it lighter.
- 3 to 4 tablespoons Japanese mayonnaise
- Kewpie tastes best here, but regular mayo works in a pinch.
- 1 teaspoon soy sauce
- 1/2 teaspoon rice vinegar or lemon juice
- 1/2 teaspoon sugar
- 1 to 2 teaspoons finely chopped green onion or chives (optional)
- 1 teaspoon toasted sesame seeds (optional, white or black)
- Freshly ground black pepper to taste
Nori & Seasoning
- 3 to 4 full sheets nori, cut into strips or rectangles
- Use roasted sushi nori; choose a brand labeled “yaki nori” for best flavor.
- Extra fine sea salt for seasoning the rice while shaping
- Optional mix-ins for rice:
- 1 to 2 teaspoons furikake seasoning
- Extra toasted sesame seeds
Pantry Shortcuts & Substitutions
- Use pre-cooked frozen rice if you have it; just reheat until hot and fluffy.
- Swap canned salmon for tuna if you want a different flavor.
- Use light mayo if you prefer, but add a splash more oil or sesame oil for richness.
- Use soy sauce packets from takeout if you run low on bottled soy.
Equipment
- Rice cooker, Instant Pot, or a medium saucepan with lid
- Mixing bowl for tuna mayo
- Rice paddle or silicone spatula
- Small bowl of salted water for dipping hands
- Clean kitchen towel or plastic wrap
- Kitchen scissors for cutting nori
- Measuring spoons and cups
Tips & Tricks
- Rinse the rice 3 to 4 times until the water runs mostly clear so the grains cook fluffy and not gummy.
- Let the cooked rice rest covered for 10 minutes, then fluff it to release steam and improve texture.
- Season the rice lightly with salt while it is still warm so the flavor spreads evenly.
- Keep your hands slightly wet and lightly salted when shaping onigiri so the rice does not stick and the surface tastes seasoned.
- Use warm rice, not hot or cold, to shape onigiri; hot rice burns your hands and cold rice cracks.
- Do not overfill; use about 1 to 1 1/2 tablespoons tuna mayo per onigiri so the filling stays inside.
- Wrap nori just before eating if you want it crisp; wrap earlier if you like it softer and chewy.
- Chill the tuna mayo filling before shaping so it firms up and stays in the center.
- Use plastic wrap to help shape if you feel nervous about handling sticky rice directly.
- Pack onigiri tightly enough to hold together, but not so tight that the rice turns dense and hard.
How to Make Tuna Mayo Onigiri
1: Cook the Rice
- Rinse the rice in a bowl with cold water, swishing gently, then drain. Repeat until the water looks mostly clear.
- Add the rinsed rice and measured water to your rice cooker or pot. Cook according to rice cooker instructions, or bring to a boil on the stove, then cover and simmer on low for about 15 minutes.
- Turn off the heat and let the rice sit covered for another 10 minutes. Fluff with a rice paddle, then sprinkle in 1/2 teaspoon salt and 1 teaspoon rice vinegar if using, and gently fold to season.
2: Mix the Tuna Mayo Filling
- Add drained tuna to a mixing bowl and break it into small flakes with a fork.
- Stir in 3 tablespoons Japanese mayo, soy sauce, rice vinegar or lemon juice, sugar, and black pepper.
- Taste and adjust with more mayo for creaminess or more soy for saltiness.
- Fold in green onion and sesame seeds if you use them, then chill the filling in the fridge while the rice cools slightly.
3: Prep Your Shaping Station
- Set out a small bowl of water and dissolve a pinch of salt in it.
- Cut nori sheets into strips or rectangles that fit around the bottom or sides of each onigiri.
- Place a clean kitchen towel or a sheet of plastic wrap on your work surface.
- Keep the warm rice in the pot with the lid on so it stays moist while you work.
4: Shape the Onigiri by Hand
- Wet your hands lightly with the salted water and rub them together to spread the salt.
- Scoop about 1/3 to 1/2 cup warm rice into one hand and flatten it slightly into a thick disk.
- Place about 1 to 1 1/2 tablespoons tuna mayo in the center.
- Use your other hand to gather the rice around the filling, covering it completely.
- Gently press and rotate the rice ball between your hands to form a triangle or oval. Keep the pressure firm but gentle so the rice sticks together without crushing.
- Repeat with the remaining rice and filling, wetting and salting your hands as needed.
5: Shape with Plastic Wrap (Alternative Method)
- Lay a square of plastic wrap on the counter and sprinkle a tiny pinch of salt in the center.
- Spoon 1/3 to 1/2 cup rice onto the plastic, then make a small well in the middle.
- Add the tuna mayo filling into the well and cover it with a spoonful of rice if needed.
- Gather the plastic wrap around the rice and twist the top.
- Use your hands over the plastic to shape a triangle or ball, pressing gently until it feels compact and even.
- Unwrap just before adding nori or packing in a lunchbox.
6: Add the Nori
- Right before serving or packing, wrap a strip or rectangle of nori around the bottom or side of each onigiri.
- Press the nori lightly so it sticks to the rice.
- If you pack them for later, you can keep nori strips separate in a small bag and wrap them right before eating to keep them crisp.
7: Taste and Adjust Seasoning
- Try one onigiri while still slightly warm.
- If the rice tastes bland, sprinkle a little salt on your hands before shaping the next batch or mix a pinch of salt into the remaining rice.
- If you want more flavor, sprinkle a bit of furikake on the outside or mix some into the rice before shaping.
What to Serve with Tuna Mayo Onigiri
Serve tuna mayo onigiri with miso soup, a simple cucumber salad, or sliced fruit for a balanced meal. Add edamame, carrot sticks, or cherry tomatoes for color and crunch in a bento box. Pack them with green tea, iced barley tea, or flavored sparkling water for a refreshing drink. You can also pair them with a small side of kimchi or pickled radish if you enjoy a little tang and spice.
Storage Options
- Store tuna mayo onigiri in an airtight container in the fridge for up to 2 days; keep nori separate if you want it crisp.
- Wrap each onigiri tightly in plastic wrap before refrigerating to keep the rice from drying out.
- Freeze plain rice onigiri without mayo filling for up to 1 month; thaw in the fridge and reheat gently before adding any filling.
- Reheat chilled onigiri in the microwave, loosely covered, for 20 to 30 seconds until just warm and soft, then add fresh nori and enjoy.

Tuna Mayo Onigiri Recipe
Ingredients
Instructions
- Rinse the rice in cold water several times until the water runs mostly clear, then drain well.
- Add the rinsed rice and 2 1/2 cups water to a rice cooker or pot and cook according to the rice cooker instructions or bring to a boil, then cover and simmer on low until the water is absorbed and rice is tender, about 15–20 minutes. Let rest covered for 10 minutes.
- While the rice cooks, prepare the filling: in a bowl combine the drained tuna, Japanese mayonnaise, soy sauce, 1/4 teaspoon salt, black pepper if using, and rice vinegar if using. Mix until creamy and adjust seasoning to taste.
- Transfer the hot cooked rice to a wide bowl. While still warm, lightly season with a pinch or two of salt and gently fold to distribute without mashing the grains. Let cool until just warm to the touch.
- Prepare a small bowl of water and a pinch of salt. Wet your hands lightly with water, then rub a little salt onto your palms to prevent sticking and lightly season the rice surface.
- Scoop about 1/2 cup of warm rice into your hand and gently flatten it into a thick disk. Place about 1 tablespoon of the tuna mayo filling in the center.
- Fold the rice around the filling, sealing it completely, and gently shape into a triangle or ball by pressing lightly with your hands, taking care not to crush the rice.
- Repeat with the remaining rice and filling to make about 8 onigiri, re-wetting and salting your hands as needed.
- Just before serving, wrap each onigiri with a strip or rectangle of nori, shiny side out, pressing gently so it adheres.
- Serve immediately at room temperature, or pack in a bento box once cooled completely.
Notes
Approximate per 1 onigiri (1 of 8): 190 calories; fat 6 g; saturated fat 1 g; carbohydrates 27 g; fiber 1 g; sugars 1 g; protein 7 g; sodium 320 mg. Values will vary based on brands, exact rice yield, and portion size.
Leave a Reply