
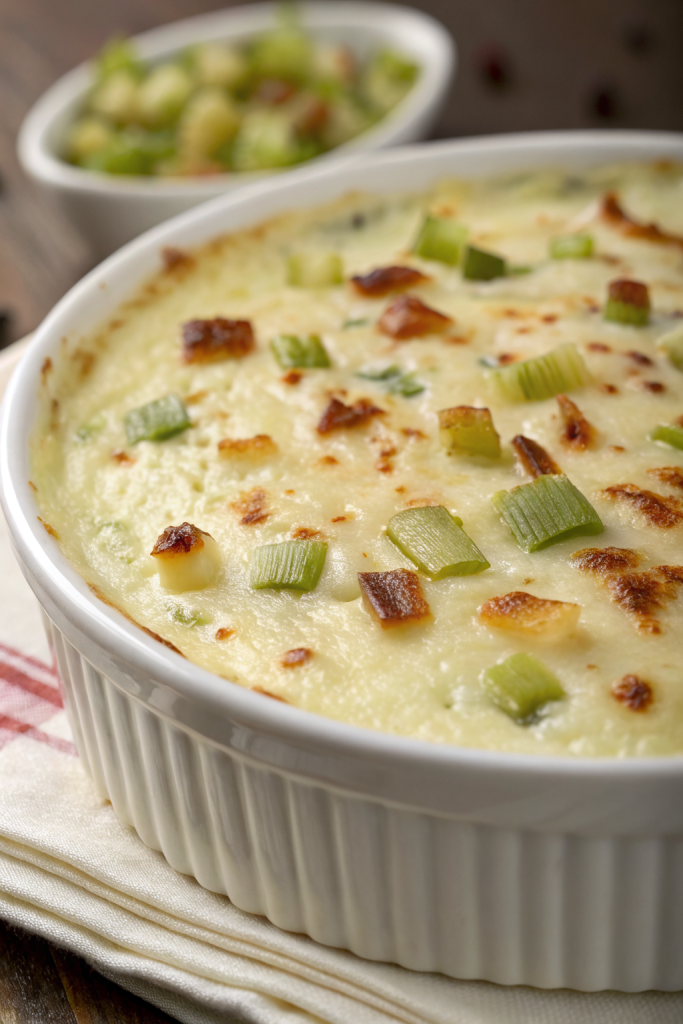
Cheesy Hatch Green Chile Dip Recipe hits that perfect balance of creamy, cheesy, smoky, and just-spicy-enough that keeps everyone hovering around the bowl. It works for busy weeknights, game days, or last‑minute parties, and you can pull it together in about 30 minutes total. I first made this on a sweltering August afternoon in New Mexico, and my friends scraped the dish so clean I almost didn’t need to wash it.
Why Choose This Cheesy Hatch Green Chile Dip Recipe
This Cheesy Hatch Green Chile Dip Recipe uses real roasted Hatch chiles, so the flavor tastes deeper and more complex than dips that rely only on jalapeños or canned green chiles. The combo of cream cheese, sour cream, and two cheeses gives a rich, scoopable texture that still holds up on a chip.
You can bake it in the oven or bubble it in a cast iron skillet on the grill, so it fits both indoor and backyard cooking. You also control the heat level, which helps when your family includes both chile fanatics and “mild only” folks.
“This Cheesy Hatch Green Chile Dip Recipe disappeared in 10 minutes at our party, and guests asked for the recipe before they even wiped their hands. ★★★★★”
Ingredients You’ll Need
Dairy & Base
- 8 ounces cream cheese, softened
- Use full-fat for the creamiest texture; whipped cream cheese works in a pinch but thickens less.
- 1 cup sour cream
- Greek yogurt works as a lighter swap; use whole milk yogurt for best flavor.
- 1 cup mayonnaise
- I like Duke’s or Hellmann’s; avocado oil mayo works if you avoid seed oils.
Cheese
- 1 ½ cups shredded Monterey Jack cheese
- Pepper Jack adds extra heat if you enjoy more spice.
- 1 cup shredded sharp cheddar cheese
- Pre-shredded saves time, but freshly grated melts smoother and tastes richer.
- ¼ cup grated Parmesan cheese
- Adds a salty, nutty kick that balances the creamy base.
Hatch Green Chiles & Flavor Boosters
- 1 ½ to 2 cups roasted Hatch green chiles, chopped
- Use mild, medium, or hot depending on your heat preference.
- Freshly roasted tastes best, but frozen roasted Hatch chiles or canned Hatch brand chiles work well when the season ends.
- 3 cloves garlic, minced
- ½ small yellow onion, very finely diced
- 1 teaspoon ground cumin
- ½ teaspoon smoked paprika
- ½ teaspoon chili powder
- ½ teaspoon kosher salt, plus more to taste
- ¼ teaspoon black pepper
- Juice of ½ lime
- 2 tablespoons chopped fresh cilantro (optional, but highly recommended)
- 1 small jalapeño, minced (optional, for extra kick)
Optional Mix‑ins
- ½ cup canned corn kernels, drained and patted dry
- ½ cup cooked, crumbled bacon
- ¼ cup chopped green onion for topping
Equipment
- Medium mixing bowl
- Large mixing bowl
- Rubber spatula or wooden spoon
- 8×8 baking dish, pie dish, or small cast iron skillet
- Cutting board and sharp knife
- Oven or grill
- Measuring cups and spoons
Tips & Tricks
- Soften the cream cheese fully so it blends smooth and avoids lumps.
- Drain roasted Hatch green chiles well; excess liquid can make the dip watery.
- Taste your chiles before adding; adjust the amount if they run extra hot that day.
- Mix the base ingredients first, then fold in cheese and chiles to keep the texture light.
- Use a shallow baking dish so the top browns nicely and the center heats evenly.
- Sprinkle a little extra cheese on top for a bubbly, golden crust.
- Let the dip rest 5 to 10 minutes after baking so it thickens and stops burning mouths.
- Keep a “mild” side batch without jalapeño for kids or spice-sensitive guests.
- Roast extra Hatch chiles in season and freeze them in small bags for quick future batches.
- Serve the dip warm, not boiling hot, so the flavors come through and chips do not break as easily.
How to Make Cheesy Hatch Green Chile Dip Recipe
Step 1: Prep the Oven and Pan
Preheat your oven to 375°F. Grease an 8×8 baking dish, pie dish, or small cast iron skillet with a light coating of oil or nonstick spray. Set the dish aside while you mix the dip.
Step 2: Mix the Creamy Base
In a large bowl, add softened cream cheese, sour cream, and mayonnaise. Beat or stir until the mixture turns smooth and fluffy with no visible cream cheese chunks. Scrape down the sides of the bowl so everything blends evenly.
Step 3: Add Seasonings and Aromatics
Stir in minced garlic, finely diced onion, cumin, smoked paprika, chili powder, salt, pepper, and lime juice. Mix until the seasonings distribute evenly through the creamy base. Taste a tiny bit and adjust salt or lime if you want more brightness.
Step 4: Fold in Hatch Green Chiles
Add the chopped roasted Hatch green chiles to the bowl. If you use jalapeño or corn, add them now as well. Fold gently with a spatula so the chiles spread throughout without breaking down into mush.
Step 5: Add the Cheese
Pour in Monterey Jack, cheddar, and Parmesan. Stir until the cheeses mix evenly with the chile mixture and no pockets of plain cheese remain. The mixture should feel thick and scoopable.
Step 6: Transfer to Baking Dish
Spoon the dip mixture into your prepared baking dish or skillet. Spread it into an even layer so it bakes uniformly. Sprinkle a small handful of extra shredded cheese on top if you want a more dramatic cheesy crust.
Step 7: Bake Until Hot and Bubbly
Place the dish in the preheated oven. Bake for 18 to 25 minutes, until the edges bubble and the top turns lightly golden. If you like a deeper browned top, switch to broil for 1 to 2 minutes and watch closely so it does not burn.
Step 8: Finish and Garnish
Remove the dip from the oven and let it sit for 5 to 10 minutes. Top with chopped cilantro and green onion if you use them. Serve warm with your favorite dippers and enjoy the cheesy Hatch green chile goodness.
What to Serve with Cheesy Hatch Green Chile Dip Recipe
This Cheesy Hatch Green Chile Dip Recipe pairs beautifully with sturdy tortilla chips, warm flour or corn tortillas, or crisp pita chips. I also love it with sliced bell peppers, cucumber rounds, jicama sticks, and carrot coins for a fresher option. Spoon it over baked potatoes, tuck it into quesadillas, or use it as a topping for grilled chicken or roasted veggies. Serve it alongside sparkling water with lime, iced tea, or a fruity mocktail to balance the richness.
Storage Options
- Cool leftovers to room temperature, then store in an airtight container in the fridge for up to 4 days.
- Reheat in a small baking dish at 350°F for 10 to 15 minutes until hot and melty, or warm individual portions in the microwave in 20 to 30 second bursts, stirring between each.
- Freeze tightly wrapped portions for up to 2 months; thaw overnight in the fridge before reheating.
- Stir the dip after reheating to bring the creamy texture back together if any slight separation occurs.
Leave a Reply