
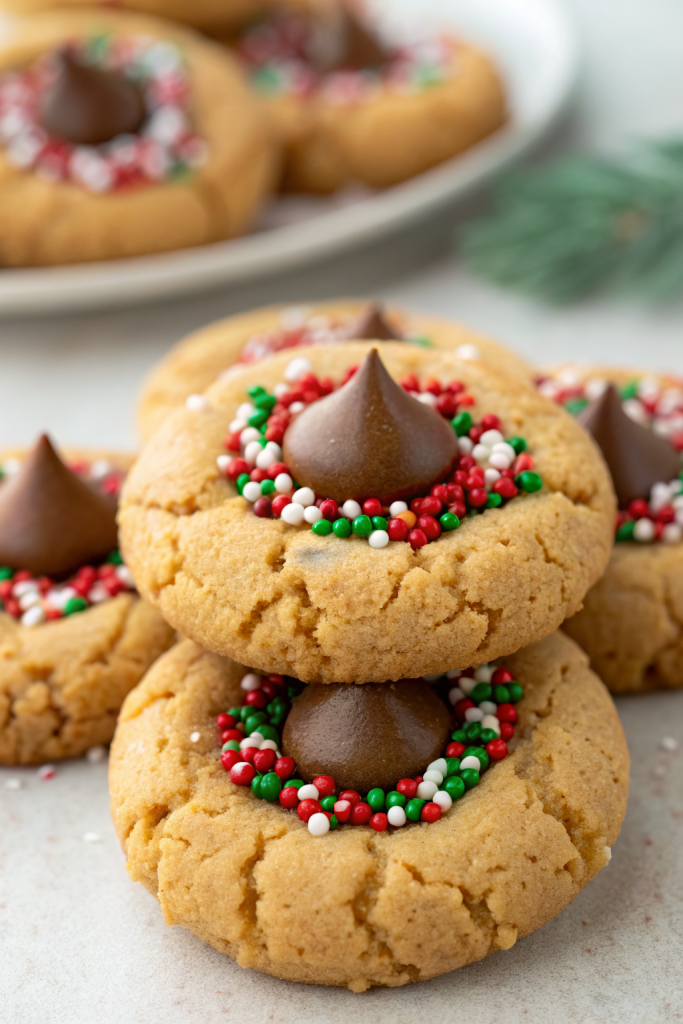
Chocolate Thumbprint Cookies Recipe tastes like a rich brownie and a buttery shortbread cookie had a very chocolatey baby, and it works perfectly for holiday trays, bake sales, or weeknight cravings in about 45 minutes. This recipe suits beginners and seasoned bakers who want a simple, impressive cookie with big chocolate flavor and soft, tender centers. I still bake these for my neighbors every December, and they now drop off butter when they want a fresh batch.
Why Make This Chocolate Thumbprint Cookies Recipe at Home
You control everything at home, from how soft the cookie stays to how dark and rich the chocolate center tastes. Store-bought versions often taste dry or crumbly, while this recipe keeps the cookie tender with a fudgy middle that stays glossy and smooth.
You also customize the filling and toppings to match your style. Kids love sprinkles, adults love flaky salt, and everyone loves that they came out of your oven instead of a plastic tray.
“These chocolate thumbprint cookies taste like tiny bakery treats, but they come together so easily that I felt like I cheated the system. ★★★★★”
Ingredients You Need
Here is everything you need for this Chocolate Thumbprint Cookies Recipe, plus some helpful notes from many test batches.
For the chocolate cookie dough
- Unsalted butter: 1 cup (2 sticks), softened to room temperature
- Use a good quality butter like Kerrygold or Plugrá for richer flavor.
- Granulated sugar: 2/3 cup
- Light brown sugar: 1/3 cup, packed
- Brown sugar adds moisture and a slight caramel note that keeps the cookies soft.
- Large egg yolks: 2
- Save the whites for meringues or an omelet.
- Pure vanilla extract: 2 teaspoons
- Use real vanilla, not imitation, for the best flavor.
- All-purpose flour: 2 cups
- Spoon and level the flour so you avoid dry, dense cookies.
- Unsweetened cocoa powder: 1/2 cup
- Use natural cocoa like Hershey’s or Ghirardelli; Dutch-process also works and gives deeper color.
- Fine sea salt: 1/2 teaspoon
- Baking powder: 1/2 teaspoon
For rolling
- Granulated sugar: 1/3 cup
- This gives a sparkly, slightly crisp exterior.
For the chocolate filling
- Semi-sweet chocolate chips or chopped chocolate: 1 cup
- Use a brand you like to snack on, such as Ghirardelli, Guittard, or Trader Joe’s.
- Heavy cream: 1/3 cup
- This turns the chocolate into a smooth, truffle-like center.
- Butter: 1 tablespoon
- Adds shine and a softer bite.
- Vanilla extract: 1/2 teaspoon
- Fine sea salt: a pinch
- Balances the sweetness and deepens the chocolate flavor.
Optional toppings
- Flaky sea salt
- Holiday sprinkles
- Crushed peppermint candies
- Toasted chopped nuts (pecans, hazelnuts, or almonds)
Equipment
- Large mixing bowl and medium bowl
- Hand mixer or stand mixer with paddle attachment
- Rubber spatula
- Measuring cups and spoons
- Baking sheets
- Parchment paper or silicone baking mats
- Small cookie scoop (about 1 tablespoon size)
- Small spoon or the back of a measuring spoon for the “thumbprint”
- Small saucepan or microwave-safe bowl for the chocolate filling
Tips & Mistakes
- Chill the dough for 20 to 30 minutes if your kitchen feels warm, so the cookies hold their shape.
- Use room temperature butter and egg yolks so the dough mixes smoothly and stays tender.
- Press the thumbprint gently and stop before you crack the edges; if cracks appear, pinch them back together.
- Re-press the indent right after baking while the cookies still feel soft, since they puff slightly in the oven.
- Measure flour lightly and accurately; too much flour leads to dry, crumbly cookies.
- Use good quality chocolate for the filling, since it carries most of the flavor in this Chocolate Thumbprint Cookies Recipe.
- Let the cookies cool before you fill them so the chocolate center sets nicely instead of running.
- Store the filled cookies in a single layer or with parchment between layers so the tops stay pretty.
How to Make Chocolate Thumbprint Cookies Recipe
Step 1: Mix the dry ingredients
Add the flour, cocoa powder, baking powder, and salt to a medium bowl. Whisk until the mixture looks uniform and no cocoa streaks remain. Set the bowl aside.
Step 2: Cream the butter and sugars
Place the softened butter, granulated sugar, and brown sugar in a large mixing bowl. Beat with a hand mixer or stand mixer on medium speed for 2 to 3 minutes until the mixture looks light and fluffy. Scrape the bowl sides so everything mixes evenly.
Step 3: Add egg yolks and vanilla
Add the egg yolks and vanilla extract to the butter mixture. Beat on medium speed until the mixture looks smooth and glossy. Scrape the bowl again to catch any butter at the bottom.
Step 4: Add dry ingredients to form the dough
Pour the dry ingredients into the wet mixture in two additions. Mix on low speed until the dough just comes together and no dry spots remain. Stop mixing as soon as the dough looks uniform so you avoid tough cookies.
If the dough feels very soft or sticky, place it in the fridge for 20 to 30 minutes. Slightly chilled dough rolls more easily and keeps a neat shape.
Step 5: Shape and coat the cookies
Preheat your oven to 350°F and line baking sheets with parchment paper. Scoop the dough into 1 tablespoon portions and roll each portion into a smooth ball between your palms.
Pour the extra granulated sugar into a small bowl. Roll each dough ball in the sugar until fully coated. Place the balls on the prepared baking sheets, leaving about 2 inches between them.
Step 6: Make the thumbprints
Use your thumb, the back of a small spoon, or the end of a rounded measuring spoon to press a deep indent into the center of each dough ball. Press almost to the bottom but not all the way through. Shape any cracked edges back into a neat circle with your fingers.
Step 7: Bake the cookies
Bake one sheet at a time for 9 to 11 minutes, until the edges look set and the tops lose their raw shine. The cookies should still feel soft in the center. They firm up as they cool, which keeps the texture fudgy instead of dry.
Right after you pull the cookies from the oven, gently press the centers again with the same tool you used earlier. This refreshes the thumbprint and makes more room for the chocolate filling. Let the cookies cool on the baking sheet for 5 minutes, then move them to a wire rack to cool completely.
Step 8: Make the chocolate filling
Place the chocolate and butter in a heatproof bowl. Heat the heavy cream in a small saucepan over medium heat until it steams and tiny bubbles appear around the edges. Pour the hot cream over the chocolate and let it sit for 2 minutes.
Add the vanilla and a pinch of salt. Stir slowly from the center outward until the mixture turns smooth and glossy. If a few bits of chocolate remain, microwave the bowl in 10 second bursts and stir until they melt.
Step 9: Fill the thumbprints
Use a small spoon or a piping bag to fill each cooled cookie center with the warm chocolate mixture. Fill almost to the top, since the filling sets as it cools. If you want toppings like flaky salt, sprinkles, or crushed peppermint, add them while the chocolate still feels soft.
Let the filled cookies sit at room temperature until the centers firm up. This usually takes 30 to 45 minutes, depending on your kitchen temperature. After that, the Chocolate Thumbprint Cookies Recipe delivers perfect bites with a soft cookie and truffle-like middle.
Variations I've Tried
- Salted caramel center: Fill the thumbprints with thick caramel sauce instead of chocolate, then sprinkle flaky salt on top. This version tastes like a caramel brownie in cookie form.
- Peppermint mocha: Add 1/2 teaspoon peppermint extract to the chocolate filling and top with crushed candy canes. This works especially well for winter cookie trays.
- Nutty crunch: Roll the dough balls in finely chopped toasted nuts instead of sugar before baking. The nuts add texture and a roasted flavor that pairs nicely with the chocolate.
- White chocolate swirl: Fill the thumbprints with dark chocolate, then drizzle melted white chocolate over the top. This gives a bakery-style look with very little extra effort.
How to Serve Chocolate Thumbprint Cookies Recipe
Serve these cookies at room temperature so the centers taste creamy and the cookie base stays tender. Pair them with cold milk, hot chocolate, coffee, or a mug of tea for a cozy treat. They shine on holiday cookie platters, but they also work as a simple dessert after a weeknight dinner. I also pack them in lunchboxes as a surprise treat, since they hold their shape and do not crumble easily.
How to store
- Room temperature: Store the cookies in an airtight container at room temperature for 3 to 4 days. Keep them in a cool spot so the chocolate centers stay firm.
- Fridge: Place cookies in a single layer or separate layers with parchment and refrigerate for up to 1 week. Let them sit at room temperature for 15 to 20 minutes before serving so the centers soften.
- Freezer (unbaked dough): Shape the dough balls, press the thumbprints, and freeze on a tray until solid, then transfer to a freezer bag for up to 2 months. Bake from frozen, adding 1 to 2 minutes to the baking time, then fill with fresh chocolate.
- Freezer (baked and filled cookies): Freeze the finished cookies in a single layer until firm, then stack them with parchment between layers in a container for up to 2 months. Thaw at room temperature for about 1 hour; the chocolate centers soften again and taste freshly made.
Chocolate Thumbprint Cookies Recipe
Ingredients
Instructions
- In a medium bowl, whisk together the all-purpose flour, unsweetened cocoa powder, baking powder, and fine sea salt until evenly combined. Set aside.
- In a large mixing bowl, beat the softened butter, granulated sugar, and light brown sugar with a hand mixer or stand mixer on medium speed for 2 to 3 minutes, until light and fluffy. Scrape down the sides of the bowl.
- Add the egg yolks and vanilla extract to the creamed butter mixture and beat on medium speed until smooth and glossy, scraping the bowl as needed.
- Add the dry ingredients to the wet mixture in two additions, mixing on low speed just until a soft dough forms and no dry streaks remain. If the dough feels very soft or sticky, chill it for 20 to 30 minutes.
- Preheat the oven to 350°F (175°C). Line baking sheets with parchment paper. Scoop the dough into 1-tablespoon portions and roll each into a smooth ball between your palms.
- Place the 1/3 cup granulated sugar for rolling in a small bowl. Roll each dough ball in the sugar to coat, then arrange them on the prepared baking sheets, spacing them about 2 inches apart.
- Using your thumb, the back of a small spoon, or the rounded end of a measuring spoon, press a deep indent into the center of each dough ball, being careful not to press all the way through. Smooth any cracked edges with your fingers.
- Bake one sheet at a time for 9 to 11 minutes, or until the edges look set and the tops lose their raw shine but the centers are still soft. Immediately after removing from the oven, gently press the centers again to refresh the thumbprint. Cool on the sheet for 5 minutes, then transfer to a wire rack to cool completely.
- To make the chocolate filling, place the semi-sweet chocolate and butter in a heatproof bowl. Heat the heavy cream in a small saucepan over medium heat until steaming and just beginning to bubble at the edges, then pour it over the chocolate. Let sit for 2 minutes.
- Add the vanilla extract and a pinch of sea salt, then stir gently from the center outward until the mixture is smooth and glossy. If small bits of chocolate remain, microwave in 10-second bursts and stir until fully melted.
- Using a small spoon or piping bag, fill each cooled cookie indent with the warm chocolate mixture, almost to the top. While the chocolate is still soft, add optional toppings such as flaky sea salt, sprinkles, crushed peppermint, or chopped nuts. Let the cookies sit at room temperature for 30 to 45 minutes, or until the centers are set.
Notes
Approximate per 1 cookie (1 of 36): 140 calories; fat 9 g; saturated fat 5 g; carbohydrates 15 g; fiber 1 g; sugars 9 g; protein 2 g; sodium 55 mg. Values will vary based on exact ingredients, brands, and portion size.