
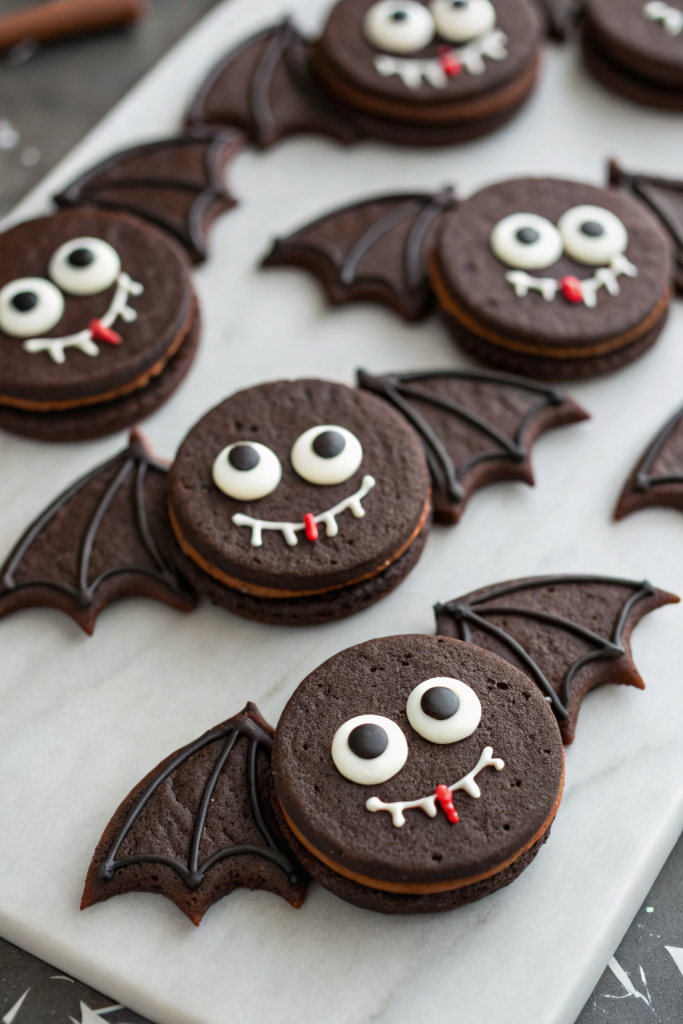
Cute Bat Oreos Recipe tastes like a cookies-and-cream truffle hugged in rich chocolate with a fun crunch from candy eyes, and kids and adults both inhale them in seconds. This Halloween treat works perfectly for busy parents, classroom parties, or anyone who wants a cute dessert in under 30 minutes. I test these every October “just to be sure,” and my family never complains about the quality control.
Why Cute Bat Oreos Recipe Is Worth It
These Cute Bat Oreos look impressive, but you only need store-bought Oreos, chocolate, and a few candies. You skip baking, you skip chilling dough, and you still end up with a tray of Halloween treats that everyone photographs before they eat.
You also customize them easily. Change the cookie flavor, use different candy eyes, or swap the wings, and you still keep the same simple method.
“These Cute Bat Oreos disappeared from the party table in ten minutes, and everyone asked for the recipe. ★★★★★”
Ingredients You Need
-
Oreos or chocolate sandwich cookies
- Classic Oreos work best because they hold their shape.
- Use Double Stuf if you want extra filling and a sturdier “body.”
- Any store-brand chocolate sandwich cookie works in a pinch.
-
Extra Oreos for wings
- You need extra cookies to split and cut into “bat wings.”
- Use the same flavor so the color matches the body.
-
Chocolate for coating
- Use semi-sweet chocolate chips or candy melts.
- Candy melts (black or dark purple) give a smoother, shinier finish and set faster.
- Add 1–2 teaspoons neutral oil (like canola or refined coconut) if the chocolate looks too thick.
-
Candy eyes
- Buy small or medium candy eyes in the baking aisle or online.
- Mini chocolate chips work as a backup if you cannot find candy eyes.
-
Optional decorations
- Sprinkles for a “starry night” effect on the wings.
- Red or white gel icing to draw fangs or little smiles.
Equipment List
- Microwave-safe bowl or a small saucepan with a heatproof bowl for a double boiler
- Spoon or fork for dipping
- Small knife or paring knife to cut wings
- Parchment paper or silicone baking mat
- Baking sheet or large plate
- Toothpicks or skewer (helpful for adjusting wings and eyes)
Quick Tips & substitutions
- Use candy melts if you want the coating to set quickly and look super smooth.
- Stir 1 teaspoon coconut oil into melted chocolate if it looks too thick for dipping.
- Swap regular Oreos with gluten-free Oreos to make gluten-free Cute Bat Oreos.
- Use dairy-free chocolate chips and vegan sandwich cookies for a dairy-free or vegan version.
- Cut wings from chocolate graham crackers or chocolate wafers if you run out of Oreos.
- Chill dipped cookies in the fridge for 10 minutes if your kitchen feels warm and the coating sets slowly.
- Keep a dry spoon away from the chocolate because water makes it seize and turn grainy.
- Work in small batches so the chocolate stays melted and smooth while you decorate.
How to Make Cute Bat Oreos Recipe
Step 1: Prep the cookies and wings
Line a baking sheet with parchment paper or a silicone mat. Set 12–16 whole Oreos on the tray; these will become the bat bodies. Take 8–10 extra Oreos, twist them apart, and gently scrape off the cream filling.
Use a small knife to cut each chocolate cookie half in half again to form two “wings.” Aim for curved pieces that look like bat wings; uneven pieces still look cute. Set all the wing pieces aside in a small bowl so you can grab them quickly while the chocolate stays melted.
Step 2: Melt the chocolate
Place chocolate chips or candy melts in a microwave-safe bowl. Heat in 20–30 second bursts, stirring well between each burst, until the chocolate turns smooth and glossy. Add 1–2 teaspoons neutral oil if the chocolate looks too thick, and stir until it loosens.
You can also use a double boiler on the stove. Set a heatproof bowl over a pot with a little simmering water, and stir the chocolate until it melts. Keep the heat low so the chocolate does not scorch.
Step 3: Dip the Oreo “bodies”
Drop one Oreo at a time into the melted chocolate. Use a fork to flip it and coat both sides, then lift it out and tap the fork gently on the edge of the bowl to shake off extra chocolate. Slide the coated Oreo onto the lined baking sheet.
Repeat with the remaining Oreos. Leave a little space between each cookie so you can add wings and eyes without bumping into the next bat. Work fairly quickly so the chocolate stays fluid and the surface stays soft enough to hold decorations.
Step 4: Attach the bat wings
While the chocolate still feels wet, press one wing piece into each side of the Oreo. Angle the wings slightly upward so they look like they flap. Push gently so the chocolate hugs the wing edge and holds it in place.
If the chocolate starts to firm up, dip the tip of each wing in a little warm chocolate before you attach it. You can also reheat the chocolate in the microwave for 10–15 seconds to loosen it again. Adjust the wings with a toothpick if they slide.
Step 5: Add candy eyes and faces
Drop two candy eyes onto the top front of each bat while the chocolate still feels soft. Press lightly so they sit flat and stick. If you want fangs or smiles, use red or white gel icing to draw tiny details under the eyes.
You can also sprinkle a few bats with star-shaped sprinkles or black sanding sugar for extra texture. Keep the decorations simple so the bats still look like bats and not mystery blobs. Kids love to help with this step, so expect some wild expressions.
Step 6: Let the bats set
Leave the tray at room temperature for 20–30 minutes until the chocolate hardens. If your kitchen runs warm, slide the tray into the fridge for about 10 minutes. Touch one bat lightly; if the chocolate feels firm and dry, they are ready.
Once they set, peel the Cute Bat Oreos off the parchment. Arrange them on a platter or tiered stand for serving. Keep extras in an airtight container until party time.
Recipe Variations
- Gluten-free: Use gluten-free Oreos or any certified gluten-free chocolate sandwich cookie and gluten-free candy eyes.
- Vegan: Choose vegan sandwich cookies, dairy-free chocolate chips, and vegan-friendly candy eyes or mini chocolate chips.
- Low sugar / lower carb: Use sugar-free chocolate sandwich cookies and sugar-free dark chocolate chips; use sugar-free sprinkles or skip extra decorations.
- Flavor twist: Try mint Oreos, peanut butter Oreos, or golden Oreos dipped in colored candy melts like purple or orange.
- Extra crunch: Sprinkle crushed Oreos, mini chocolate chips, or cocoa nibs over the bats before the chocolate sets.
- Spooky sprinkle bats: Dip just the wings in contrasting colored melts and cover them with Halloween sprinkles.
Ways to Serve Cute Bat Oreos Recipe
- Arrange them on a black or orange platter as a Halloween dessert centerpiece.
- Pack a couple in lunchboxes as a surprise October treat.
- Use them as cupcake toppers by standing one bat on each frosted cupcake.
- Add them to a Halloween dessert board with fruit, pretzels, and popcorn.
- Hand them out in clear treat bags tied with ribbon for classroom parties or trunk-or-treat events.
Storage Success
Store Cute Bat Oreos in an airtight container at room temperature for up to 4–5 days. Keep them in a cool, dry spot away from direct sunlight so the chocolate does not soften or bloom. If your house runs warm, store them in the fridge, then let them sit out for 5–10 minutes before serving so the chocolate loses the fridge chill. Stack them in layers with parchment between each layer to protect the wings and eyes from breaking.
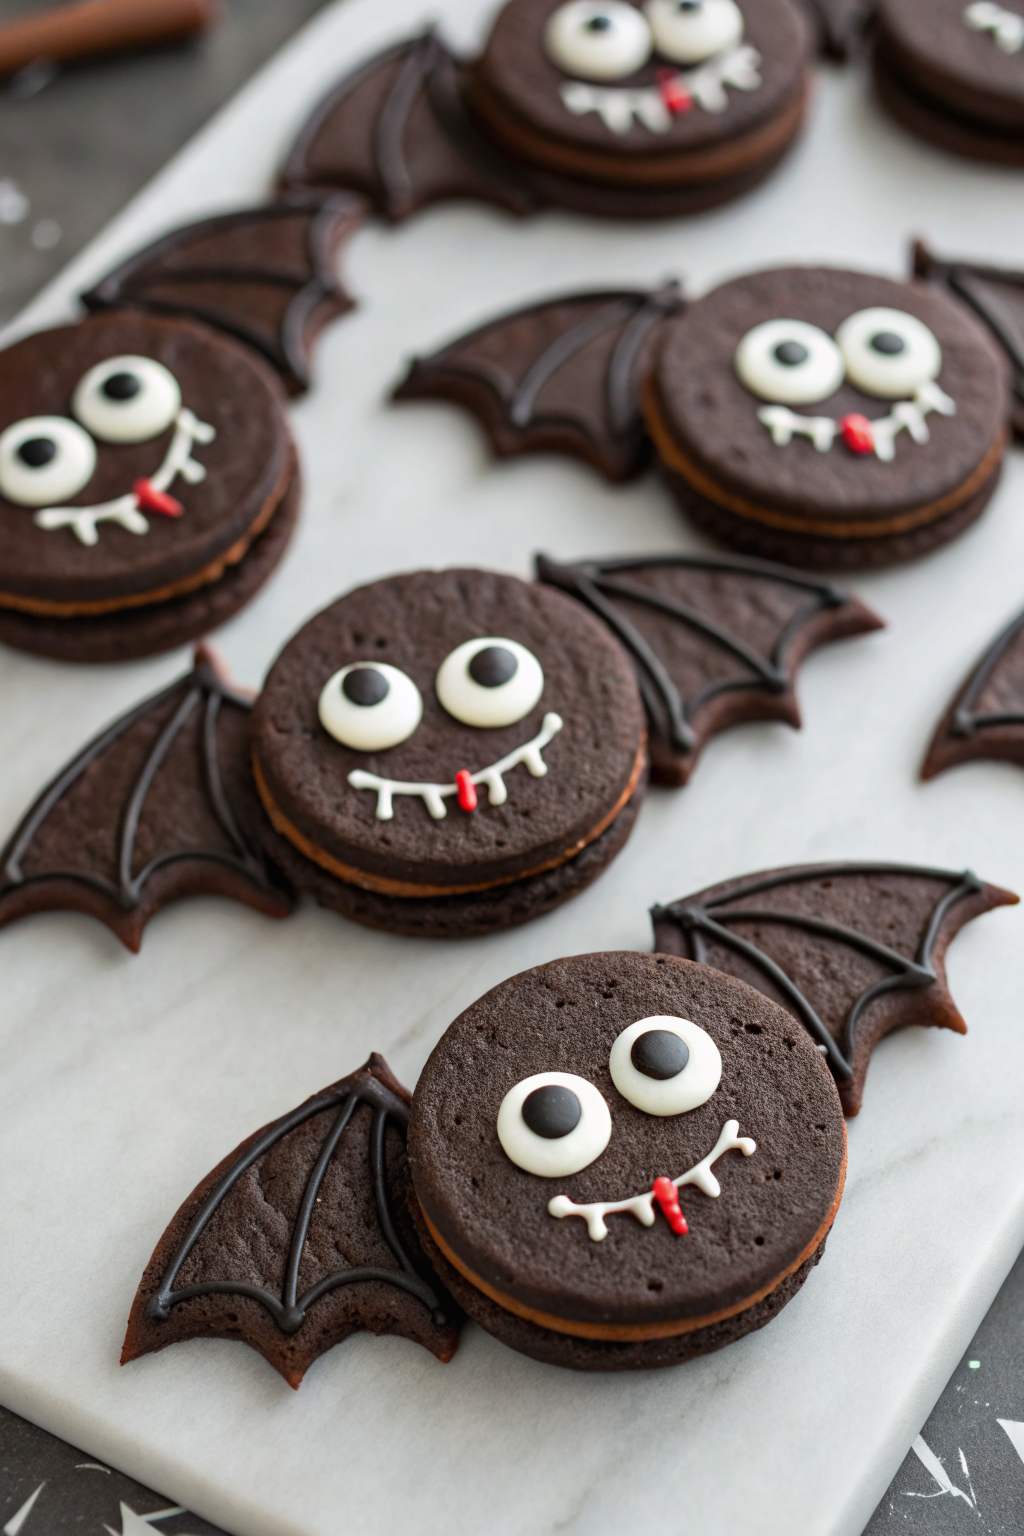
Cute Bat Oreos Recipe
Ingredients
Instructions
- Line a baking sheet with parchment paper or a silicone baking mat. Place 12–16 whole Oreos on the tray for the bat bodies. Twist apart 8–10 extra Oreos, scrape off the cream, and use a small knife to cut each chocolate cookie half in half again to form curved “bat wings.” Set the wing pieces aside in a small bowl.
- Place the chocolate chips or candy melts in a microwave-safe bowl. Microwave in 20–30 second bursts, stirring well between each, until smooth and glossy. Stir in 1–2 teaspoons neutral oil if the chocolate looks too thick for dipping.
- Drop one Oreo body at a time into the melted chocolate. Use a fork to flip and coat both sides, then lift out and tap the fork gently on the edge of the bowl to remove excess chocolate. Slide each coated Oreo onto the prepared baking sheet, leaving space between them.
- While the chocolate is still wet, press one wing piece into each side of the Oreo so the wings angle slightly upward like they are flapping. Press gently so the chocolate hugs the edges and holds the wings in place. If needed, dip the tips of the wings in a little warm chocolate before attaching.
- Add two candy eyes to the front of each bat while the chocolate is soft, pressing lightly so they stick. Use gel icing to draw tiny fangs or smiles if desired, and add sprinkles sparingly so the bats still look like bats.
- Let the bats sit at room temperature for 20–30 minutes until the chocolate hardens, or chill the tray in the fridge for about 10 minutes if your kitchen is warm. Once set, gently peel the bats off the parchment and arrange on a platter for serving.
Notes
Approximate per 1 bat Oreo (assuming 12 bats, made with regular Oreos and semi-sweet chocolate): 190–220 calories; fat 10–12 g; saturated fat 6–8 g; carbohydrates 25–28 g; fiber 1–2 g; sugars 18–20 g; protein 2–3 g; sodium 120–160 mg. Values will vary based on cookie brand, type and amount of chocolate, decorations used, and actual portion size.
Leave a Reply