
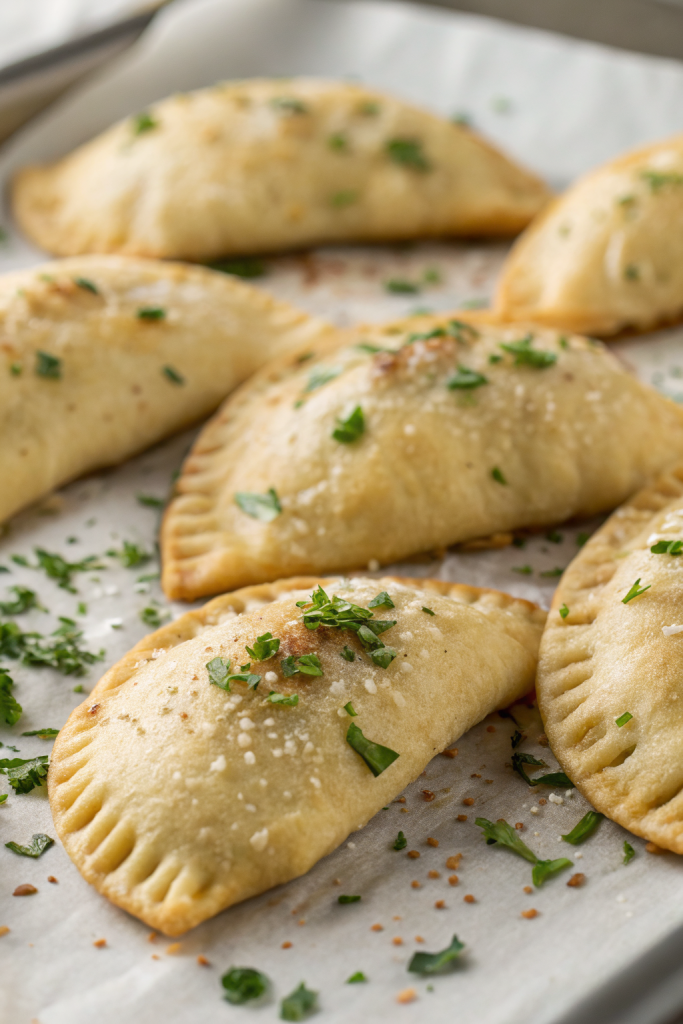
Fried Chicken Buns with Cheese taste like a mash-up of a crispy chicken sandwich and a gooey cheese-stuffed dinner roll, in the best way possible. This recipe works for busy weeknights, game days, or casual parties and takes about 1 hour total if you work efficiently. I tested these while my kids circled the kitchen like tiny food critics, so you know they passed a tough panel.
Why You Should Try This Fried Chicken Buns with Cheese
These buns give you juicy fried chicken, stretchy melted cheese, and soft bread in every bite. You get all the comfort of fried chicken and cheesy sliders without juggling a bunch of separate components.
They also reheat surprisingly well, so you can pack them in lunchboxes or keep a stash for late-night snacking. If you like fast-food chicken sandwiches, this homemade version tastes fresher and lets you control the spice, salt, and cheese level.
“These Fried Chicken Buns with Cheese taste like something from a fancy chicken joint, only hotter, fresher, and way more satisfying at home. ★★★★★”
Ingredients You’ll Need
For the buns
You can use homemade dough or a smart shortcut with store-bought.
- 3 cups all-purpose flour (scoop and level)
- 2 teaspoons instant yeast (SAF Red or similar works great)
- 2 tablespoons sugar
- 1 teaspoon fine sea salt
- 3 tablespoons neutral oil (canola, vegetable, or light olive)
- 1 cup warm milk, about 110°F (whole milk tastes richer, but 2% works)
- 1 large egg, room temperature
Shortcut option:
Use 12 store-bought refrigerated biscuit dough pieces or 12 small frozen dinner rolls (thawed). They save time and still taste great.
For the fried chicken
- 1 pound boneless skinless chicken thighs, cut into 12 equal pieces
- You can use chicken breast instead, but thighs stay juicier.
- 1 cup buttermilk
- No buttermilk? Mix 1 cup milk with 1 tablespoon vinegar or lemon juice and rest 5 minutes.
- 1 teaspoon hot sauce (optional, for a mild kick)
- 1 ½ cups all-purpose flour
- ½ cup cornstarch (helps extra crispiness)
- 1 ½ teaspoons salt
- 1 teaspoon black pepper
- 1 teaspoon garlic powder
- 1 teaspoon onion powder
- 1 teaspoon smoked paprika or regular paprika
- ½ teaspoon cayenne pepper (optional, for heat)
- Oil for frying (about 3 cups, enough to shallow or deep fry)
- Use canola, peanut, or vegetable oil. Skip olive oil here.
For the cheese filling
- 8 ounces low-moisture mozzarella, cut into 12 cubes
- String cheese sticks cut into chunks work perfectly.
- ¼ cup grated parmesan or pecorino (adds salty flavor)
- Optional: ½ cup shredded cheddar for extra flavor
For the topping
- 2 tablespoons melted butter
- 1 teaspoon garlic powder
- 1 teaspoon dried parsley or Italian seasoning
- Pinch of flaky salt or coarse salt
Equipment
- Large mixing bowl for dough
- Medium bowl for buttermilk marinade
- Shallow dish for flour dredge
- Heavy-bottomed pot or deep skillet for frying
- Slotted spoon or spider strainer
- Baking sheet
- Parchment paper
- Oven-safe pan or baking dish (9×13 works well)
- Instant-read thermometer (very helpful for oil and chicken)
- Pastry brush for butter topping
Tips & Tricks
- Cut chicken into similar-sized pieces so they cook evenly and fit inside the buns.
- Chill marinated chicken at least 20 to 30 minutes so the coating sticks better.
- Pat chicken lightly with paper towels before dredging so the flour mixture clings well.
- Mix flour and cornstarch thoroughly so every piece fries up crispy.
- Use an instant-read thermometer and keep oil around 350°F for golden chicken that stays juicy.
- Fry in small batches so the oil temperature stays steady and the coating stays crisp.
- Use low-moisture cheese so the buns stay gooey inside without leaking everywhere.
- Seal the dough tightly around the chicken and cheese so nothing oozes out while baking.
- Brush buns with garlic butter right out of the oven so they soak up flavor.
- Let buns rest 5 to 10 minutes before serving so the cheese settles and does not burn your mouth.
How to Make Fried Chicken Buns with Cheese
Step 1: Mix and knead the bun dough
- Add warm milk, sugar, and yeast to a large bowl and stir. Let it sit 5 minutes so the yeast wakes up and gets foamy.
- Whisk in the egg, oil, and salt. Add flour gradually while you stir until a shaggy dough forms.
- Knead by hand 8 to 10 minutes or in a mixer 5 to 6 minutes until the dough feels smooth and slightly tacky but not sticky. Add a tablespoon of flour at a time if it sticks a lot.
Step 2: Let the dough rise
- Lightly oil a clean bowl and place the dough inside. Turn it once so it coats in a thin layer of oil.
- Cover with a towel or plastic wrap and set it in a warm spot. Let it rise 45 to 60 minutes until it doubles in size and feels puffy.
(If you use biscuit dough or thawed rolls, skip straight to shaping later and keep them chilled until you need them.)
Step 3: Marinate the chicken
- Cut chicken thighs into 12 equal pieces. Aim for slider-sized chunks that fit inside your palm.
- Add buttermilk, hot sauce, salt, and pepper to a bowl and stir. Toss in the chicken pieces and coat them well.
- Cover and chill at least 20 to 30 minutes while the dough rises. You can marinate up to 8 hours if you plan ahead.
Step 4: Prepare the flour coating
- In a shallow dish, combine flour, cornstarch, salt, black pepper, garlic powder, onion powder, paprika, and cayenne.
- Stir well so the spices spread evenly through the flour. Taste a tiny pinch of the dry mix so you can adjust salt or spice before you coat the chicken.
Step 5: Coat and fry the chicken
- Heat oil in a heavy pot or deep skillet over medium heat until it reaches about 350°F.
- Take chicken from the buttermilk and let extra liquid drip off. Dredge each piece in the flour mixture and press the coating on so it sticks.
- Fry chicken in batches, about 3 to 4 minutes per side, until it looks deep golden and the internal temperature hits 165°F.
- Place fried chicken on a wire rack or paper towel lined plate so extra oil drains. Let it cool slightly while you shape the buns.
Step 6: Portion and fill the dough
- Punch down the risen dough gently and turn it out onto a lightly floured surface.
- Divide into 12 equal pieces. Roll each piece into a ball, then flatten it into a small circle about 3 to 4 inches wide.
- Place one cube of mozzarella and a spoonful of cheddar (if using) in the center of each circle. Add one piece of fried chicken on top of the cheese.
Step 7: Seal the buns
- Pull the edges of the dough up and over the chicken and cheese. Pinch firmly at the top so you seal everything inside.
- Turn each bun seam-side down and gently shape it into a smooth ball.
- Place buns on a parchment-lined baking sheet or in a greased baking dish, leaving a little space between them so they can puff.
Step 8: Second rise
- Cover the buns lightly with a towel or plastic wrap.
- Let them rise 20 to 30 minutes until they look slightly puffy. During this time, preheat your oven to 375°F.
Step 9: Bake the Fried Chicken Buns with Cheese
- Bake the buns at 375°F for 18 to 22 minutes until they look golden on top and feel set on the sides.
- If you packed them close together in a dish, check the center buns and add a couple more minutes if they look pale.
Step 10: Add the buttery topping
- Mix melted butter, garlic powder, and dried parsley in a small bowl.
- Brush the hot buns generously with the garlic butter mixture.
- Sprinkle a pinch of flaky salt on top while they still feel hot. Let them cool 5 to 10 minutes before serving so the cheese settles but still stretches.
What to Serve with Fried Chicken Buns with Cheese
Serve Fried Chicken Buns with Cheese with a crisp green salad, coleslaw, or simple cucumber salad to balance the richness. Kids love them with carrot sticks, celery, and ranch or honey mustard for dipping. You can add baked fries, sweet potato wedges, or roasted broccoli for a more filling meal. Pair them with lemonade, iced tea, or sparkling water with citrus slices for a fresh contrast.
Storage Options
- Cool Fried Chicken Buns with Cheese completely before you store them so condensation does not make them soggy.
- Store leftovers in an airtight container in the fridge for up to 3 days.
- Freeze individually wrapped buns in a freezer bag for up to 2 months and label the bag with the date.
- Reheat in a 350°F oven or air fryer for 8 to 12 minutes until hot and crisp on the outside and melty inside.
- Avoid microwaving as the bread can turn chewy and the coating on the chicken can lose its crunch.
Leave a Reply