
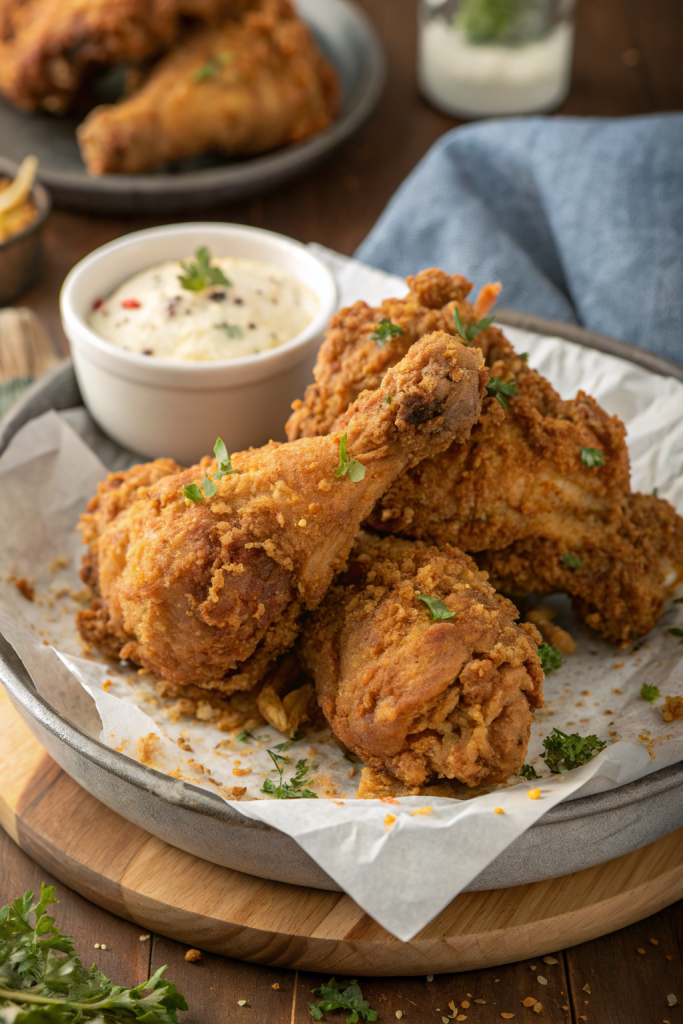
Buttermilk Fried Chicken Recipe tastes ultra crispy on the outside, juicy in the middle, and packed with tangy, peppery flavor that beats most takeout buckets. It works for busy weeknights, game days, or Sunday dinners, and you can finish a batch in about 1 hour plus marinating time. I still remember burning my first batch 12 years ago, so you can borrow all my hard-earned lessons and skip the smoky kitchen phase.
Why Make This Buttermilk Fried Chicken Recipe at Home
You control every detail at home, from the salt level to the crunch factor. The buttermilk brine gives the chicken a tender, juicy texture that most grocery hot cases never hit.
You also save money and get better quality meat and oil. Kids, picky eaters, and spice lovers all win, because you can season each batch exactly how your crew likes it.
“This Buttermilk Fried Chicken Recipe tastes like a secret family recipe you waited years to get your hands on, only easier to pull off at home. ★★★★★”
Ingredients You Need
Chicken
- 3 to 4 pounds chicken pieces
- Mix of drumsticks, thighs, and bone-in breasts
- Use similar size pieces so they cook evenly
- You can use all drumsticks if your family fights over them
Buttermilk Marinade
- 2 cups buttermilk
- Use full-fat if possible for better flavor
- If you do not have buttermilk, mix 2 cups whole milk with 2 tablespoons white vinegar or lemon juice and rest 5 minutes
- 2 large eggs
- 2 teaspoons kosher salt
- 2 teaspoons garlic powder
- 2 teaspoons onion powder
- 2 teaspoons smoked paprika or sweet paprika
- 1 to 2 teaspoons hot sauce
- Any brand you like, such as Crystal, Frank’s, or Cholula
- Adjust to taste for kids
Seasoned Flour Coating
- 2 ½ cups all-purpose flour
- ½ cup cornstarch
- This helps the crust stay extra crisp
- 2 teaspoons kosher salt
- 2 teaspoons black pepper, freshly ground
- 2 teaspoons smoked paprika or sweet paprika
- 1 teaspoon cayenne pepper
- Cut in half for mild heat or skip for no heat
- 2 teaspoons garlic powder
- 1 teaspoon onion powder
- 1 teaspoon baking powder
- This helps the crust puff and crisp
Oil for Frying
- 6 to 8 cups neutral oil with high smoke point
- Peanut oil gives classic flavor
- Canola, vegetable, or sunflower oil also work
- Use a heavy pot, Dutch oven, or deep cast iron skillet
- Use a deep-fry thermometer or instant-read thermometer
Optional Garnishes
- Flaky sea salt, to sprinkle right after frying
- Fresh parsley or chives, finely chopped
- Lemon wedges, for squeezing over the top
Equipment List
- Large bowl or zip-top bags for marinating
- Tongs
- Wire rack set over a sheet pan
- Heavy pot or Dutch oven
- Thermometer
- Slotted spoon or spider skimmer
- Paper towels
- Small plate or tray for dredging station
Tips & Mistakes
-
Pat the chicken dry before marinating so the buttermilk clings well.
-
Salt the marinade generously; bland marinade gives bland chicken.
-
Marinate at least 4 hours; overnight gives the best Buttermilk Fried Chicken Recipe texture.
-
Do not overcrowd the pot; too many pieces drop the oil temperature and cause soggy crust.
-
Keep oil between 325 and 350 degrees F; hotter burns the crust before the meat cooks.
-
Use a thermometer; guessing leads to undercooked or overcooked chicken.
-
Let excess buttermilk drip off before flouring; too much liquid creates gummy spots.
-
Press the flour coating onto the chicken so it sticks and forms craggy, crunchy bits.
-
Rest coated chicken on a rack 10 to 15 minutes before frying so the crust sets.
-
Maintain consistent piece size; tiny wings and giant breasts in the same batch cook unevenly.
-
Season the chicken lightly with salt right after it comes out of the oil while it still steams.
-
Drain on a wire rack, not just paper towels, so the bottom stays crisp.
-
Do not cover hot chicken with foil; steam softens the crust.
-
Skim crumbs from the oil between batches so they do not burn and turn the oil bitter.
-
Use fresh oil or well-strained oil; old oil gives off flavors.
-
Let the chicken rest 5 to 10 minutes before biting in so juices settle.
How to Make Buttermilk Fried Chicken Recipe
Step 1: Prep the Chicken
Rinse and pat the chicken pieces completely dry with paper towels. Trim any large flaps of fat or extra skin. Keep the skin on the meat, since the skin helps the crust cling and adds flavor.
If you use large bone-in breasts, cut them in half crosswise so they match the size of thighs and drumsticks. Place all chicken pieces in a large bowl or zip-top bag. Set aside while you mix the marinade.
Step 2: Mix the Buttermilk Marinade
In a large bowl, whisk together buttermilk, eggs, salt, garlic powder, onion powder, paprika, and hot sauce. Taste a tiny spoonful of the marinade so you can adjust salt or heat. The marinade should taste well seasoned and slightly salty.
Pour the marinade over the chicken and toss to coat every piece. Press out extra air if you use a bag, then seal it. Chill in the fridge at least 4 hours, or up to 24 hours for deeper flavor and tenderness.
Step 3: Set Up the Dredging Station
When you get close to frying time, pull the chicken from the fridge and let it sit at room temperature for 20 to 30 minutes. This step helps the chicken cook more evenly. While it sits, prepare the seasoned flour.
In a large shallow dish, mix flour, cornstarch, salt, pepper, paprika, cayenne, garlic powder, onion powder, and baking powder. Stir very well so the spices distribute evenly. Place a wire rack over a sheet pan next to the flour so you can rest the coated chicken.
Step 4: Coat the Chicken
Lift one piece of chicken from the buttermilk marinade and let the excess drip back into the bowl. Place it in the seasoned flour and toss, turning and pressing the flour into every nook and cranny. Use your hands to squeeze and pack the coating so it forms a thick, shaggy crust.
Place the coated piece on the wire rack. Repeat with the remaining chicken pieces. Let the coated chicken rest on the rack 10 to 15 minutes so the flour hydrates and sticks firmly.
Step 5: Heat the Oil
Pour oil into a heavy pot or Dutch oven, filling it about halfway. Clip on a thermometer and heat the oil over medium to medium-high heat until it reaches 340 to 350 degrees F. Adjust the heat as needed to keep it in that range.
Keep kids and pets out of the frying zone, since hot oil demands full attention. Set another wire rack over a sheet pan near the stove for draining the cooked chicken. Keep tongs and a spider skimmer within reach.
Step 6: Fry the Chicken
Carefully lower 3 to 4 pieces of chicken into the hot oil, skin side down. Do not drop them from high above the pot; ease them in close to the surface to avoid splashes. The oil temperature will drop a bit, so adjust the heat to keep it between 325 and 350 degrees F.
Fry dark meat pieces like thighs and drumsticks about 12 to 15 minutes, turning occasionally so they brown evenly. Fry smaller pieces like wings about 8 to 10 minutes. Fry breast pieces about 10 to 12 minutes, depending on size.
Step 7: Check Doneness
Use an instant-read thermometer to check the thickest part of each piece, without touching the bone. Aim for 165 degrees F internal temperature. If the crust browns too fast while the inside stays under temperature, lower the heat slightly.
When a piece hits 165 degrees F and looks deep golden brown, lift it from the oil and let excess oil drip back into the pot. Transfer it to the clean wire rack. Sprinkle lightly with flaky salt if you like.
Step 8: Finish All Batches
Skim any loose crumbs from the oil between batches so they do not burn. Let the oil come back up to 340 to 350 degrees F before you add the next round of chicken. Repeat the frying process with the remaining pieces.
Arrange cooked chicken in a single layer on the rack so steam can escape. Let the fried chicken rest 5 to 10 minutes before serving so the juices redistribute and the crust sets. Try not to burn your mouth during the first “test bite” like I still do.
Variations I've Tried
Spicy Nashville-style: Toss the hot fried chicken in a mix of hot oil from the pot, cayenne, brown sugar, paprika, and garlic powder, then serve with pickles. This version hits hard on heat and sweet.
Herb and garlic version: Add dried thyme, oregano, and extra garlic powder to both the buttermilk marinade and the flour. This version tastes great with mashed potatoes and gravy.
Extra crunchy double-dip: Dip the floured chicken back into a thin splash of buttermilk, then dredge again in the flour mixture. This method gives a thicker, craggier crust that shatters when you bite it.
Boneless tenders: Use chicken tenders or sliced chicken breasts. Marinate, coat, and fry about 5 to 7 minutes until golden and cooked through, then serve as Buttermilk Fried Chicken Recipe tenders with dipping sauces.
Gluten-free version: Swap the flour with a good gluten-free all-purpose blend and use cornstarch as written. The crust still turns out crisp and flavorful.
How to Serve Buttermilk Fried Chicken Recipe
Serve Buttermilk Fried Chicken Recipe hot with classic sides like mashed potatoes, coleslaw, cornbread, or mac and cheese. Add a crisp green salad or steamed green beans to balance the richness. Kids love it with ketchup, honey, ranch, or barbecue sauce, while adults often reach for hot sauce and lemon wedges.
Pack leftovers in lunchboxes with biscuits, pickles, and a little honey for a fun twist. I also love a cold leftover thigh tucked into a toasted brioche bun with mayo, lettuce, and tomato for a next-day fried chicken sandwich.
How to store
- Cool leftovers completely on a wire rack before storing so condensation does not soften the crust.
- Store in the fridge in an airtight container for up to 3 to 4 days.
- Freeze individual pieces on a sheet pan until solid, then transfer to freezer bags and keep up to 2 months.
- Reheat in a 375 degree F oven or air fryer for 10 to 15 minutes from the fridge, or 20 to 25 minutes from frozen, until hot and crisp again.
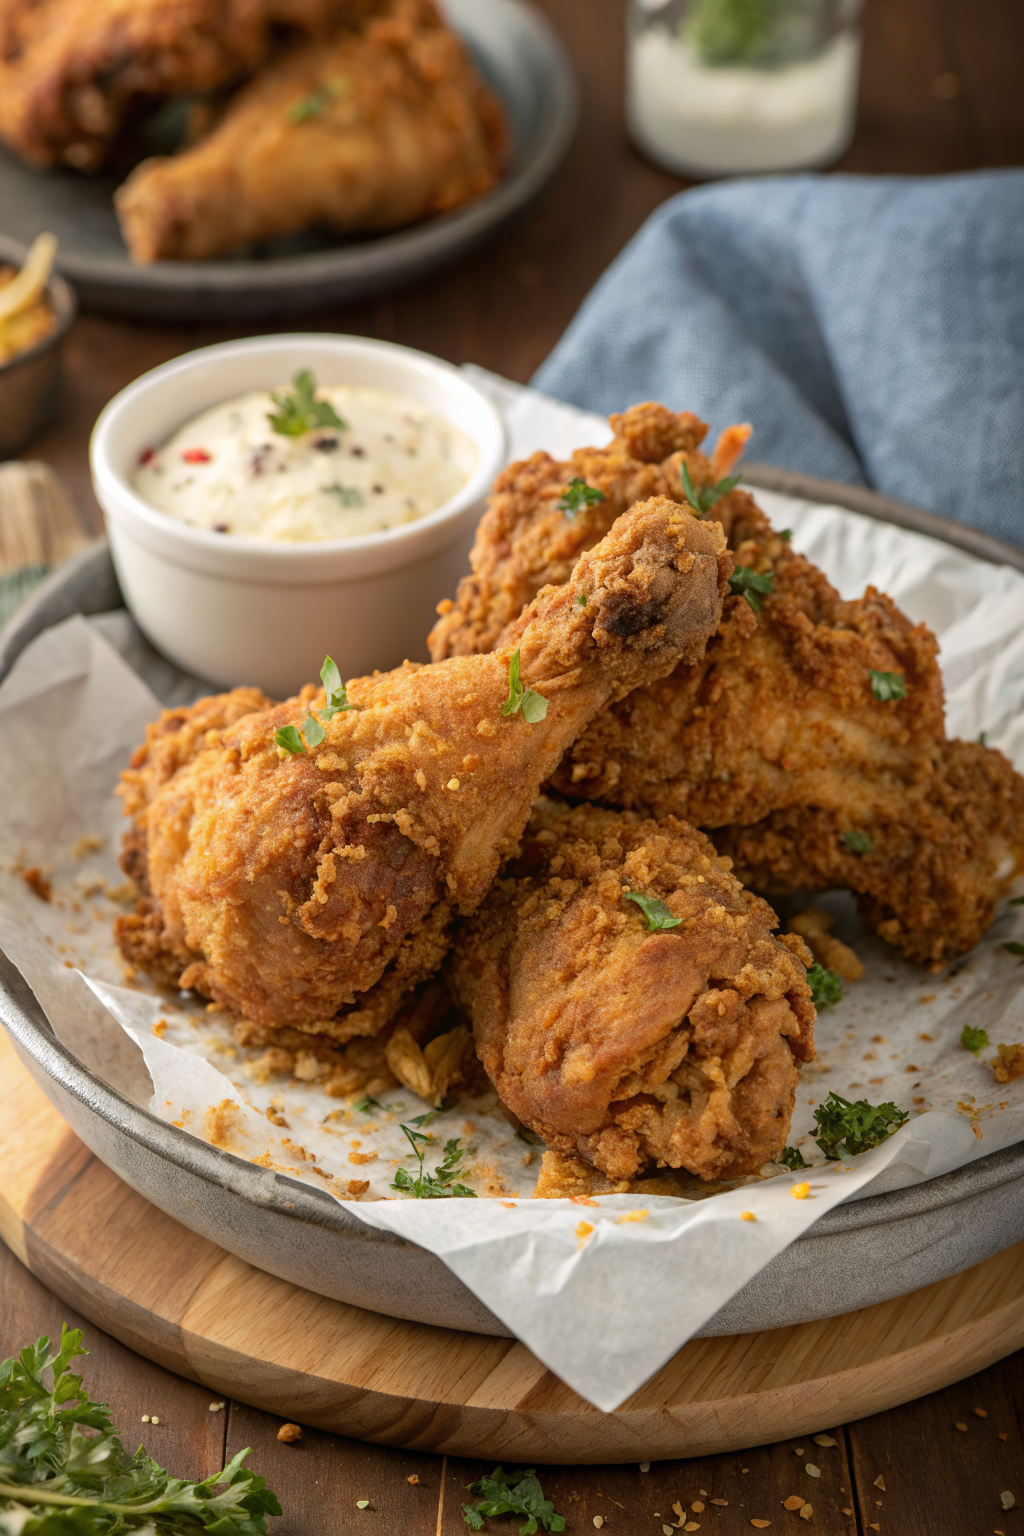
Buttermilk Fried Chicken Recipe
Ingredients
Instructions
- Rinse and pat the chicken pieces completely dry with paper towels. Trim any large flaps of fat or extra skin, leaving the skin on to help the crust cling and add flavor. If using large bone-in breasts, cut them in half crosswise so they are similar in size to thighs and drumsticks.
- Place the chicken pieces in a large bowl or zip-top bag and set aside while you prepare the buttermilk marinade.
- In a large bowl, whisk together the buttermilk, eggs, kosher salt, garlic powder, onion powder, paprika, and hot sauce (if using) until well combined. Taste a tiny spoonful of the marinade and adjust salt or heat if needed; it should taste well seasoned and slightly salty.
- Pour the marinade over the chicken and toss to coat every piece thoroughly. Press out excess air if using a bag and seal. Refrigerate for at least 4 hours and up to 24 hours to tenderize and flavor the chicken.
- About 30 minutes before frying, remove the chicken from the refrigerator and let it sit at room temperature. Meanwhile, in a large shallow dish, stir together the flour, cornstarch, kosher salt, black pepper, paprika, cayenne (if using), garlic powder, onion powder, and baking powder until the spices are evenly distributed.
- Set a wire rack over a sheet pan. Working with one piece of chicken at a time, lift it from the buttermilk marinade and let the excess drip back into the bowl. Place the chicken in the seasoned flour mixture and toss, turning and firmly pressing the flour into every nook and cranny to form a thick, shaggy coating.
- Transfer the coated chicken piece to the wire rack and repeat with the remaining chicken. Let the coated pieces rest on the rack for 10 to 15 minutes so the flour hydrates and the crust sets before frying.
- Pour the oil into a heavy pot or Dutch oven, filling it about halfway. Attach a thermometer and heat the oil over medium to medium-high heat until it reaches 340–350°F (171–177°C). Adjust the heat as needed to keep it within this range.
- Carefully lower 3–4 pieces of chicken into the hot oil, skin side down, easing them in close to the surface to avoid splashes. The oil temperature will drop slightly; adjust the heat to maintain 325–350°F (163–177°C) during frying.
- Fry thighs and drumsticks for about 12–15 minutes, turning occasionally so they brown evenly. Fry smaller pieces like wings for about 8–10 minutes, and breast pieces for about 10–12 minutes, depending on size, until deeply golden and crisp.
- Use an instant-read thermometer to check doneness: insert it into the thickest part of each piece without touching the bone. The internal temperature should reach 165°F (74°C). If the crust is browning too quickly while the inside is under temperature, lower the heat slightly.
- When a piece is done, lift it from the oil, let excess oil drip back into the pot, then place it on a clean wire rack set over a sheet pan. Immediately sprinkle lightly with flaky sea salt if desired.
- Skim any loose crumbs from the oil between batches, and allow the oil to return to 340–350°F (171–177°C) before adding more chicken. Repeat the frying process with the remaining pieces, keeping the cooked chicken arranged in a single layer on the rack so steam can escape and the crust stays crisp.
- Let the fried chicken rest for 5–10 minutes before serving to allow the juices to redistribute. Garnish with chopped fresh parsley or chives and serve with lemon wedges if desired.
Notes
Approximate per serving (about 1/6 of recipe, including skin and fry oil absorption): 650 calories; fat 42 g; saturated fat 10 g; carbohydrates 32 g; fiber 1 g; sugars 4 g; protein 36 g; sodium 1350 mg. Values will vary based on exact chicken pieces, oil type, and how much coating and oil are absorbed.
Leave a Reply